
Okay, sourdough. Seriously, is there anything better than that tangy, slightly chewy deliciousness? I’ve been obsessed for years, and trust me, I’ve tried *everything* when it comes to mastering that perfect loaf. But honestly? So many recipes are just… intimidating! That’s why I had to share my super simple, almost foolproof, way to get an amazing **active sourdough starter recipe** going. It’s the base for EVERYTHING sourdough, right? I’m telling you, this is the *easy* way to join the viral trend, and it’s become a favorite even in my family’s chaotic kitchen. Let’s get bubbling!
Why You’ll Love These Active Sourdough Starter Recipes
Okay, so why *this* recipe? I get it, the internet’s FULL of sourdough stuff. But here’s why you’ll be obsessed:
- **It’s EASY!** Seriously, if I can do it, anyone can.
- **Amazing Flavor:** Get ready for that tangy, authentic sourdough taste.
- **Beginner-Friendly:** No fancy techniques or equipment needed.
- **Versatile:** Use it for bread, pizza crust, pancakes… you name it!
- **Family Favorite (and Viral!):** Even my picky eaters love what comes from this starter. Plus, you’ll be part of the sourdough party everyone’s raving about!
Ingredients for the Active Sourdough Starter Recipes
Alright, let’s talk ingredients! The best part? You only need TWO things. Seriously! But listen up, quality matters here.
- 1 cup unbleached all-purpose flour: Don’t skimp! Unbleached is key for the best flavor. See this guide for a deep dive!
- 1/2 cup filtered water, lukewarm: Not too hot, not too cold. Like baby bear’s porridge, just right! Filtered water helps avoid any weird stuff messing with your starter.
How to Prepare These Active Sourdough Starter Recipes: Step-by-Step Instructions
Okay, ready to dive in? Don’t worry; it’s way easier than it sounds! Just follow these steps, and you’ll have a bubbly, happy starter in no time. Seriously, you can do this! And for even MORE sourdough goodness, check out this page!
- Day 1: Get it Started! In a clean, large glass jar (seriously, make sure it’s clean!), mix that 1 cup of flour and 1/2 cup of lukewarm water. Stir it until you get a shaggy dough – don’t worry if it’s not perfect! Kinda like a thick pancake batter.
- Rest Time! Cover the jar loosely. I use a lid, but cheesecloth with a rubber band works too. Let it sit at room temperature (70-75°F is ideal) for a full 24 hours. Don’t peek… okay, maybe a little peek!
- Day 2 (and beyond): Discard and Feed! This is important, so pay attention! After 24 hours, you’re gonna discard *half* of the mixture. Yep, toss it. I know, feels wasteful, but trust me. Then, add 1/2 cup of unbleached all-purpose flour and 1/4 cup of lukewarm filtered water to what’s left in the jar. Mix it up GOOD.
- Repeat, Repeat, Repeat! Keep repeating that discard and feed process (step 3) every 24 hours for the next 7-10 days. Patience, my friend, patience!
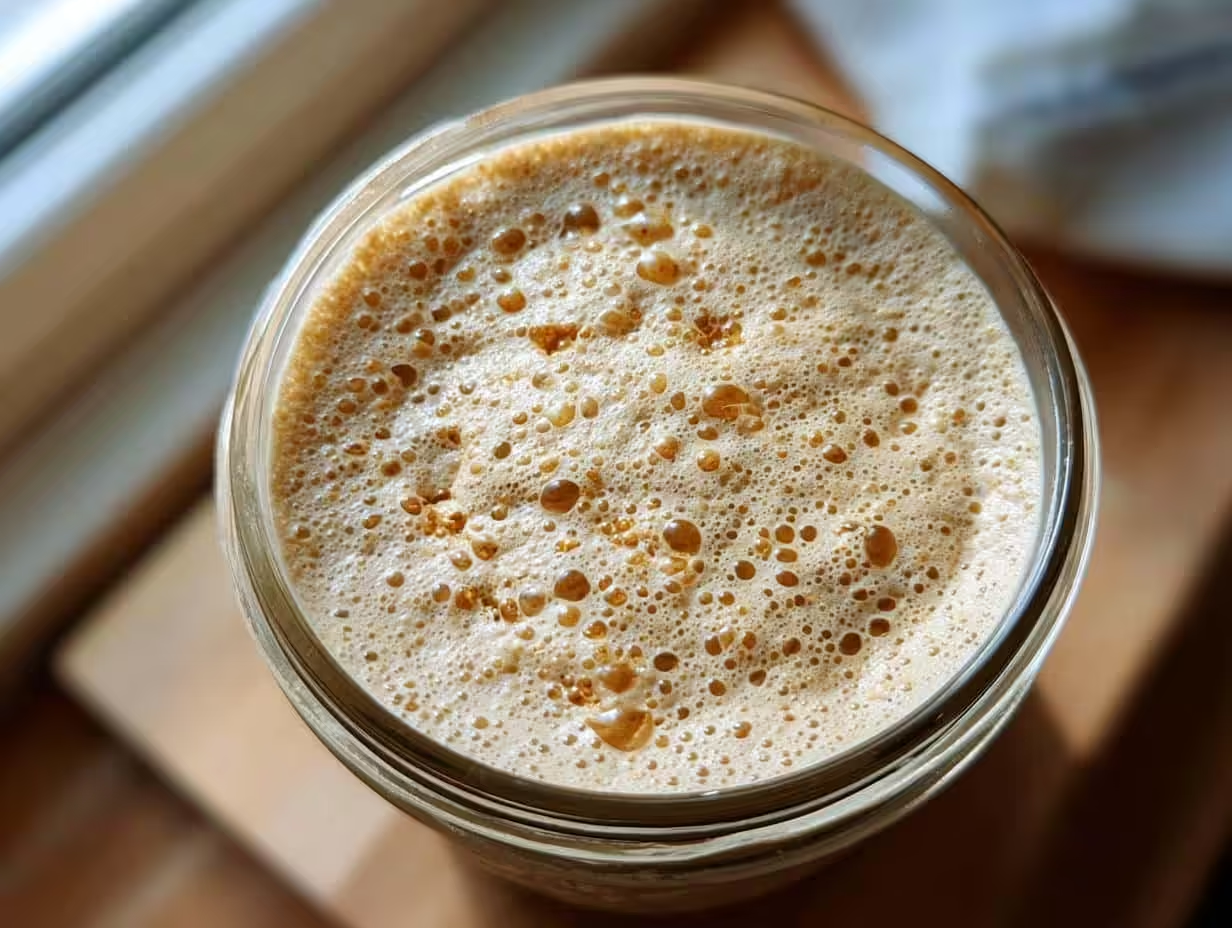
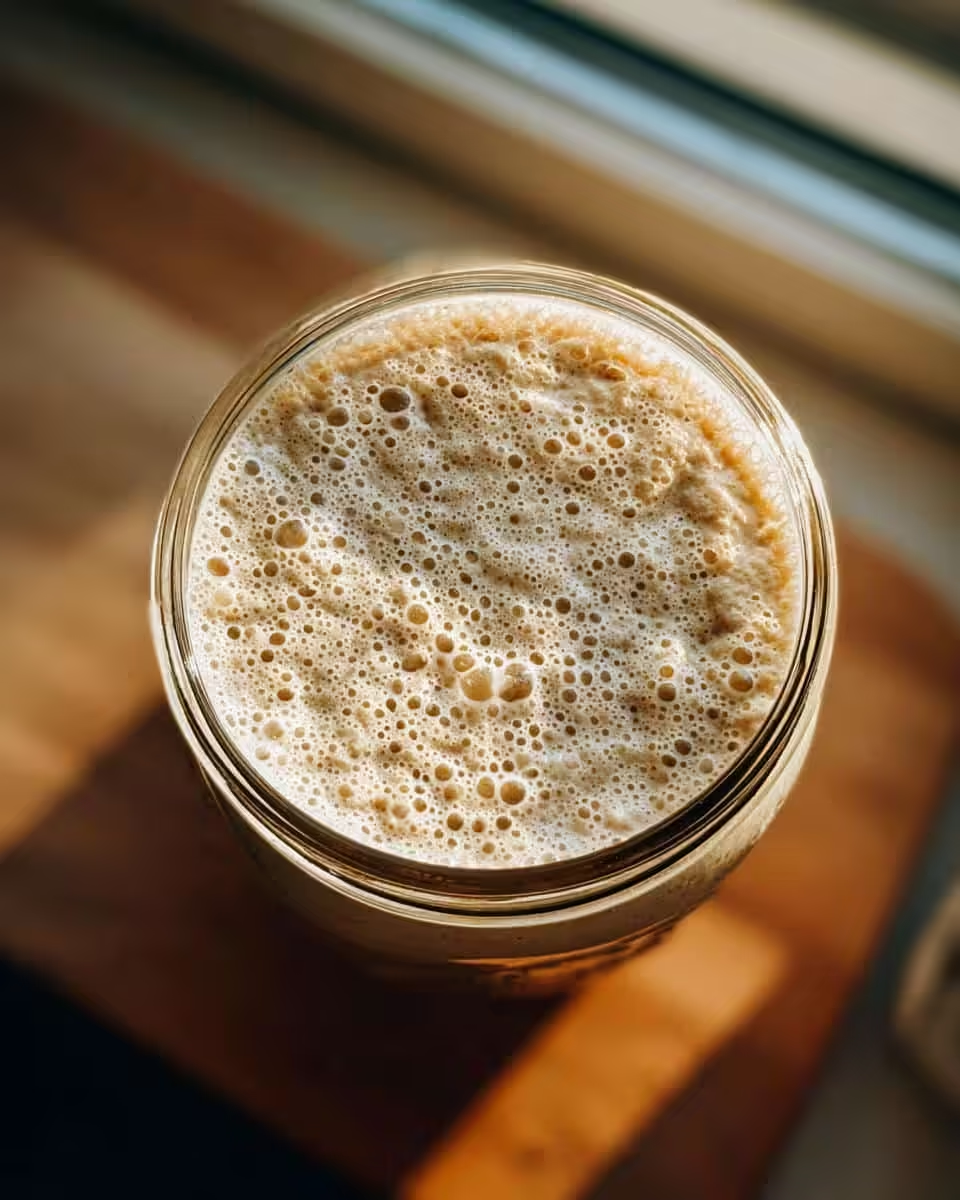
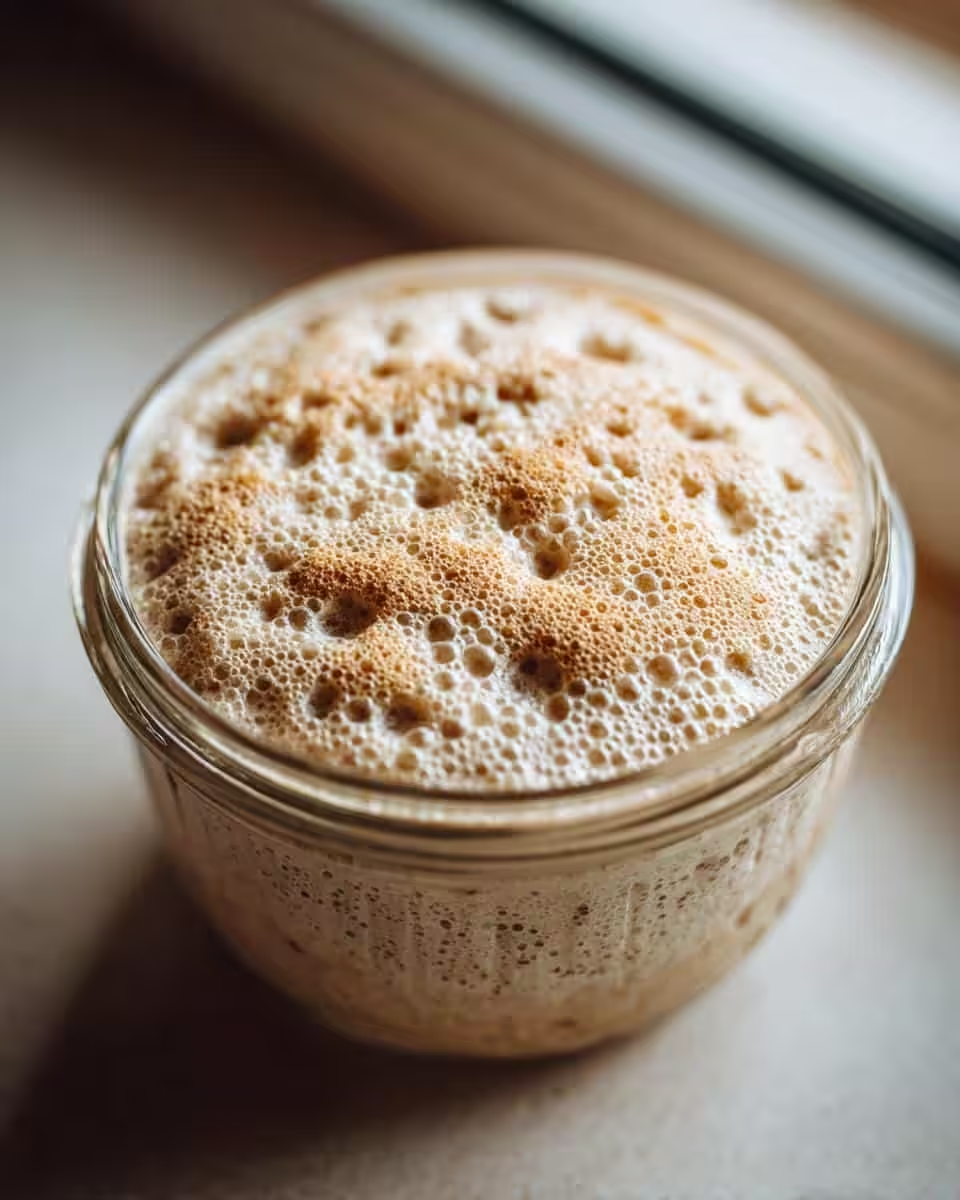
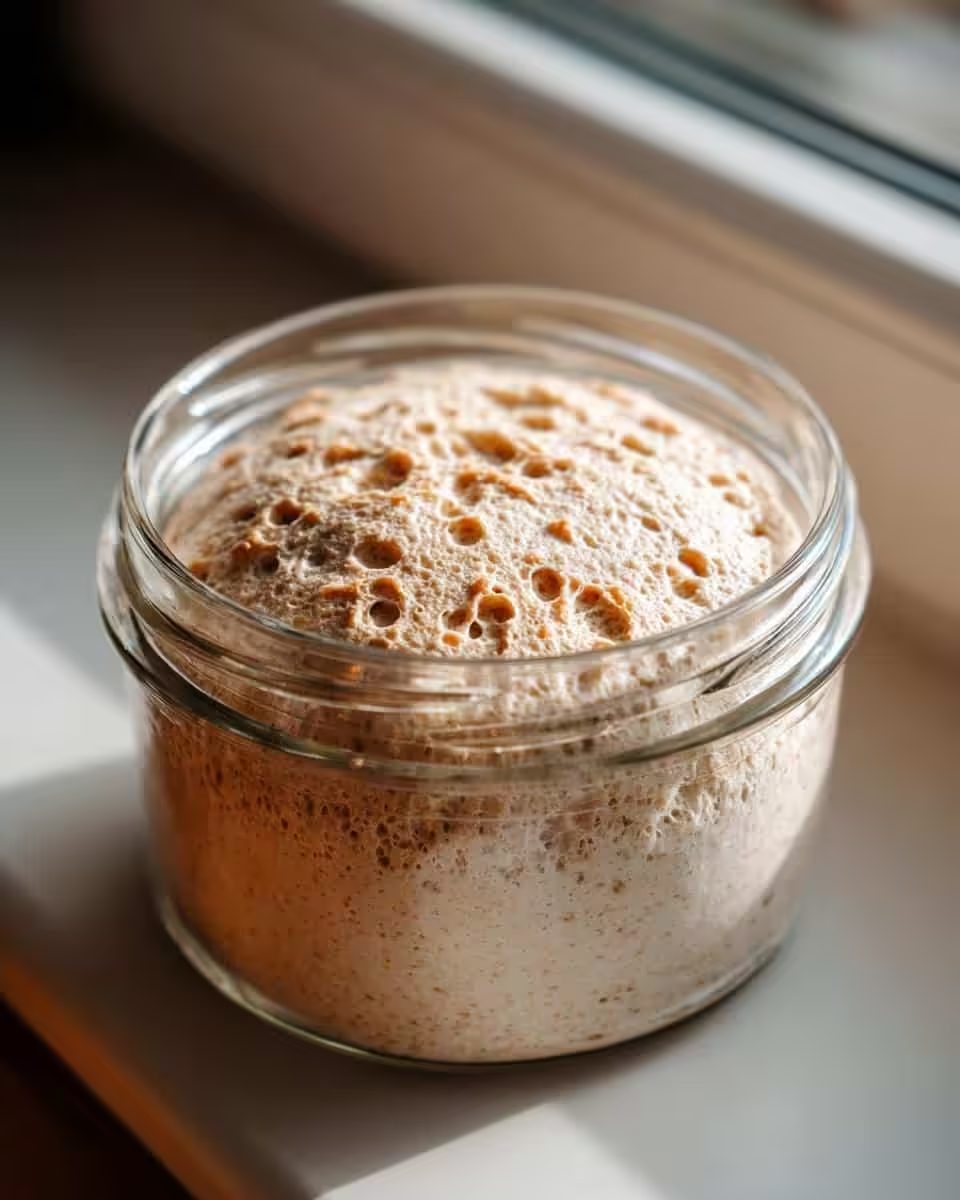
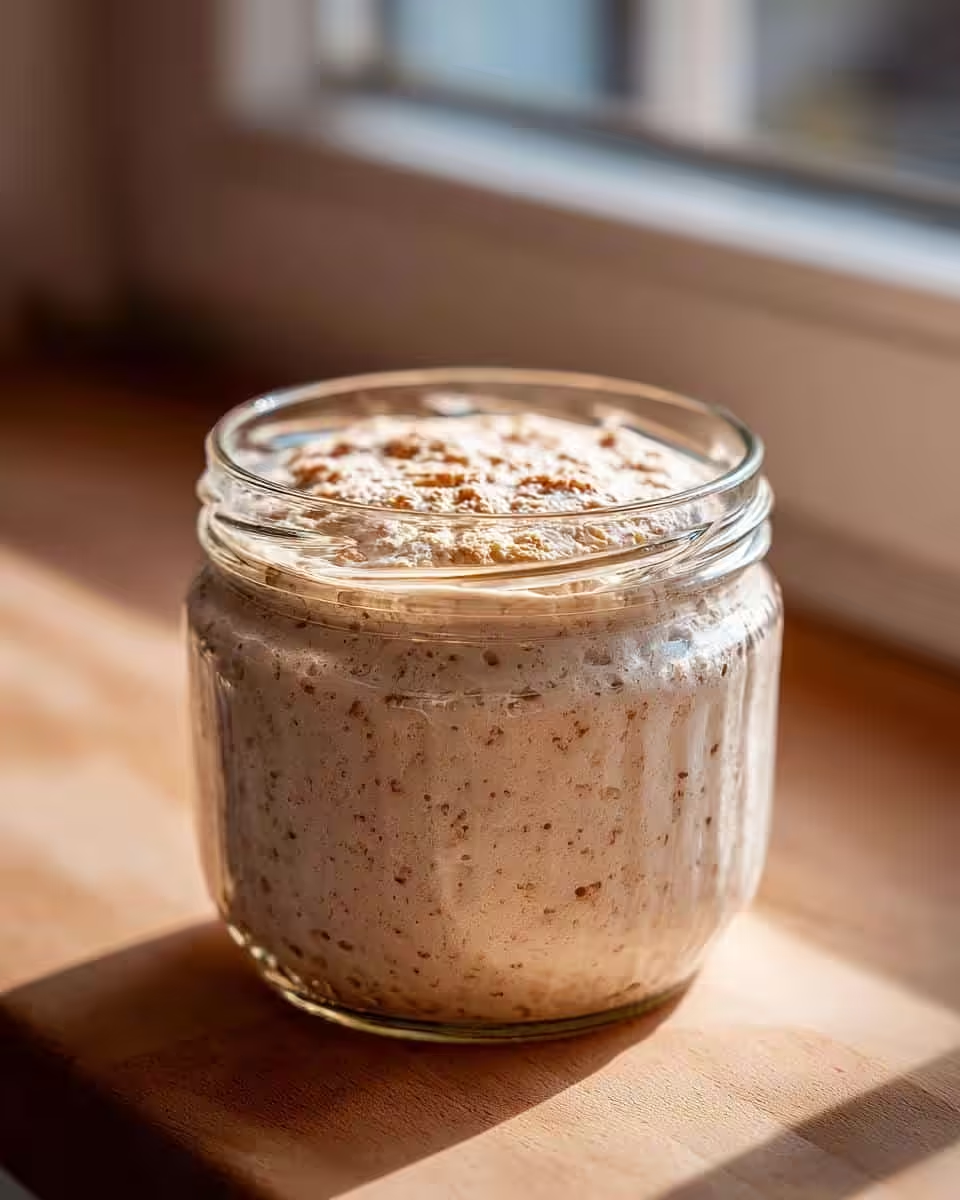
- The Grand Finale: Is it Alive?! By day 7-10, your starter should be bubbly (like, REALLY bubbly!), doubled in size within 4-8 hours *after* you feed it, and have a slightly tangy aroma. That’s the good stuff! That means it’s *active* and ready to bake some magic! If it’s sluggish, give it another few days of feedings.
Tips for Success with These Active Sourdough Starter Recipes
Want to guarantee sourdough stardom? Here’s my hard-won wisdom – listen up!
- Temperature is KING (or Queen!): Seriously, keep that starter happy! 70-75°F is the sweet spot. Too cold, and it’ll be sluggish. Too hot, and… well, you don’t want to know! If your house is chilly, try popping it in the oven with *just* the light on.
- Weigh It Out: I know, I know, measuring cups are easy. But a kitchen scale? Total game-changer! It makes sure your flour and water are consistent every single time. Trust me on this.
- Bubbly is BEST! You want to see those bubbles! It’s like the starter’s way of saying “I’m alive!”. If you’re not seeing bubbles after a few days, don’t panic. Just keep feeding it, and be patient. Sometimes it just needs a little extra love.
- Don’t Give Up! Sourdough can be finicky, but so worth it. If it’s not working at first, don’t toss it all! Keep at it and you will have success.
Ingredient Notes and Substitutions for Active Sourdough Starter Recipes
Okay, let’s talk swaps! While I *highly* recommend sticking to the basics for the *best* results, sometimes you gotta work with what you’ve got, right?
- Flour Power! All-purpose is my go-to, but if your starter’s being a little… stubborn, try swapping in some whole wheat or rye flour for a feeding or two. It gives it a little extra boost!
- Water Works: Filtered is best, I think, but if you absolutely have to use tap water, let it sit out for a few hours first to let any chlorine evaporate. Sounds crazy, but it can make a difference!
FAQ About Active Sourdough Starter Recipes
Sourdough got you scratching your head? Don’t sweat it! Here are some of the questions I get asked *all* the time. Hopefully, this’ll clear things up!
Why isn’t my sourdough starter bubbly?
Ah, the classic question! If your starter isn’t bubbly, don’t panic. It probably just needs more time. Make sure you’re keeping it in a warm place (remember, 70-75°F is ideal!). Also, are you using good quality flour? Sometimes cheap flour just doesn’t cut it. And most importantly: be patient, even if you’re using the best **active sourdough starter recipes.** Stick with those regular feedings, and it’ll get there!
Can I use a different kind of flour?
Yep, absolutely! While I usually stick to unbleached all-purpose, you can totally experiment. Whole wheat, rye, even bread flour can work! Just keep in mind that different flours will give you slightly different flavors and textures. Also, some flours absorb more water, so you might need to adjust the amount of water you use. It’s all about finding what works best for *you*!
How often do I *really* need to feed my starter?
If you’re baking regularly, feeding it every 24 hours is a good idea. But if you’re not baking as often, you can store it in the fridge. When it’s in the fridge, you only need to feed it once a week. Just remember to take it out a day or two before you want to bake, and give it a few feedings to wake it up! Kinda like us on Monday mornings, eh?
Help! My starter smells… weird!
Okay, a *slightly* tangy smell is normal. But if it smells like, say, gym socks or nail polish remover, that’s not a good sign. It could mean that bad bacteria have moved in. In that case, it’s probably best to start over. But hey, now you’re a pro, and you can get another one going even faster!
Storage and Reheating Instructions for Active Sourdough Starter Recipes
Okay, so you’ve got a happy, bubbly starter. Now what? Let’s talk storage!
- Fridge Time! If you’re not baking every day, pop that baby in the fridge! It’ll slow down the fermentation process.
- Weekly Feast! Even in the fridge, your starter needs to eat! Once a week, take it out, feed it, let it sit at room temperature for a couple of hours, and then put it back in the fridge.
- Wakey, Wakey!: When you’re ready to bake, take the starter out of the fridge 1-2 days before. Feed it every 12 hours until it’s bubbly and active again.
Nutritional Information Disclaimer About Active Sourdough Starter Recipes
Okay, one quick but important note: I’m a home cook, not a nutritionist! Nutrition info can vary WILDLY depending on the flour and water you use. So, don’t take the numbers too seriously, okay?
Rate This Active Sourdough Starter Recipes
Alright, sourdough superstars! If you’ve given my **active sourdough starter recipe** a whirl, I’d LOVE to hear what you think! Leave a comment below, rate the recipe, and be sure to share your sourdough adventures on social media! Let’s get this sourdough party started!
Print
Easy Active Sourdough Starter Recipe
- Total Time: 7-10 days
- Yield: 1 active starter 1x
- Diet: Vegan
Description
This recipe provides a simple method to create an active sourdough starter, perfect for baking enthusiasts. Follow these steps to cultivate a thriving starter for your sourdough creations.
Ingredients
- 1 cup unbleached all-purpose flour
- 1/2 cup filtered water, lukewarm
Instructions
- In a clean, large glass jar, mix the flour and water until a shaggy dough forms.
- Cover loosely with a lid or cheesecloth secured with a rubber band. Let it sit at room temperature (70-75°F) for 24 hours.
- After 24 hours, discard half of the mixture (about 1/2 cup). Add 1/2 cup of unbleached all-purpose flour and 1/4 cup of lukewarm filtered water to the remaining starter. Mix well.
- Repeat this feeding process (discarding half and adding flour and water) every 24 hours for the next 7-10 days.
- By day 7-10, your starter should be bubbly, doubled in size within 4-8 hours after feeding, and have a slightly tangy aroma. This indicates it’s active and ready for baking.
Notes
- Use a kitchen scale for precise measurements.
- If your starter is not showing activity after a few days, try using whole wheat or rye flour for a feeding to boost its growth.
- Keep your starter in a consistent temperature environment for best results.
- Prep Time: 5 min
- Cook Time: 0 min
- Category: Baking
- Method: Fermentation
- Cuisine: N/A
Nutrition
- Serving Size: 1/4 cup
- Calories: 100
- Sugar: 0g
- Sodium: 1mg
- Fat: 0g
- Saturated Fat: 0g
- Unsaturated Fat: 0g
- Trans Fat: 0g
- Carbohydrates: 21g
- Fiber: 1g
- Protein: 3g
- Cholesterol: 0mg