
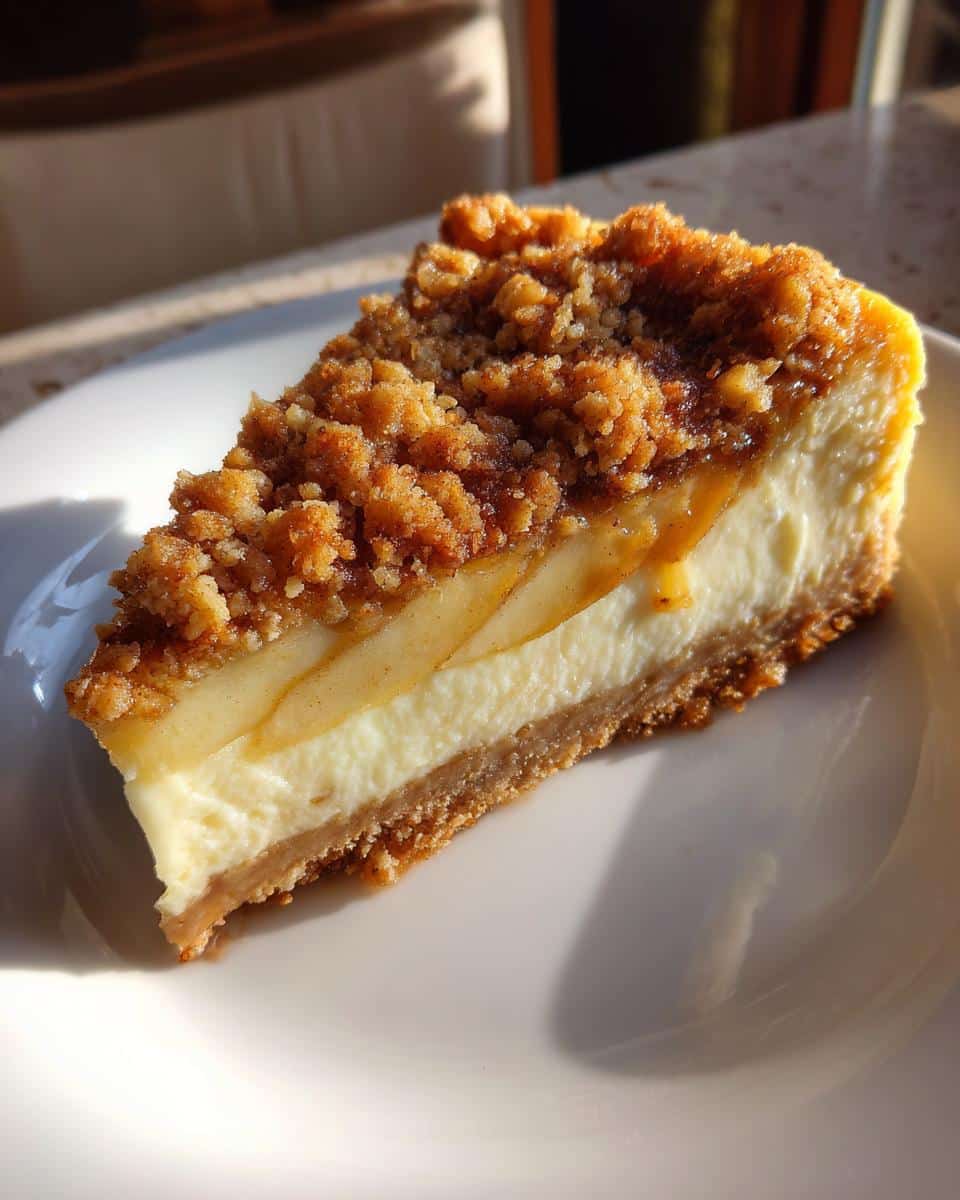
Oh, you are going to LOVE this apple crisp cheesecake! It’s like getting two of your favorite desserts all wrapped up in one glorious package. My Grandma Max, bless her heart, taught me so much about cooking from scratch, and even though she didn’t make this exact combo, she always said the best recipes come from mixing what you love. This really brings together that comforting, spiced apple crisp with that dreamy, creamy cheesecake filling. It’s just perfect for those cozy fall days, or honestly, any time you want something truly special. Trust me, it’s a winner!
Why You’ll Love This Apple Crisp Cheesecake
- It’s surprisingly simple to whip up, making it an easy apple crisp cheesecake for any home baker.
- You get that perfect harmony of tangy, creamy cheesecake and warm, spiced apple crisp in every single bite.
- It’s an absolute showstopper that’s guaranteed to impress your friends and family at any get-together.
- It’s the ultimate fall dessert recipe – it just tastes like home and cozy evenings.
Gathering Your Apple Crisp Cheesecake Ingredients
Alright, let’s get everything ready for this amazing homemade apple crisp cheesecake! It’s not complicated at all, but having your ingredients prepped makes everything flow so much smoother. Think of me as your kitchen helper, just making sure you’ve got all your ducks in a row before we start mixing magic.
For the Graham Cracker Crust
First up, the base! You’ll need about 1.5 cups of graham cracker crumbs – I usually just crush up a whole sleeve of crackers in a zip-top bag with a rolling pin. Then, we’ll mix that with 1/4 cup of granulated sugar for a hint of sweetness, and 6 tablespoons of butter that’s been melted so it holds everything together beautifully.
For the Creamy Cheesecake Filling
Now for the star of the show: the filling! We need 24 ounces of cream cheese, and this is super important: make sure it’s softened to room temperature. Seriously, don’t skip this! It makes all the difference for a super smooth, lump-free filling. We’ll also use 3/4 cup of granulated sugar, 3 large eggs, 1 teaspoon of vanilla extract, and those warm spices – 1 teaspoon of cinnamon and a pinch of nutmeg. This combo makes for a truly creamy apple crisp dessert.
For the Delicious Apple Crisp Topping
And for that irresistible crisp topping! You’ll need 2 cups of apples, peeled and chopped into nice little bite-sized pieces. Then, we’ll mix in 1/2 cup of all-purpose flour, 1/2 cup of packed brown sugar (it gives such a lovely caramel flavor!), 1/2 cup of rolled oats for that classic crisp texture, and 1/4 cup of butter that’s cold and cubed. Just toss it all together, and it’s ready to go!
How to Prepare the Perfect Apple Crisp Cheesecake
Alright, deep breaths, we’re going to make this happen! Putting together this apple crisp cheesecake recipe is really like a little kitchen symphony, and it’s totally doable. My Grandma Max always said to take it one step at a time, and that’s exactly what we’ll do here. You’ve got this!
Preparing the Crust and Pre-Baking
First things first, get that oven preheated to 350°F (175°C). You’ll want to grease a 9-inch springform pan – this makes getting the cheesecake out so much easier later. Then, take that graham cracker crumb mixture you made and press it nice and firm into the bottom of the pan. Give it a little 8-10 minute bake to set it up, then let it cool while we make the yummy filling.
Creating the Cheesecake Filling
Now for the creamy magic! In a big bowl, beat together that softened cream cheese and the 3/4 cup of sugar until it’s super smooth. Seriously, no lumps allowed! Then, add your eggs one at a time, mixing just until they’re incorporated. Stir in the vanilla, cinnamon, and nutmeg. Pour this glorious mixture right over your cooled crust. It’s going to be so smooth and dreamy, making for a truly creamy apple crisp dessert.
Assembling and Baking the Apple Crisp Cheesecake
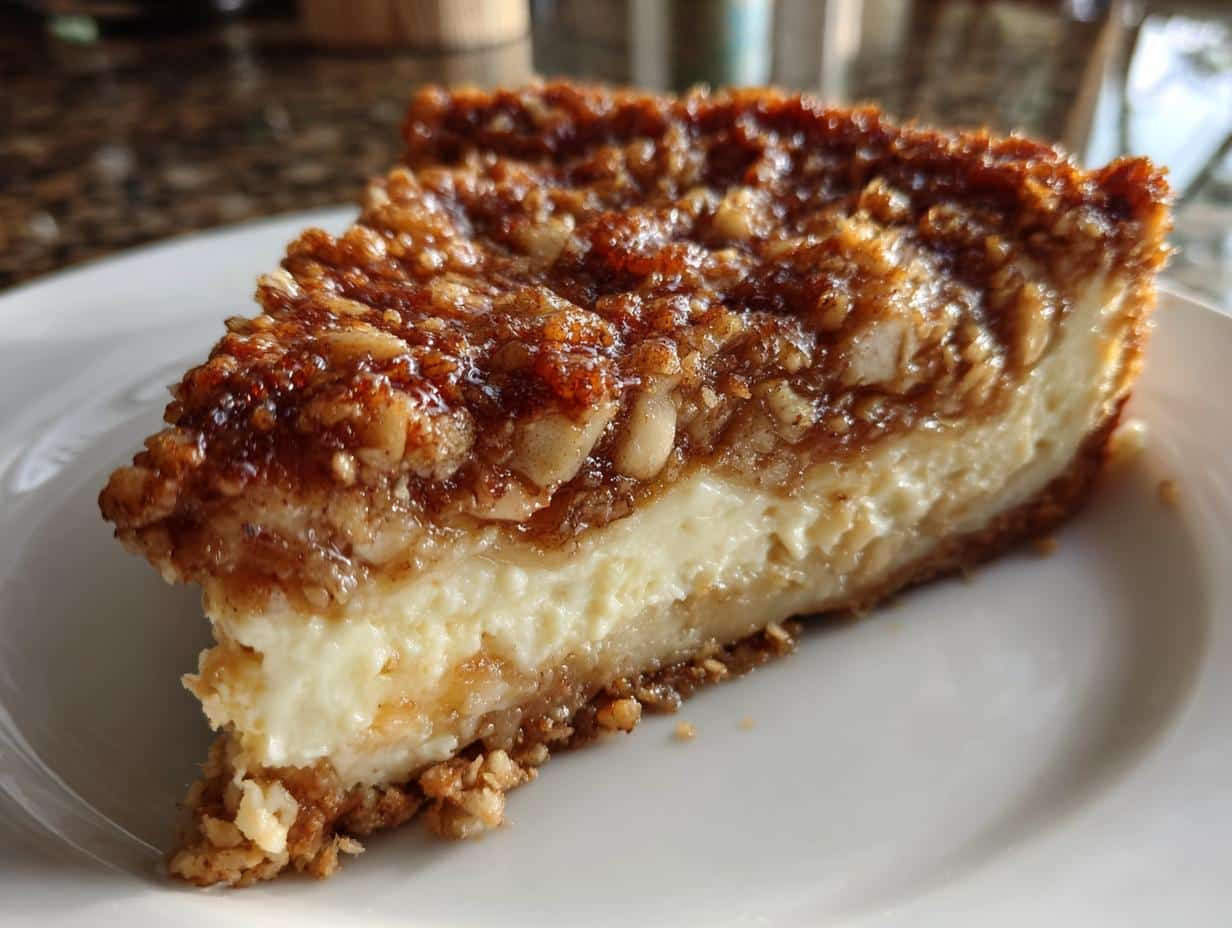
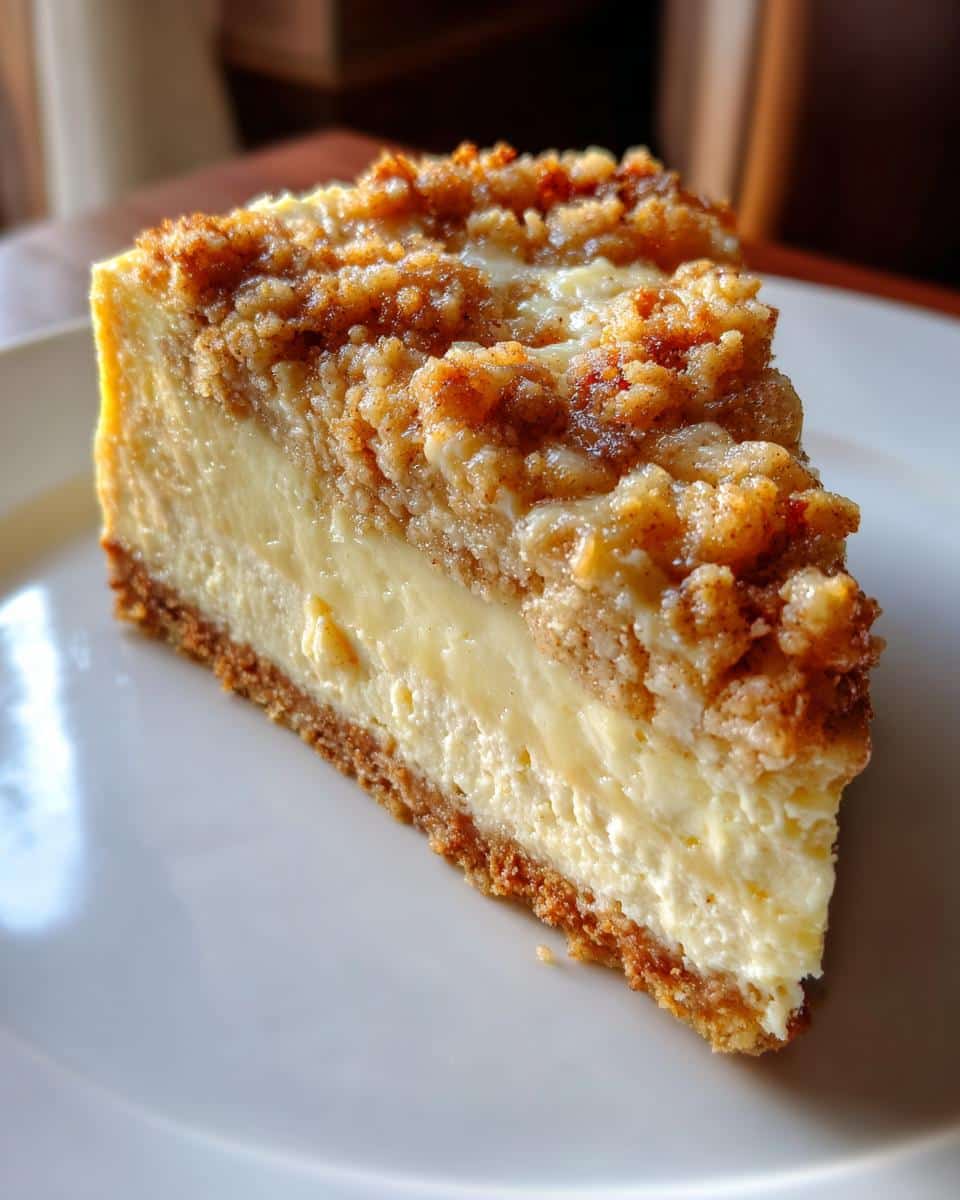
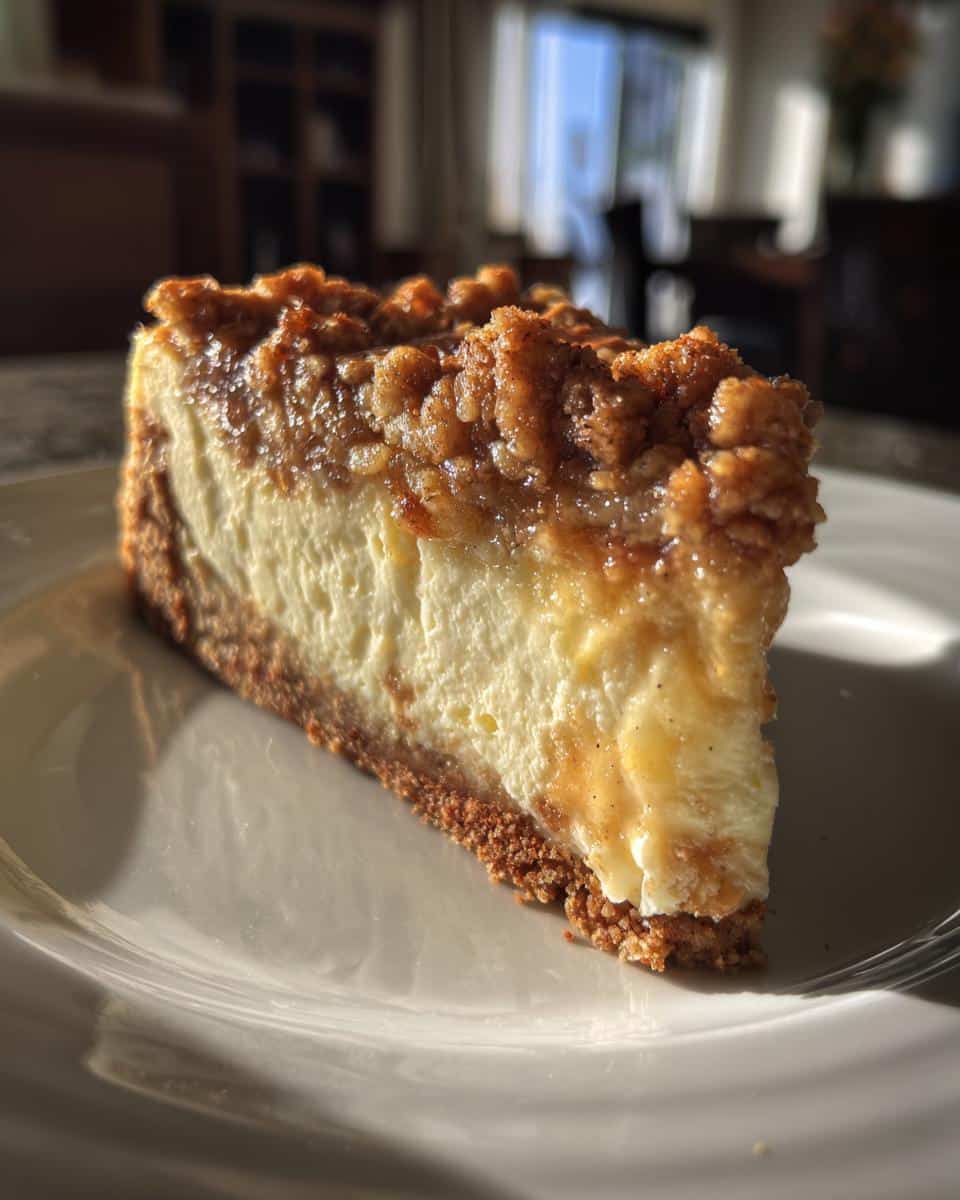
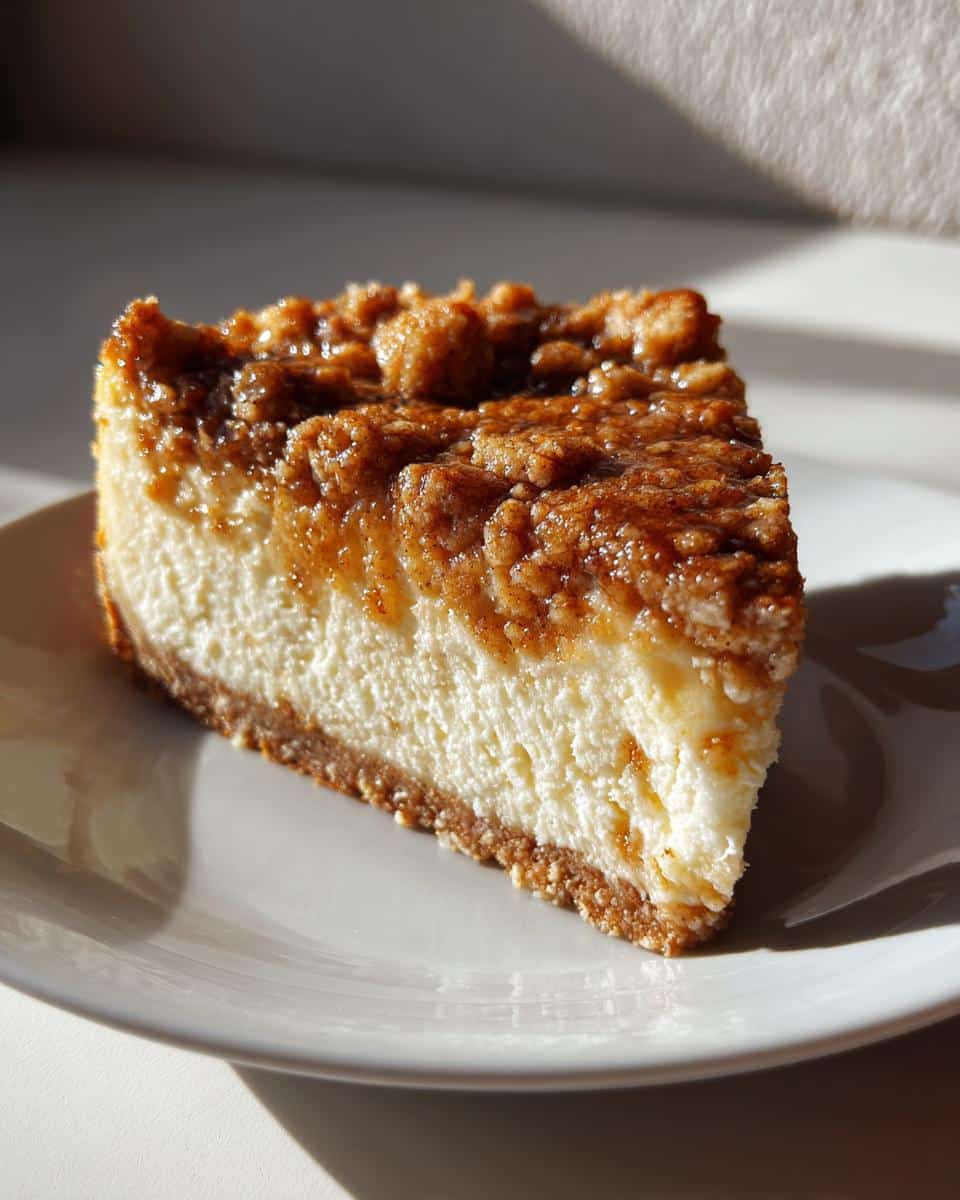
Okay, time to bring it all together! Gently pour that beautiful cheesecake filling over the graham cracker crust. Now, take that apple crisp topping you mixed up and crumble it all over the top of the cheesecake. Try to get it as even as you can. Pop it into the oven and bake for about 50-60 minutes. You’ll know it’s ready when the center is mostly set and the topping is that perfect golden brown. This is how you get the best apple crisp cheesecake!
Cooling and Chilling for Optimal Texture
This part is SO important, and it’s where patience really pays off! Once it’s out of the oven, let the cheesecake cool completely on a wire rack. Don’t rush this! Then, carefully transfer it to the refrigerator and let it chill for at least 4 hours, or even better, overnight. This chilling time is crucial for it to set up perfectly and get that amazing, smooth texture we’re going for.
Tips for the Best Apple Crisp Cheesecake
Making a truly amazing cinnamon apple cheesecake is all about a few little tricks that make a big difference. First off, that cream cheese? It *has* to be at room temperature. Trust me, it’s the secret to a super smooth, luscious filling without any lumps. Also, when you’re mixing the filling, just mix until everything is combined. Overmixing can make it crack, and we definitely don’t want that!
And that chilling time? Don’t you dare skip it! Letting it chill in the fridge for at least 4 hours, or ideally overnight, is what allows it to set up perfectly. It’s the difference between a slightly wobbly cheesecake and that perfectly dense, sliceable slice of heaven. It really makes all the effort worthwhile!
Frequently Asked Questions about Apple Crisp Cheesecake
Got questions about this delightful apple crisp cheesecake? I totally get it! Sometimes you just need a little reassurance or a tweak here and there. That’s what I’m here for!
Can I make this apple crisp cheesecake ahead of time?
Oh, absolutely! This is a fantastic make-ahead dessert, which is perfect for busy bakers. You can bake it completely, let it chill, and then cover it tightly in the fridge for up to 2 days. It’s even better the next day!
What are some variations for this apple crisp cheesecake?
You can totally play around with this! For a different twist on this easy apple crisp cheesecake, try adding a pinch of cardamom or allspice to the apple topping. Some chopped pecans or walnuts in the topping are also divine. And if you don’t have apples, pears work beautifully too!
How do I know when my apple crisp cheesecake is done baking?
The edges should look set, and the center should still have a slight wobble when you gently nudge the pan. The topping will be beautifully golden brown. It will continue to set up as it cools, so don’t worry if the very middle looks a *tiny* bit soft. It’s a classic cheesecake indicator!
Serving and Storing Your Apple Crisp Cheesecake
This gorgeous apple crisp cheesecake is best served chilled. When you’re ready to slice it, use a sharp knife dipped in hot water and wiped dry between each cut – it makes for super clean slices! You can even cut it into nice thick apple cheesecake bars for a different presentation. If you happen to have any leftovers (which is rare in my house!), just wrap it tightly in plastic wrap or pop it into an airtight container and keep it in the refrigerator for up to 3 days. It stays wonderfully fresh!
Understanding the Nutrition of Your Apple Crisp Cheesecake
Just a little note here about the nutrition info – it’s an estimate, okay? What you see is based on the ingredients I typically use, but brands and even the size of your apples can change things up a bit. So, think of these numbers as a friendly guide rather than strict gospel!
Print
Amazing Apple Crisp Cheesecake: Fall’s 1 Dessert
- Total Time: 4 hours 30 minutes
- Yield: 10-12 servings 1x
- Diet: Vegetarian
Description
Enjoy a delightful fusion of creamy cheesecake and comforting apple crisp with this easy-to-make recipe. Perfect for fall gatherings or any occasion that calls for a delicious homemade dessert.
Ingredients
- 1.5 cups graham cracker crumbs
- 1/4 cup granulated sugar
- 6 tablespoons unsalted butter, melted
- 24 ounces cream cheese, softened
- 3/4 cup granulated sugar
- 3 large eggs
- 1 teaspoon vanilla extract
- 1 teaspoon ground cinnamon
- 1/4 teaspoon ground nutmeg
- 2 cups peeled and chopped apples
- 1/2 cup all-purpose flour
- 1/2 cup packed brown sugar
- 1/2 cup rolled oats
- 1/4 cup unsalted butter, cold and cubed
Instructions
- Preheat oven to 350°F (175°C). Grease a 9-inch springform pan.
- In a bowl, combine graham cracker crumbs and 1/4 cup granulated sugar. Stir in melted butter until combined. Press mixture evenly into the bottom of the prepared pan. Bake for 8-10 minutes. Let cool.
- In a large bowl, beat cream cheese and 3/4 cup granulated sugar until smooth. Beat in eggs one at a time. Stir in vanilla extract, cinnamon, and nutmeg.
- Pour cream cheese mixture over the cooled crust.
- In a separate bowl, combine chopped apples, flour, brown sugar, rolled oats, and cubed butter. Mix until well combined.
- Crumble apple crisp topping evenly over the cream cheese layer.
- Bake for 50-60 minutes, or until the center is set and the topping is golden brown.
- Let cool completely on a wire rack. Chill in the refrigerator for at least 4 hours before serving.
Notes
- For a stronger apple flavor, you can add a pinch of allspice to the apple crisp topping.
- Ensure cream cheese is at room temperature for a smoother filling.
- Allow the cheesecake to chill sufficiently for the best texture.
- Prep Time: 30 minutes
- Cook Time: 60 minutes
- Category: Dessert
- Method: Baking
- Cuisine: American
Nutrition
- Serving Size: 1 slice
- Calories: 450
- Sugar: 35g
- Sodium: 200mg
- Fat: 28g
- Saturated Fat: 17g
- Unsaturated Fat: 9g
- Trans Fat: 0.5g
- Carbohydrates: 45g
- Fiber: 2g
- Protein: 7g
- Cholesterol: 100mg