 Skip to content
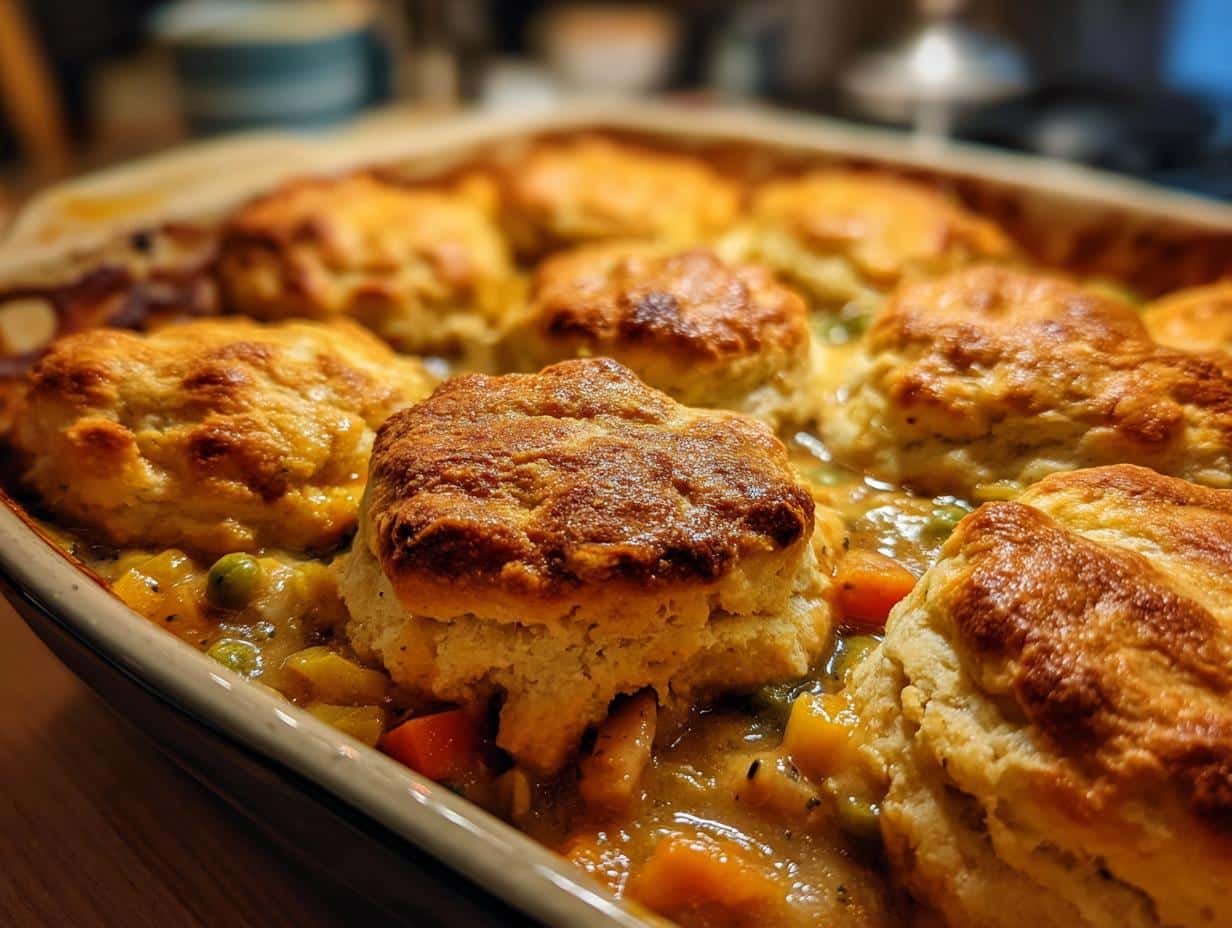
Oh, cobblers. Is there anything more comforting? For me, they just scream “home” – that warm, fuzzy feeling you get when you’re surrounded by family, maybe with a fire crackling in the background. And while I’m a sucker for a good fruit cobbler, *this* chicken cobbler? It’s next-level comfort food! My family has been making something similar for years, and it’s evolved into this super-easy, unbelievably delicious recipe that I’m just bursting to share.

The secret? Simple ingredients, a whole lotta love, and, okay, maybe a *tiny* bit of thyme (that stuff is magic, I swear!). I’ve tweaked and tested this recipe a million times (mostly because my kids demand it!), and I’ve finally landed on the perfect balance of savory chicken, tender veggies, and those golden-brown, fluffy biscuits on top. My grandma used to say the best meals are the ones that bring people together, and I think this chicken cobbler completely nails it. It’s a one-pan wonder that’s perfect for a cozy night in, and I guarantee it’ll become a new family favorite! You know, I really started perfecting this recipe after seeing so many sad, bland chicken cobblers out there. I wanted to create something truly special, something that tasted like a warm hug from your favorite person. And I think I’ve done it!
Why You’ll Love This Chicken Cobbler Recipe
Okay, so why this chicken cobbler over all the others? Here’s the deal:
- Super Easy: Seriously, anyone can make this. If you can stir, you can cobble!
- Comfort Food Central: That warm, savory flavor is like a hug in a bowl. Perfect for chilly nights!
- Quick Cooking Time: Dinner’s on the table in about an hour. No all-day kitchen marathons here!
- Family-Friendly: Even picky eaters gobble this up (pun intended!). It’s a guaranteed win!
- Simple Ingredients: Nothing fancy-schmancy, just regular stuff you probably already have. Score!
The Best Ingredients for Chicken Cobbler
Alright, let’s talk ingredients! Nothing too crazy here, promise. We’re going for that “pantry staple” vibe, y’know? Here’s what you’ll need for the yummy chicken filling and those golden biscuits:
For the Chicken Filling:
- 1 tablespoon olive oil
- 1 pound boneless, skinless chicken breasts, cut into 1-inch pieces
- 1 teaspoon salt
- 1/2 teaspoon black pepper
- 1 onion, chopped
- 2 carrots, peeled and chopped
- 2 celery stalks, chopped
- 2 cloves garlic, minced
- 1 teaspoon dried thyme
- 1/2 teaspoon dried rosemary
- 1/4 cup all-purpose flour
- 3 cups chicken broth
- 1 cup frozen peas
For the Biscuit Topping:
- 1 cup all-purpose flour
- 2 teaspoons baking powder
- 1/2 teaspoon salt
- 1/4 cup cold unsalted butter, cut into small pieces
- 1/2 cup milk
Seriously, that’s it! I bet you have most of that already, right? If not, quick trip to the store and you’re golden. Remember, fresh ingredients *always* make a difference, so grab the best you can. And don’t worry too much about being exact – cooking should be fun, not stressful!
How to Make This Chicken Cobbler: Step-by-Step
Okay, ready to get cookin’? Don’t sweat it, this is easier than it looks! Just follow these steps, and you’ll be chowing down on some serious comfort food in no time. And hey, if you mess up? No biggie! It’ll still taste amazing!
- Preheat and Prep: First things first, let’s get that oven cranked up to 400°F (200°C). Trust me, you want it nice and hot! While it’s preheating, chop all your veggies – onion, carrots, celery. Mince that garlic, too! Having everything ready to go makes the whole process a breeze, ya know?
- Brown the Chicken: Heat up that olive oil in a large oven-safe skillet over medium-high heat. Make sure your skillet is oven-safe – wouldn’t want any kitchen mishaps! Season the chicken pieces with salt and pepper. Now, brown the chicken until it’s cooked.. I like to use a cast iron skillet for this – it gets nice and even heat, but any oven-safe skillet will do. Remove the chicken from the skillet and set aside. We’re not cooking it all the way through, just giving it some color and flavor.
- Sauté the Veggies: Add the chopped onion, carrots, and celery to the skillet. Cook ’em until they soften up a bit, about 5 minutes. You want them tender, not mushy! Then, toss in the minced garlic, dried thyme, and dried rosemary. Cook for another minute until the garlic is fragrant—yum! Be careful not to burn the garlic, it gets bitter FAST!
- Make the Magic Sauce: Stir in the flour, making sure it coats all the veggies. This helps thicken up the sauce. Then, GRADUALLY whisk in the chicken broth. You wanna whisk constantly to avoid any clumpy situations. Bring it all to a simmer—that’s a gentle bubble. Add the frozen peas and the cooked chicken back into the skillet. Give it a good stir so everything’s swimming in that delicious sauce.
- Biscuit Time! In a separate bowl, whisk together the flour, baking powder, and salt for the biscuit topping. Cut in the cold butter using a pastry blender or your fingers (if you’re brave!). You want the mixture to resemble coarse crumbs – think beach sand. Stir in the milk until it’s just combined. Don’t overmix! Lumpy batter makes for tender biscuits, I swear!
- Top it Off: Drop spoonfuls of the biscuit dough over the chicken mixture in the skillet. Don’t worry about making it perfect – rustic is the name of the game here!
- Bake It ‘Till Golden: Pop the whole skillet into the preheated oven and bake for 20-25 minutes, or until the biscuits are golden brown and the filling is bubbly. The biscuits should be cooked through. Use a toothpick to check!
- Cool Slightly and Devour: Let the cobbler cool for a few minutes before serving – ain’t nobody got time for a burnt tongue! Then, dig in and enjoy! Seriously, this stuff is addictive!
See? Wasn’t that easy? Now, go pat yourself on the back—you just made an amazing chicken cobbler! Okay, I’m officially hungry now. Time for seconds!
Tips for the Perfect Chicken Cobbler
Want to take your chicken cobbler game to the next level? Here are a few tricks I’ve learned over the years (and a few minor kitchen disasters!) that’ll help you nail it every single time:
- Cold Butter is Key: Seriously, don’t skip this! Cold butter in the biscuit dough creates those flaky layers we all crave. The colder, the better!
- Don’t Overmix the Biscuits: I’m serious! Overmixing develops gluten and makes for tough biscuits. Gently stir until just combined! A few lumps are totally fine. Actually, they’re perfect!
- Oven Thermometers are Your Friend: Ovens can be sneaky liars! Get yourself an oven thermometer to make sure you’re actually baking at the temp you think you are.
- Watch for Golden Brown: The biscuits should be a beautiful golden brown and the filling should be bubbly when it’s done. That’s your sign it’s ready!
Trust me, following these little tidbits will make a world of difference. Now go forth and cobble like a pro!
Variations on This Chicken Cobbler Recipe
Okay, so you’ve mastered the classic? Awesome! Now let’s get a little crazy, shall we? The beauty of chicken cobbler is that it’s SUPER flexible. Don’t be afraid to mix things up and make it your own! Here are a few ideas to get those creative juices flowing:
- Herb It Up!: Swap out the thyme and rosemary for other herbs like sage, parsley, or even a little dill. Each brings its own vibe!
- Spice It Right: A pinch of smoked paprika, a dash of cayenne pepper, or a little bit of garlic powder can turn up the heat!
- Veggie Power: Throw in some mushrooms, potatoes, green beans, or even some bell peppers for extra flavor and nutrients!
- Cheese, Please!: Sprinkle some cheddar cheese, parmesan, or even a little goat cheese on top of the biscuits before baking! Trust me on the goat cheese thing – it’s divine.
- Go Meatless!: Swap out the chicken for lentils, chickpeas, or even some cubed tofu for a vegetarian version. Hearty and delicious!
Seriously, the possibilities are endless! Just raid your fridge and pantry and see what inspires you. Most of all, don’t be afraid to experiment. Who knows? You might just create the next big chicken cobbler masterpiece!
Make-Ahead and Storage Tips for Chicken Cobbler
Life’s busy, right? So, sometimes you just gotta get a head start! Good news: you can totally prep this chicken cobbler in advance! Make the chicken filling a day ahead, store it in the fridge. Then, just whip up the biscuits and bake when you’re ready to eat. Leftovers? They’re even better the next day! Store ’em in an airtight container in the fridge for up to 3 days. Wanna freeze it? Sure thing! Just let it cool completely, then wrap it tightly in plastic wrap and foil. It’ll keep for up to 2 months. To reheat, thaw it overnight in the fridge, then bake it at 350°F (175°C) until it’s heated through and bubbly. Easy peasy!
Frequently Asked Questions About Chicken Cobbler
Got questions? I’ve got answers! Here are a few of the most common chicken cobbler conundrums I hear, solved just for you:
Can I use a different type of meat?
Absolutely! While this recipe calls for chicken (because, well, it’s *chicken* cobbler!), you can totally swap it out. Turkey, pork, or even some hearty sausage would be delicious! Just adjust the cooking time as needed to make sure the meat’s cooked through. Play around and find your favorite!
Can I make this ahead of time?
Yep! As I mentioned before, you can definitely make the filling a day or two in advance. Just store it in the fridge. Then, when you’re ready to bake, whip up the biscuit topping and you’re good to go!
How do I prevent the biscuits from being soggy?
Ah, the dreaded soggy biscuit! The key is to not add the biscuit topping until right before baking. That way, they stay nice and fluffy on top. Also, make sure your oven is fully preheated, and don’t overcrowd the skillet. You want those biscuits to have room to breathe and get nice and golden!
Can I use store-bought biscuit dough?
Of course! I’m all about shortcuts when time is tight. Store-bought biscuit dough works perfectly in this recipe. Just be sure to follow the package directions for baking time. The canned kind is also great for camping if you’re cooking over a campfire, too! Just make sure the easy Chicken cobbler recipe becomes and *easy* camping cobbler!
Nutritional Information for Chicken Cobbler
Okay, gotta throw in the disclaimer here! Just keep in mind that the nutrition information is an estimate, and it can vary depending on the exact ingredients and brands you use. So, take it with a grain of salt, okay?
Enjoy Your Homemade Chicken Cobbler
And there you have it! Your very own, ridiculously delicious chicken cobbler! I’m seriously so excited for you to try this. When you do, please, please, PLEASE come back and rate the recipe and leave a comment – I wanna hear all about how it turned out and if you made any fun tweaks! And if you’re feeling social, snap a pic and share it on your socials using #MyAwesomeChickenCobbler – I’d absolutely love to see your creations!
Print
Chicken Cobbler
- Total Time: 60 min
- Yield: 6 servings 1x
- Diet: Low Fat
Description
A comforting and easy chicken cobbler recipe.
Ingredients
- 1 tablespoon olive oil
- 1 pound boneless, skinless chicken breasts, cut into 1-inch pieces
- 1 teaspoon salt
- 1/2 teaspoon black pepper
- 1 onion, chopped
- 2 carrots, peeled and chopped
- 2 celery stalks, chopped
- 2 cloves garlic, minced
- 1 teaspoon dried thyme
- 1/2 teaspoon dried rosemary
- 1/4 cup all-purpose flour
- 3 cups chicken broth
- 1 cup frozen peas
- 1 cup all-purpose flour
- 2 teaspoons baking powder
- 1/2 teaspoon salt
- 1/4 cup cold unsalted butter, cut into small pieces
- 1/2 cup milk
Instructions
- Preheat your oven to 400°F (200°C).
- Heat olive oil in a large oven-safe skillet over medium-high heat. Season chicken with salt and pepper. Cook chicken until browned. Remove from skillet and set aside.
- Add onion, carrots, and celery to the skillet. Cook until softened, about 5 minutes. Add garlic, thyme, and rosemary; cook for 1 minute.
- Stir in flour. Gradually whisk in chicken broth. Bring to a simmer. Add peas and cooked chicken.
- In a bowl, whisk together flour, baking powder, and salt. Cut in cold butter until the mixture resembles coarse crumbs. Stir in milk until just combined.
- Drop spoonfuls of the biscuit dough over the chicken mixture.
- Bake for 20-25 minutes, or until the biscuits are golden brown and the filling is bubbly.
Notes
- Feel free to add other vegetables like mushrooms or potatoes.
- You can use store-bought biscuit mix to save time.
- Prep Time: 20 min
- Cook Time: 40 min
- Category: Dinner
- Method: Baking
- Cuisine: American
Nutrition
- Serving Size: 1 slice
- Calories: 350
- Sugar: 5g
- Sodium: 450mg
- Fat: 15g
- Saturated Fat: 7g
- Unsaturated Fat: 6g
- Trans Fat: 0g
- Carbohydrates: 30g
- Fiber: 3g
- Protein: 25g
- Cholesterol: 80mg