 Skip to content

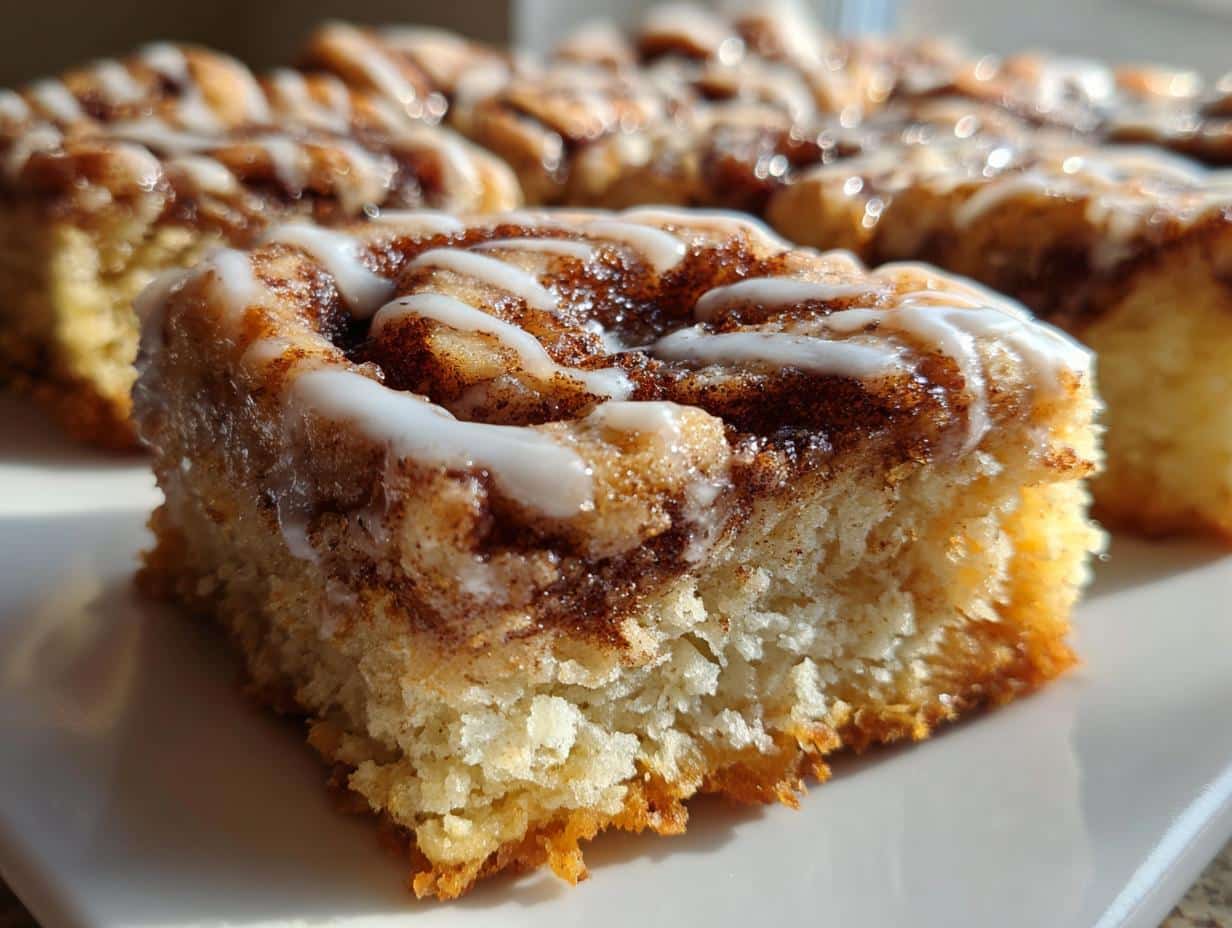
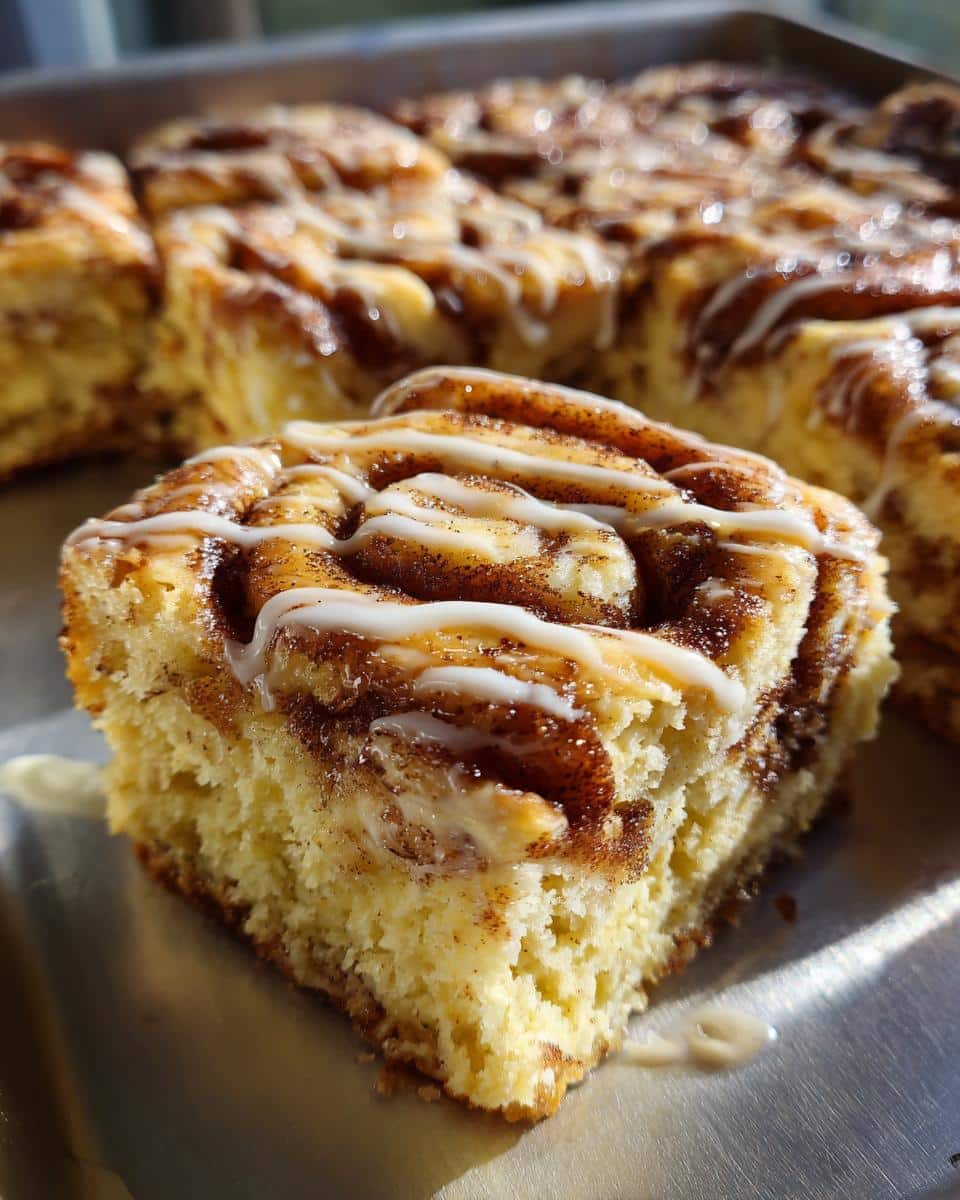
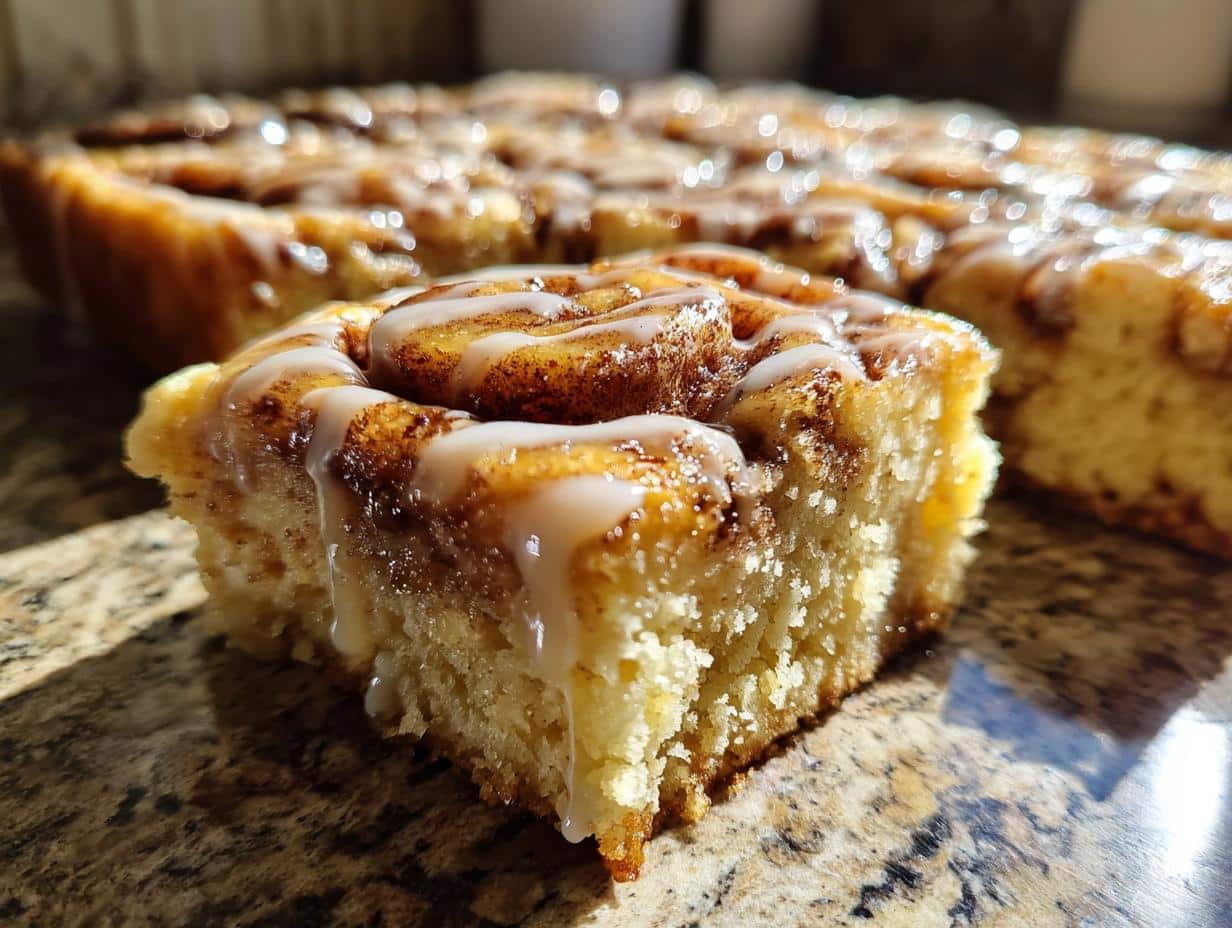
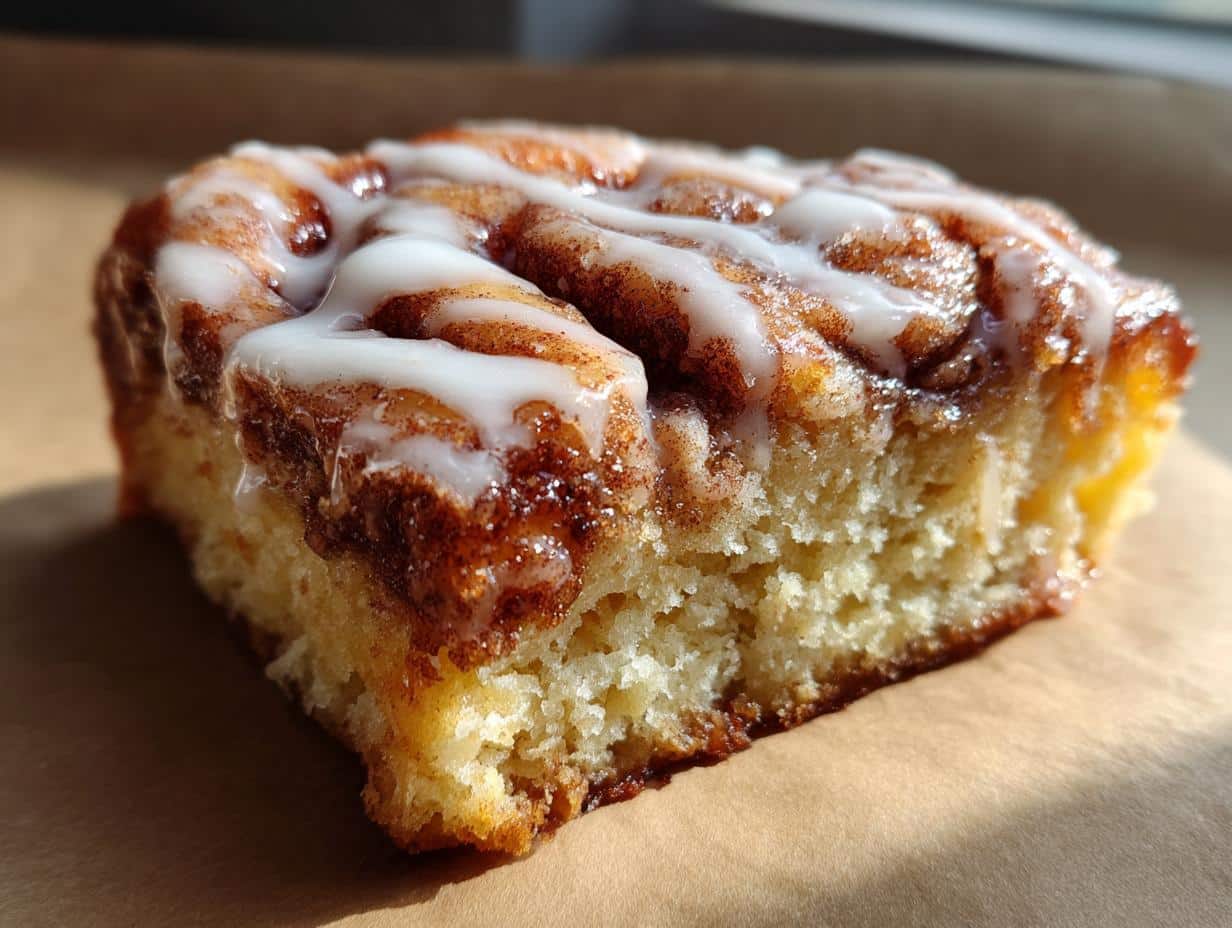
Oh, the smell of cinnamon rolls baking! It just fills the kitchen with such warmth and comfort, doesn’t it? But let’s be real, sometimes making traditional cinnamon rolls feels like a whole weekend project. That’s where these incredible Cinnamon Roll Bliss Bars come in! They capture all the gooey, spiced, sweet goodness of your favorite morning treat but in a super easy, no-fuss bar form. I swear, these bars are my secret weapon when I want that cozy cinnamon roll vibe without all the rolling, proofing, and waiting. They bring such a simple joy to my kitchen – just pop them in the oven, and soon enough, that irresistible aroma takes over. Trust me, these Cinnamon Roll Bliss Bars are going to be your new go-to for a quick breakfast or a delightful sweet treat!
Why You’ll Love These Cinnamon Roll Bliss Bars
So, why am I absolutely obsessed with these Bliss Bars? Well, let me tell you, they’re truly a game-changer! Imagine getting all that classic, warm cinnamon roll flavor without spending hours in the kitchen. It’s like magic, I tell ya!
- Seriously Simple: No yeast, no rising, no endless kneading. Just mix, spread, and bake. It’s so easy, you’ll wonder why you ever bothered with traditional rolls!
- That Classic Taste: Every bite is pure cinnamon roll heaven – warm spice, rich brown sugar, and that dreamy glaze. All the comfort, none of the fuss.
- Anytime Treat: Perfect for a relaxed breakfast on a Sunday morning, a delicious dessert after dinner, or even a pick-me-up with your afternoon coffee. They’re super versatile!
- Amazing Texture: They’re soft and chewy, with that lovely ripple of cinnamon sugar throughout. So satisfying!
Essential Ingredients for Your Cinnamon Roll Bliss Bars
Alright, so to whip up these amazing Cinnamon Roll Bliss Bars, you’re going to need a few key players in your kitchen lineup. Now, I love a good homemade cinnamon roll, but the beauty of these bars is how simple the ingredients are! No fancy stuff, just everyday pantry staples that come together for something truly magical. Here’s what you’ll want to have on hand:
For the Bars:
- 1 cup unsalted butter, softened (Seriously, let it soften! It makes all the difference for that creamy texture.)
- 1 1/2 cups granulated sugar
- 2 large eggs
- 1 teaspoon vanilla extract
- 2 1/2 cups all-purpose flour
- 1 teaspoon baking powder
- 1/2 teaspoon salt
- 1/2 cup milk
For the Cinnamon Swirl:
- 1/2 cup packed light brown sugar
- 2 teaspoons ground cinnamon (Use good quality stuff here, it’s the star!)
- 1/2 cup chopped pecans (optional, but oh-so-good!)
For the Glaze:
- 1 cup powdered sugar
- 2 tablespoons milk
- 1/2 teaspoon vanilla extract
See? Nothing complicated! Just good, honest ingredients ready to transform into pure bliss. Happy baking, my friends!
How to Make Cinnamon Roll Bliss Bars: Step-by-Step Instructions
Okay, now for the fun part – actually making these amazing Cinnamon Roll Bliss Bars! This is seriously straightforward, so don’t you worry. We’re going to break it down into super easy steps, and before you know it, your kitchen will smell absolutely heavenly, just like when I make cinnamon roll French toast roll-ups or red velvet cinnamon rolls!
- First things first, oven prep! Go ahead and preheat your oven to 350°F (175°C). While it’s warming up, grab a 9×13 inch baking pan. You’ll want to grease it really well, then lightly flour it. This little step makes sure those bars pop right out later – trust me, there’s nothing worse than a sticky situation!
- Cream ‘er up! In a big bowl, get your softened butter and granulated sugar together. Beat them with an electric mixer until they’re super light and fluffy. This is where you build the base of that tender crumb, so give it a good minute or two!
- Egg-cellent addition! Now, beat in your eggs, one at a time. Make sure each egg is fully incorporated before adding the next. Then, stir in that lovely vanilla extract. The smell alone is enough to get you excited!
- Flour power! In a separate, medium-sized bowl, whisk together your flour, baking powder, and salt. Just a quick whisk to make sure everything’s evenly distributed.
- Combine and conquer! This is where things come together. Gradually add your dry ingredients to the wet ingredients. Here’s my little trick: add a bit of the dry mix, then a splash of the milk, then dry, then milk, starting and ending with the dry ingredients. Mix just until combined! Seriously, don’t overmix, or your bars might get tough.
- Bottom layer bliss! Take about half of that batter and spread it evenly into your prepared baking pan. It might seem a little sticky, but just gently coax it into place.
- Cinnamon swirl magic! Grab a small bowl and mix your brown sugar and cinnamon together. If you’re using pecans (and you totally should!), sprinkle them over this mixture. Now, sprinkle that glorious cinnamon-sugar blend evenly over the batter in the pan.
- Top it off! Carefully, and I mean *carefully*, spread the remaining batter over the cinnamon sugar layer. You don’t want to mess up that beautiful swirl too much!
- Bake it! Pop your pan into the preheated oven and bake for 25-30 minutes. You’ll know they’re done when a wooden skewer (or a trusty toothpick) inserted into the center comes out clean.
- Glaze time! While those beauties are cooling (this is important, don’t glaze hot bars!), whisk together your powdered sugar, 2 tablespoons of milk, and 1/2 teaspoon of vanilla extract in a small bowl until it’s smooth and pourable.
- Drizzle and devour! Once the bars are completely cool, drizzle that sweet glaze all over them. Then, cut ’em into squares and just try to resist eating them all!
Tips for Perfect Cinnamon Roll Bliss Bars
So, you want to make these Cinnamon Roll Bliss Bars absolutely perfect, right? Of course, you do! Here are a few of my favorite little secrets and tips that’ll take your bars from good to oh-my-goodness-gracious amazing, just like I do in my own kitchen:
- Room Temp is Your Friend: Seriously, make sure your butter and eggs are at room temperature. It helps everything cream together beautifully, creating a super smooth batter and a wonderfully tender bar. If your butter is too cold, it won’t cream properly, and if it’s too warm, it can make your batter greasy.
- Don’t Be an Over-Mixer: Once you start adding the flour, mix *just* until everything is combined. A few streaks of flour are totally fine! Overmixing develops the gluten in the flour, which can lead to tough, chewy bars instead of the soft, tender ones we’re aiming for.
- Cool It Down: I know it’s hard, but resist the urge to glaze those bars while they’re still warm. The glaze will just melt and slide right off, leaving you with sad, naked bars. Let them cool completely on a wire rack first. Patience, my friend, is key here!
- The Pan Release Trick: Even though I said grease and flour, if you want extra insurance, you can line your 9×13 pan with parchment paper, leaving an overhang on the sides. Once cooled, you can just lift the whole slab out and cut perfect squares. Genius, right?
Common Questions About Cinnamon Roll Bliss Bars
Okay, so you’ve got those amazing Cinnamon Roll Bliss Bars baking, and I bet your kitchen smells incredible! It’s totally normal to have a few questions pop up, especially when you’re trying a new recipe. So, let’s tackle some of the common ones I hear. Think of me as your kitchen confidante, ready to help you make these bars absolutely perfect!
Can I make these Cinnamon Roll Bliss Bars ahead of time?
Oh, absolutely! That’s one of the best things about these dessert bars. You can bake them a day in advance, let them cool completely, and then glaze them right before serving. They actually stay wonderfully fresh and moist for a couple of days at room temperature in an airtight container. It makes entertaining or planning for a busy morning a total breeze!
How do I store Cinnamon Roll Bliss Bars?
Easy peasy! Once they’re completely cooled and glazed, just pop your Cinnamon Roll Bliss Bars into an airtight container. They’ll be perfectly fine at room temperature for up to 2-3 days. If you want them to last a bit longer, especially if your kitchen is on the warmer side, you can store them in the fridge for up to a week. Just let them come to room temperature for a bit before enjoying!
Can I add nuts to these Cinnamon Roll Bliss Bars?
Oh, yes, please! I’m a big fan of a little crunch in my sweet baked goods. The recipe already includes an optional half-cup of chopped pecans, and frankly, I highly recommend them! They add such a lovely texture and nutty flavor that pairs beautifully with the cinnamon. If pecans aren’t your thing, walnuts would be equally delicious. Just sprinkle them over the cinnamon-sugar layer before adding the top batter.
What can I substitute for milk in Cinnamon Roll Bliss Bars?
Good question! If you’re out of milk or have a dietary preference, you can definitely swap it out. Buttermilk works wonderfully and adds a little extra tang! You could also use an unsweetened non-dairy milk like almond milk or oat milk. Just make sure whatever you choose is unsweetened so it doesn’t mess with the sugar balance in the recipe. The goal is to keep that tender, moist crumb, so liquid is key!
Storing and Reheating Your Cinnamon Roll Bliss Bars
So, you’ve managed to not eat all of your Cinnamon Roll Bliss Bars in one sitting (impressive willpower!). Now, how do we keep them tasting just as magical for later? Don’t worry, it’s super easy! For best results, just pop any leftovers into an airtight container. They’ll stay perfectly soft and delicious at room temperature for about 2-3 days.
If you want to keep them longer, or if it’s a really warm day, stick ’em in the fridge for up to a week. When you’re ready to enjoy, a quick 10-15 seconds in the microwave brings back that warm, gooey cinnamon roll freshness. You can even freeze them (unglazed, if possible) for up to a month! Just thaw, glaze, and enjoy!
Nutritional Information for Cinnamon Roll Bliss Bars
Just a little heads-up about the nutritional stuff for these Cinnamon Roll Bliss Bars: please remember that any values you might see are always just estimates. What goes into them can really vary depending on the exact brands you use, whether you add those yummy pecans, and even how big you cut your squares! So, take it all with a grain of salt, or rather, a sprinkle of cinnamon!
Share Your Cinnamon Roll Bliss Bars Experience!
Well, there you have it, my friends – the one and only recipe for my absolutely favorite Cinnamon Roll Bliss Bars! If you give these a try, I’d be SO thrilled to hear about it. Did you add pecans? Did your kitchen smell as amazing as mine does? Please, please, please leave a comment below and tell me all about your experience. Don’t forget to rate the recipe too! And if you snap a picture, share it on your social media and tag me. I just love seeing what you create in your own cozy kitchens!
Print
Cinnamon Roll Bliss Bars
- Total Time: 50 min
- Yield: 12-16 servings 1x
- Diet: Vegetarian
Description
These bars offer the classic taste of cinnamon rolls in an easy-to-make bar form. They are perfect for a quick breakfast or a sweet treat.
Ingredients
- 1 cup unsalted butter, softened
- 1 1/2 cups granulated sugar
- 2 large eggs
- 1 teaspoon vanilla extract
- 2 1/2 cups all-purpose flour
- 1 teaspoon baking powder
- 1/2 teaspoon salt
- 1/2 cup milk
- 1/2 cup packed light brown sugar
- 2 teaspoons ground cinnamon
- 1/2 cup chopped pecans (optional)
- 1 cup powdered sugar
- 2 tablespoons milk
- 1/2 teaspoon vanilla extract
Instructions
- Preheat oven to 350°F (175°C). Grease and flour a 9×13 inch baking pan.
- In a large bowl, cream together the softened butter and granulated sugar until light and fluffy.
- Beat in the eggs one at a time, then stir in the vanilla extract.
- In a separate medium bowl, whisk together the flour, baking powder, and salt.
- Gradually add the dry ingredients to the wet ingredients, alternating with the 1/2 cup milk, beginning and ending with the dry ingredients. Mix until just combined.
- Spread half of the batter evenly into the prepared baking pan.
- In a small bowl, combine the brown sugar and cinnamon. Sprinkle this mixture over the batter in the pan. If using, sprinkle the chopped pecans over the cinnamon sugar.
- Carefully spread the remaining batter over the cinnamon sugar layer.
- Bake for 25-30 minutes, or until a wooden skewer inserted into the center comes out clean.
- While the bars are cooling, prepare the glaze. In a small bowl, whisk together the powdered sugar, 2 tablespoons milk, and 1/2 teaspoon vanilla extract until smooth.
- Drizzle the glaze over the cooled bars. Cut into squares and serve.
Notes
- Ensure butter is at room temperature for best creaming results.
- Do not overmix the batter; mix until just combined to keep the bars tender.
- Allow bars to cool completely before glazing to prevent the glaze from melting.
- Prep Time: 20 min
- Cook Time: 30 min
- Category: Dessert
- Method: Baking
- Cuisine: American
Nutrition
- Serving Size: 1 bar
- Calories: 350
- Sugar: 35g
- Sodium: 180mg
- Fat: 18g
- Saturated Fat: 11g
- Unsaturated Fat: 5g
- Trans Fat: 0.5g
- Carbohydrates: 45g
- Fiber: 1g
- Protein: 3g
- Cholesterol: 55mg