 Skip to content

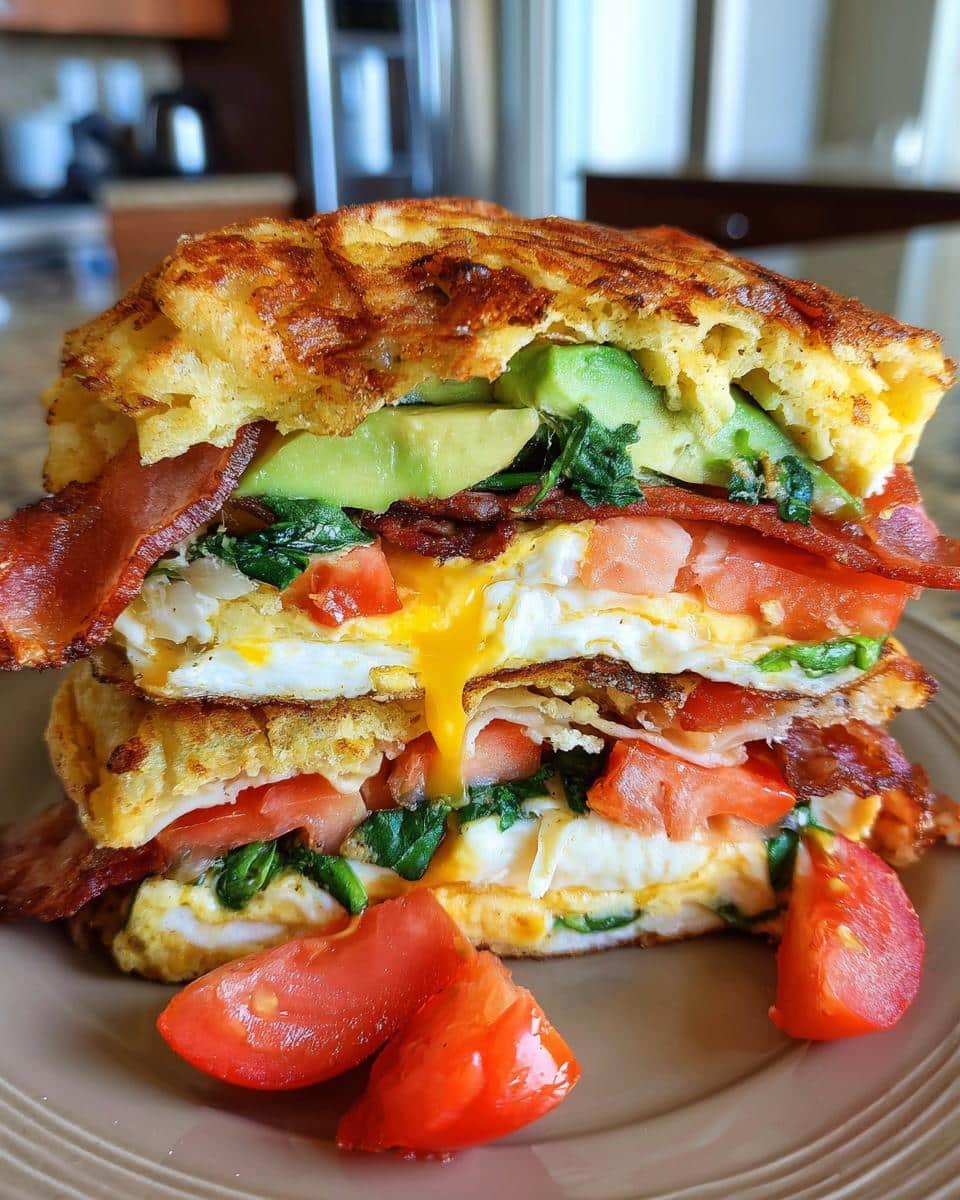
Okay, so, cloud bread! Have you heard of it? It’s kinda taken over, hasn’t it? I first saw it on Pinterest (where else, right?) and thought, “No way that’s actually good.” But, you know me, always gotta try the viral things. And WOW. I get it. Especially when you turn it into a Cloud Bread Breakfast Sandwich! Seriously, this isn’t just your average breakfast – it’s trendy, it’s surprisingly easy, and it’s seriously Instagram-worthy.
I spent a little while tweaking the recipe to get it *just* right. I wanted it light and airy, but sturdy enough to actually hold sandwich fillings. And trust me, this version? It’s the one. Get ready to make the best Cloud Bread Breakfast Sandwich – you won’t regret it!
Why You’ll Love This Cloud Bread Breakfast Sandwich
Okay, so why should you actually *make* this Cloud Bread Breakfast Sandwich? Let me give you the lowdown:
- It’s seriously **easy**. Like, almost too easy.
- **Quick** cook time! We’re talking breakfast in, like, half an hour.
- Naturally **gluten-free**, which is awesome for those of us avoiding gluten.
- Hello, **visual appeal**! This thing looks legit amazing on a plate (or, you know, on Insta).
- And my favorite part? You can **totally customize** those fillings! Go sweet, go savory, go WILD!
Seriously, what’s not to love?
Ingredients for the Cloud Bread Breakfast Sandwich
Alright, let’s gather our goodies! Here’s what you’ll need to whip up this Cloud Bread Breakfast Sandwich:
- 3 large eggs
- 3 ounces cream cheese, softened (trust me, softened is KEY!)
- 1/4 teaspoon cream of tartar
- Salt and pepper to taste (don’t be shy!)
- Your favorite breakfast sandwich fillings (cooked bacon, sliced avocado, tomato, spinach, etc.) – go wild!
See? Nothing too crazy. Now, let’s get cooking!
How to Make the Best Cloud Bread Breakfast Sandwich: Step-by-Step Instructions
Okay, ready to get cloud-bready? Don’t worry, it’s way easier than it sounds! Just follow these steps, and you’ll be munching on your own Cloud Bread Breakfast Sandwich in no time.
- Preheat & Prep: First things first, preheat your oven to 300°F (150°C). This is important! While that’s heating up, grab a baking sheet and line it with parchment paper. Trust me on the parchment paper – it’ll save you from a sticky situation later.
- Separate Those Eggs: Now, carefully separate the egg whites from the yolks. You’ll need two separate bowls for this. Make sure *no* yolk gets in with the whites, or they won’t whip up properly!
- Whip the Whites: Add that 1/4 teaspoon of cream of tartar to the bowl with the egg whites. Now, using an electric mixer (hand mixer or stand mixer works!), beat those whites until stiff peaks form. What does that mean? When you lift the beaters, the whites should stand up straight without flopping over.
- Mix the Yolks: In the other bowl (with the yolks), add the softened cream cheese. Mix it all together until it’s smooth and creamy. Season with a pinch of salt and pepper – go to town; this is where the flavor starts!
- Gentle Folding Time: This is important—be gentle! Now, carefully fold the egg yolk mixture into the egg whites. You want to combine them without deflating all that lovely air you just whipped into the whites. Just gently cut through the middle with a spatula, turn the bowl, and repeat until it’s *just* combined. Don’t worry if there are a few streaks of white left.
- Bake It Up: Spoon the mixture onto your prepared baking sheet, making four equal-sized mounds. They’ll spread a *little*, but not too much. Pop that baking sheet into your preheated oven and bake for 25-30 minutes. You want them to be a nice golden brown.
- Cool & Fill: Once they’re done, let the cloud bread cool *slightly* on the baking sheet before you try to move them. Once they’re cool enough to handle, it’s filling time! Pile on your favorite breakfast sandwich goodies.
- Assemble & Devour: Assemble your breakfast sandwiches and enjoy immediately! Seriously, these are best when they’re fresh.
See? Told ya it was easy!
Tips for the Perfect Cloud Bread Breakfast Sandwich
Okay, wanna make *sure* your cloud bread breakfast sandwich is a total success? Here are my best insider tips:
- **Softened Cream Cheese is a MUST:** Seriously, don’t even try this with cold cream cheese. It won’t mix properly! Let it sit out for at least an hour to get nice and soft.
- Be Gentle, Be Very Gentle:** When you’re folding the egg yolks into the whites, be *super* gentle. You don’t want to knock all the air out!
- Don’t Overbake:** Overbaking = dry, sad cloud bread. Keep an eye on it, and pull it out when it’s golden brown.
- Patience is Key:** Let the cloud bread cool a bit before you try to move it. They’re delicate little things!
Follow these, and you’re golden (brown and delicious, that is!).
Cloud Bread Breakfast Sandwich Variations
Okay, so you’ve nailed the basic Cloud Bread Breakfast Sandwich. Now, let’s get FUNKY! Seriously, this recipe is just begging for you to experiment. Here are some ideas to get your creative breakfast juices flowing:
- **Herbs & Spices:** Add a sprinkle of dried herbs like rosemary or thyme to the egg yolk mixture for a savory kick. Or, for a bit of sweetness, try a dash of cinnamon or nutmeg.
- Cheese, Please!:** Mix a little shredded cheese (cheddar, Gruyere, even a little feta!) into the egg yolk mixture.
- Savory Sensations:** Beyond the usual bacon and avocado, try adding sliced ham, sautéed mushrooms, or even some smoked salmon.
- Sweet Tooth Approved:** Who says cloud bread is just for savory? Add a little sweetener (honey or maple syrup) and some berries to the egg yolk mixture for a sweet treat! Think cloud bread “pancakes”!
Seriously, the possibilities are endless! Don’t be afraid to get a little weird and see what you come up with. My favorite part is trying new fillings, it is always interesting.
Serving Suggestions for Your Cloud Bread Breakfast Sandwich
Alright, you’ve got your beautiful Cloud Bread Breakfast Sandwich… now what? Here are a few ideas to make it a complete meal:
- **Fresh Fruit:** Nothing beats a side of fresh berries, sliced melon, or a juicy orange to balance out the richness of the sandwich.
- **Side Salad:** A light and refreshing side salad with a simple vinaigrette is *always* a good idea.
- **Smoothie Time!:** A quick smoothie is perfect. I throw in some spinach for extra boost.
Keep it simple, keep it fresh, and enjoy!
Frequently Asked Questions About Cloud Bread Breakfast Sandwich
Got questions about this cloud-like creation? Don’t worry, I’ve got answers. Here are some of the most common questions I get asked about this Cloud Bread Breakfast Sandwich:
Can I make cloud bread ahead of time?
Well, here’s the thing: cloud bread is really best fresh. It tends to deflate and can get a little rubbery if it sits for too long. If you *really* want to make it in advance, I’d suggest making it no more than a few hours ahead of time and storing it in an airtight container at room temperature. But honestly? Fresh is the way to go. Or you could try these Egg & Cheese Stuffed Peppers recipe if you do want to prep ahead.
How do I store cloud bread?
Similar to the last question, cloud bread isn’t the *best* for storing. But if you have leftovers, store them in an airtight container at room temperature. They’ll be okay for a day or two, but keep in mind they won’t be as light and airy as when they first came out of the oven.
What fillings work best for a Cloud Bread Breakfast Sandwich?
Okay, this is where you can really get creative! Honestly, most breakfast fillings work great. But here are some of my faves: cooked bacon or sausage, sliced avocado, tomato, spinach, sautéed mushrooms, cheese (cheddar, Gruyere, feta), or even a fried egg!
Is this Cloud Bread Breakfast Sandwich really gluten-free?
Yep! As long as you’re not adding any gluten-containing fillings, this recipe is naturally gluten-free. That’s because the “bread” part is made from eggs, cream cheese, and a little cream of tartar. It’s a win!
Estimated Nutritional Information for Cloud Bread Breakfast Sandwich
Just a quick little note: the nutritional info below is just an estimate! It’ll change depending on the exact ingredients (and brands!) you use, so don’t take it as gospel, okay?
Enjoy Your Cloud Bread Breakfast Sandwich!
There you have it! A super easy, super trendy Cloud Bread Breakfast Sandwich that’s guaranteed to impress. Now, go forth and make some cloud bread magic! And hey, if you try it out, I’d LOVE to hear what you think. Leave a comment below, rate the recipe, or tag me on social media. You can learn more about me here! Happy cooking!
PrintCloud Bread Breakfast Sandwich
- Total Time: 35 min
- Yield: 4 servings 1x
- Diet: Gluten Free
Description
Make a trendy and easy Cloud Bread Breakfast Sandwich. This recipe is visually appealing and fun to make.
Ingredients
- 3 large eggs
- 3 ounces cream cheese, softened
- 1/4 teaspoon cream of tartar
- Salt and pepper to taste
- Your favorite breakfast sandwich fillings (cooked bacon, sliced avocado, tomato, spinach, etc.)
Instructions
- Preheat your oven to 300°F (150°C). Line a baking sheet with parchment paper.
- Separate the egg whites and yolks into two bowls.
- Add cream of tartar to the egg whites and beat until stiff peaks form.
- In the other bowl, mix the cream cheese and egg yolks until smooth. Season with salt and pepper.
- Gently fold the egg yolk mixture into the egg whites until just combined.
- Spoon the mixture into 4 equal mounds on the prepared baking sheet.
- Bake for 25-30 minutes, or until golden brown.
- Let the cloud bread cool slightly before adding your favorite breakfast sandwich fillings.
- Assemble your breakfast sandwiches and enjoy.
Notes
- For best results, ensure your cream cheese is fully softened.
- Be careful not to overmix the batter when folding the egg yolks into the egg whites.
- You can add herbs or spices to the egg mixture for extra flavor.
- Prep Time: 10 min
- Cook Time: 25 min
- Category: Breakfast
- Method: Baking
- Cuisine: American
Nutrition
- Serving Size: 1 sandwich
- Calories: 250
- Sugar: 2g
- Sodium: 300mg
- Fat: 18g
- Saturated Fat: 10g
- Unsaturated Fat: 6g
- Trans Fat: 0g
- Carbohydrates: 5g
- Fiber: 1g
- Protein: 15g
- Cholesterol: 150mg