

Okay, so you know those nights? The ones where you’re *craving* takeout – that sweet, savory goodness calling your name – but you also know you probably shouldn’t? Yeah, me too. That’s where my Easy Honey Sesame Chicken comes in to save the day. Seriously, this recipe is a total game-changer.
We’re talking all that crave-able flavor, but ready in, like, under 30 minutes. No joke! I whipped this up just last Tuesday when I had zero energy, and even *I* was impressed with how fast it came together. And the best part? It’s way healthier than what you’d get delivered.
I’m Max, by the way! Some of you might know me from my little supper club here in Asheville, or maybe from the cooking classes I teach. Point is, I love good food, but I also love keeping things real and easy. And trust me, this Easy Honey Sesame Chicken? It’s about as real and easy (and delicious!) as it gets.
Why You’ll Love This Easy Honey Sesame Chicken
Listen, I get it. You’re busy. You want something yummy without spending all night in the kitchen. That’s exactly why I adore this recipe! Here’s the lowdown:
Quick and Easy
Seriously, we’re talking under 30 minutes from start to finish. And the steps are so simple, even my friend who *burns* water can make this (love you, Carol!).
Packed with Flavor
Oh man, the flavor! It’s that perfect combo of sweet from the honey, savory from the soy sauce, and that nutty goodness from the sesame oil. It’s a flavor explosion in your mouth, I swear!
Healthier Than Takeout
Let’s be honest, we all know what *really* goes into that takeout container. This way, you control the ingredients! Less oil, less sodium, all the good stuff. You can actually feel good about eating it!
Perfect for Weeknights
This is my go-to when I’m staring into the fridge at 5 PM, wondering what to make. It’s quick, it’s easy, and everyone in my house (even the picky eaters!) loves it. Weeknight dinner win!
Ingredients for Easy Honey Sesame Chicken
Alright, let’s get down to brass tacks. Here’s what you’ll need to make my Easy Honey Sesame Chicken magic happen. Don’t worry if you don’t have *everything* – I’ll give you some swap-out options later. But for the best results, this is the lineup:
- Okay, first up: 1.5 lbs boneless, skinless chicken breasts, and you’ll want to cut those into bite-sized pieces, about 1-inch. Trust me, that size is perfect.
- You’re gonna need 1/4 cup of soy sauce. I usually use low-sodium, but hey, you do you!
- Next, 1/4 cup honey – the good stuff! It makes all the difference.
- Don’t forget 2 tablespoons of sesame oil. This is key for that authentic sesame flavor. Don’t skimp!
- Grab 2 cloves of garlic, minced. I’m a garlic girl, so I sometimes throw in an extra clove (or two!).
- You’ll also need 1 teaspoon of ginger, grated. Fresh is best, but the stuff in the jar works in a pinch.
- Now, for a little kick – 1/4 teaspoon of red pepper flakes (optional). If you like it hot, go for it! If not, leave ’em out.
- 2 tablespoons of cornstarch – this is what helps the sauce get all thick and glossy. Don’t skip this!
- Of course, 2 tablespoons of sesame seeds – for that beautiful garnish and extra sesame flavor.
- And last but not least, some chopped green onions, for garnish. They add a nice pop of color and fresh flavor.
Got all that? Great! Let’s get cooking!
How to Make Easy Honey Sesame Chicken: Step-by-Step Instructions
Okay, people, listen up! This is where the magic happens. Don’t worry, it’s not complicated magic. It’s the kind of magic that turns simple ingredients into a ridiculously delicious meal. Just follow these steps, and you’ll be golden!
Prepare the Honey Sesame Sauce
First things first: the sauce. Grab a bowl – any bowl will do, really – and whisk together that soy sauce, honey, sesame oil, minced garlic, grated ginger, and red pepper flakes (if you’re using them). Just whisk it all together until it’s nice and combined. Set it aside for now. Easy peasy!
Coat the Chicken
Now, in a *separate* bowl, toss your chicken pieces with the cornstarch. Make sure each piece is evenly coated. This is what’s gonna give you that nice little crust when you cook it. Trust me, you want that crust!
Cook the Chicken
Alright, heat up a large skillet or wok over medium-high heat. Get it nice and hot! Then, add your chicken. You’ll want to cook it until it’s browned and cooked through – about 5-7 minutes. Keep an eye on it, and flip it around so it cooks evenly. You want it to look delicious, not burnt!
Add the Sauce and Thicken
This is the best part! Pour that glorious honey sesame sauce over the chicken. Now, stir constantly! Keep stirring until the sauce thickens and coats the chicken – about 2-3 minutes. It should get all glossy and sticky and amazing. If it’s not thickening, turn up the heat just a tad, but watch it carefully so it doesn’t burn!
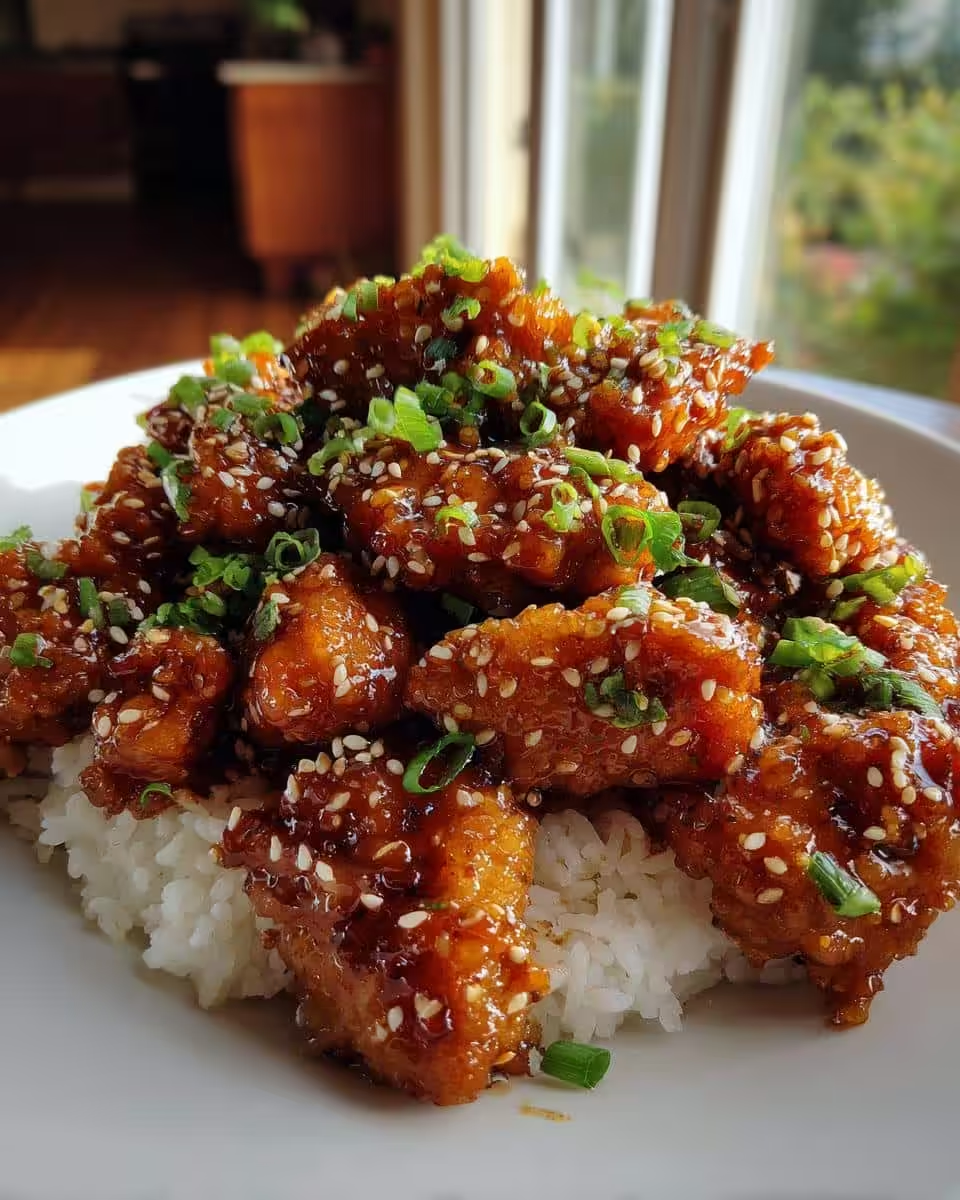
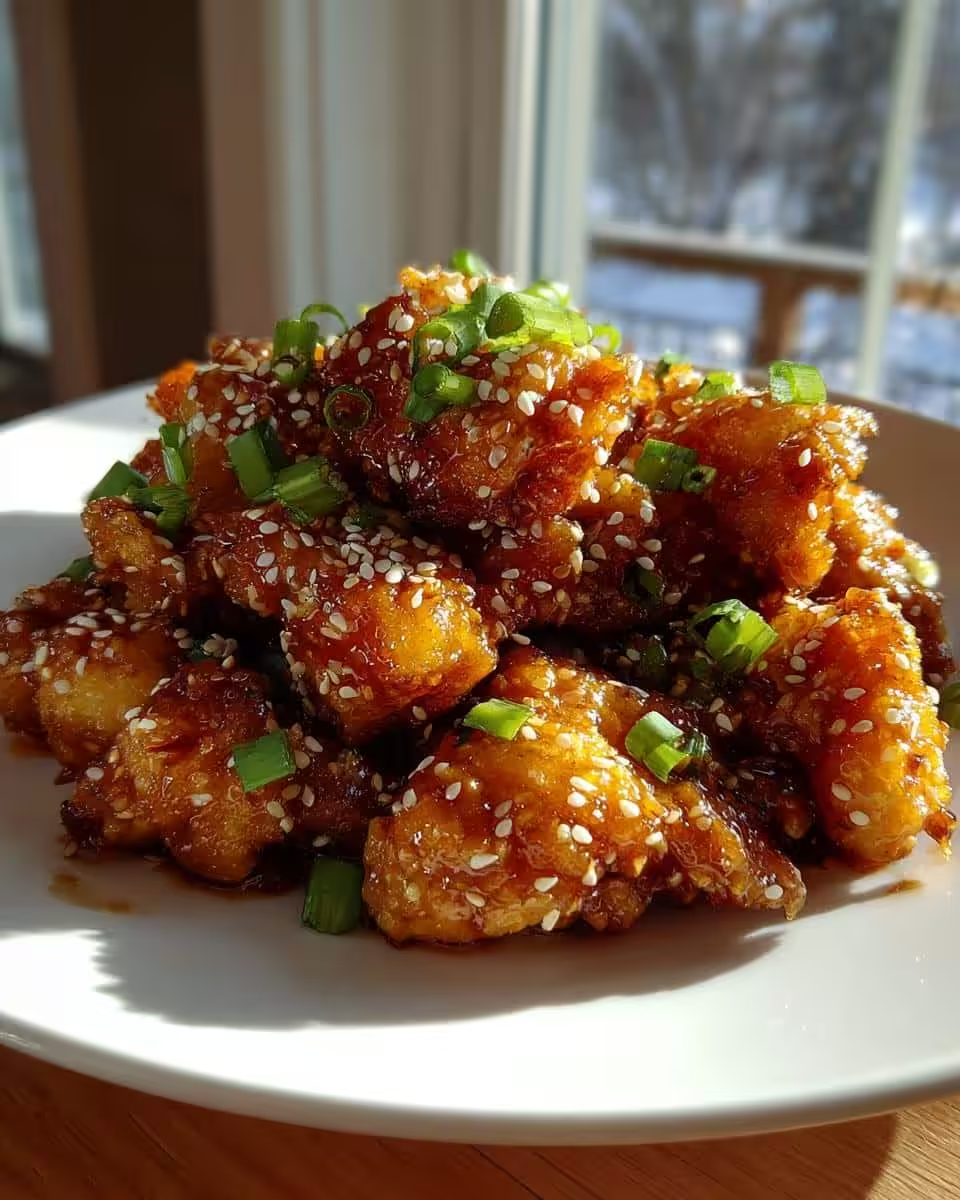
Garnish and Serve
Alright, take that skillet off the heat! Sprinkle with sesame seeds and chopped green onions. Boom! You’re done! Serve it immediately over rice or noodles. My favorite is jasmine rice, but honestly, anything works. Now, dig in and enjoy!
Tips for the Best Easy Honey Sesame Chicken
Okay, so you’ve got the basics down. Now, let’s talk about taking your Easy Honey Sesame Chicken from “good” to “OMG, this is amazing!” Here are a few of my favorite tricks and tips:
Achieving Crispy Chicken
Want that super crispy chicken, like the kind you get at your favorite takeout place? Here’s the secret: bake it! Instead of stir-frying, spread the cornstarch-coated chicken in a single layer on a sheet pan. Pop it in a 400°F (200°C) oven for about 15-20 minutes, flipping halfway through. It’ll be perfectly crispy, I promise!
Adjusting the Spice Level
Spice is a personal thing, right? Some like it hot, some not so much. So, feel free to adjust the amount of red pepper flakes to *your* taste. Start with that 1/4 teaspoon, and then add more if you’re feeling brave. Or, if you’re like my friend Carol (who can’t handle any heat!), just leave ’em out altogether. No judgment here!
Using Fresh vs. Ground Ginger
Okay, listen up: fresh ginger is *always* better. It’s got this zingy, bright flavor that ground ginger just can’t match. But, let’s be real, sometimes you just don’t have fresh ginger on hand. If you’re using ground ginger, use about 1/2 teaspoon instead of the 1 teaspoon of fresh. Just remember, the flavor will be a little different, but it’ll still be delicious!
Pairing Suggestions for Your Honey Sesame Chicken
This Easy Honey Sesame Chicken is amazing all on its own, but it’s even better with the right sides. My go-to is always rice – jasmine, basmati, whatever you like! Noodles are also a great option. And don’t forget your veggies! Some steamed broccoli, stir-fried bell peppers, or even some snap peas would be perfect. You gotta get your greens in, right?
Ingredient Notes and Substitutions for Your Easy Honey Sesame Chicken
Okay, let’s talk swaps! Sometimes you’re missing an ingredient, or maybe you just wanna try something different. No worries, I’ve got you covered. Here are some easy substitutions for my Easy Honey Sesame Chicken:
Soy Sauce Alternatives
Gotta watch that gluten? No problem! Tamari is a fantastic gluten-free alternative to soy sauce. It tastes super similar, so you won’t even notice the difference. Or, for a slightly sweeter flavor, try coconut aminos. It’s not *exactly* the same, but it’s still delicious and gluten-free!
Honey Substitutes
Out of honey? Oops! Maple syrup and agave nectar work great as substitutes. Maple syrup will give it a slightly different, more caramelly flavor, which I actually really love sometimes! Agave nectar is a bit sweeter, so you might want to use a little less. Just taste as you go and adjust to your liking. You got this!
Chicken Options
Don’t have chicken breasts on hand? No sweat! You can totally use chicken thighs instead. They’re a bit more flavorful and stay super juicy. Just keep in mind that they might need a little longer to cook – maybe an extra 5-10 minutes, depending on the size. Just make sure they’re cooked all the way through. Safety first!
Vegetable Add-Ins
Wanna sneak in some extra veggies? Go for it! Broccoli florets, sliced bell peppers (any color!), or even some snap peas would be amazing in this. Just toss them in the skillet with the chicken during the last few minutes of cooking, so they get coated in that yummy sauce. My kids never even notice they’re eating their veggies this way – ha!
FAQ About Easy Honey Sesame Chicken
Can I make Honey Sesame Chicken ahead of time?
Totally! This Easy Honey Sesame Chicken is still yummy the next day. Just let it cool completely, then pop it in an airtight container in the fridge. When you’re ready to eat, you can reheat it in the microwave, in a skillet, or even in the oven. I actually think the flavors meld even more overnight, so it’s almost *better* the next day!
Is this Honey Sesame Chicken recipe gluten-free?
Good question! As written, it’s not *automatically* gluten-free, because of the soy sauce. But, it’s super easy to make it gluten-free! Just use tamari or coconut aminos instead of regular soy sauce. Both of those are gluten-free alternatives that taste great. And boom! Gluten-free Honey Sesame Chicken!
How do I prevent the Honey Sesame Chicken sauce from being too sticky?
Ah, the dreaded sticky sauce! The trick is to watch the heat. If your sauce gets too sticky, it means you’re cooking it at too high a temperature. Turn the heat down to low, and add a tablespoon or two of water or chicken broth to thin it out. Also, make sure you’re stirring constantly! That helps prevent the sauce from sticking and burning.
Can I use frozen chicken for this Easy Honey Sesame Chicken?
Yep, you sure can! Just make sure you thaw it completely before you start cooking. The best way to do this is to put it in the fridge overnight. If you’re in a hurry, you can thaw it in a bowl of cold water, but make sure you change the water every 30 minutes. And, of course, make sure your chicken is cooked all the way through before you eat it. Nobody wants salmonella!
Storing and Reheating Your Easy Honey Sesame Chicken
Okay, so you’ve made this amazing Easy Honey Sesame Chicken, and, like, *maybe* you have leftovers (if you didn’t eat it all in one sitting, that is!). No worries, it keeps great! Here’s how to store and reheat it so it’s just as delicious the second time around.
Proper Storage Techniques
This is super simple, people! Just let your Honey Sesame Chicken cool down completely. I mean, *completely*. Then, pop it into an airtight container. I like to use glass containers, but plastic works too. Just make sure it’s sealed tight! Then, straight into the fridge it goes. It’ll keep for up to 3 days, no problem.
Reheating Methods
Alright, time to dig in again! You’ve got a few options here. My personal favorite is the stovetop. Just toss it in a skillet with a tiny splash of water or broth, and heat it over medium heat, stirring occasionally, until it’s warmed through. This keeps it nice and saucy! You can also use the oven – spread it out on a baking sheet and bake at 350°F until heated through. Or, if you’re in a real hurry, the microwave works too! Just heat it in short bursts, stirring in between, so it doesn’t dry out. Whatever you do, get ready for round two of deliciousness!
Nutritional Information for Easy Honey Sesame Chicken
Okay, so you’re probably wondering about the nitty-gritty, right? What’s *actually* in this Easy Honey Sesame Chicken? Well, here’s a rough estimate of the nutritional info. Keep in mind, this is just an estimate – it can vary depending on the exact ingredients you use and your portion sizes. But it’ll give you a general idea!
Per serving (and this recipe makes about 4 servings):
- Calories: Around 350 (not bad, right?)
- Sugar: About 15g (mostly from the honey, of course!)
- Sodium: Roughly 700mg (that soy sauce can add up!)
- Fat: Around 15g
- Saturated Fat: About 3g
- Unsaturated Fat: Around 10g (the good stuff from the sesame oil!)
- Trans Fat: 0g (yay!)
- Carbohydrates: About 20g
- Fiber: Around 1g
- Protein: A whopping 30g! (that chicken’s doing work!)
- Cholesterol: About 90mg
So there you have it! Delicious *and* (relatively) good for you. What’s not to love?
Ready to Make Your Easy Honey Sesame Chicken?
Alright, my friends, that’s it! See? I told you it was easy! This Easy Honey Sesame Chicken is seriously one of my favorite quick dinners. It’s packed with flavor, it’s healthier than takeout, and it’s ready in a flash. What more could you ask for?
So, go on! Get in that kitchen and whip up a batch. I promise, you won’t regret it. And hey, if you try it, I wanna know what you think! Leave a comment below and let me know how it turned out. Did you add extra red pepper flakes? Did you swap out the chicken for tofu? I wanna hear all about it!
And if you loved this recipe (and I know you will!), don’t forget to rate it! That helps other folks find it. Oh, and share it with your friends on social media! The more people enjoying delicious, easy dinners, the better, right?
Print
Easy Honey Sesame Chicken: Unbelievably Quick 30 Min
- Total Time: 25 minutes
- Yield: 4 servings 1x
- Diet: Gluten Free
Description
This Easy Honey Sesame Chicken recipe delivers a flavorful and satisfying meal in under 30 minutes. It’s perfect for a quick weeknight dinner.
Ingredients
- 1.5 lbs boneless, skinless chicken breasts, cut into 1-inch pieces
- 1/4 cup soy sauce
- 1/4 cup honey
- 2 tablespoons sesame oil
- 2 cloves garlic, minced
- 1 teaspoon ginger, grated
- 1/4 teaspoon red pepper flakes (optional)
- 2 tablespoons cornstarch
- 2 tablespoons sesame seeds
- Chopped green onions, for garnish
Instructions
- In a bowl, whisk together soy sauce, honey, sesame oil, garlic, ginger, and red pepper flakes (if using).
- In a separate bowl, toss chicken pieces with cornstarch until evenly coated.
- Heat a large skillet or wok over medium-high heat. Add chicken and cook until browned and cooked through, about 5-7 minutes.
- Pour the honey sesame sauce over the chicken and cook, stirring constantly, until the sauce thickens and coats the chicken, about 2-3 minutes.
- Remove from heat and sprinkle with sesame seeds and green onions.
- Serve immediately over rice or noodles.
Notes
- For crispier chicken, bake in a single layer on a sheet pan at 400°F (200°C) for 15-20 minutes.
- Adjust the amount of red pepper flakes to your spice preference.
- Store leftovers in an airtight container in the refrigerator for up to 3 days.
- Prep Time: 10 minutes
- Cook Time: 15 minutes
- Category: Main Course
- Method: Stir Fry
- Cuisine: Asian-Inspired
Nutrition
- Serving Size: 1 serving
- Calories: 350
- Sugar: 15g
- Sodium: 700mg
- Fat: 15g
- Saturated Fat: 3g
- Unsaturated Fat: 10g
- Trans Fat: 0g
- Carbohydrates: 20g
- Fiber: 1g
- Protein: 30g
- Cholesterol: 90mg