
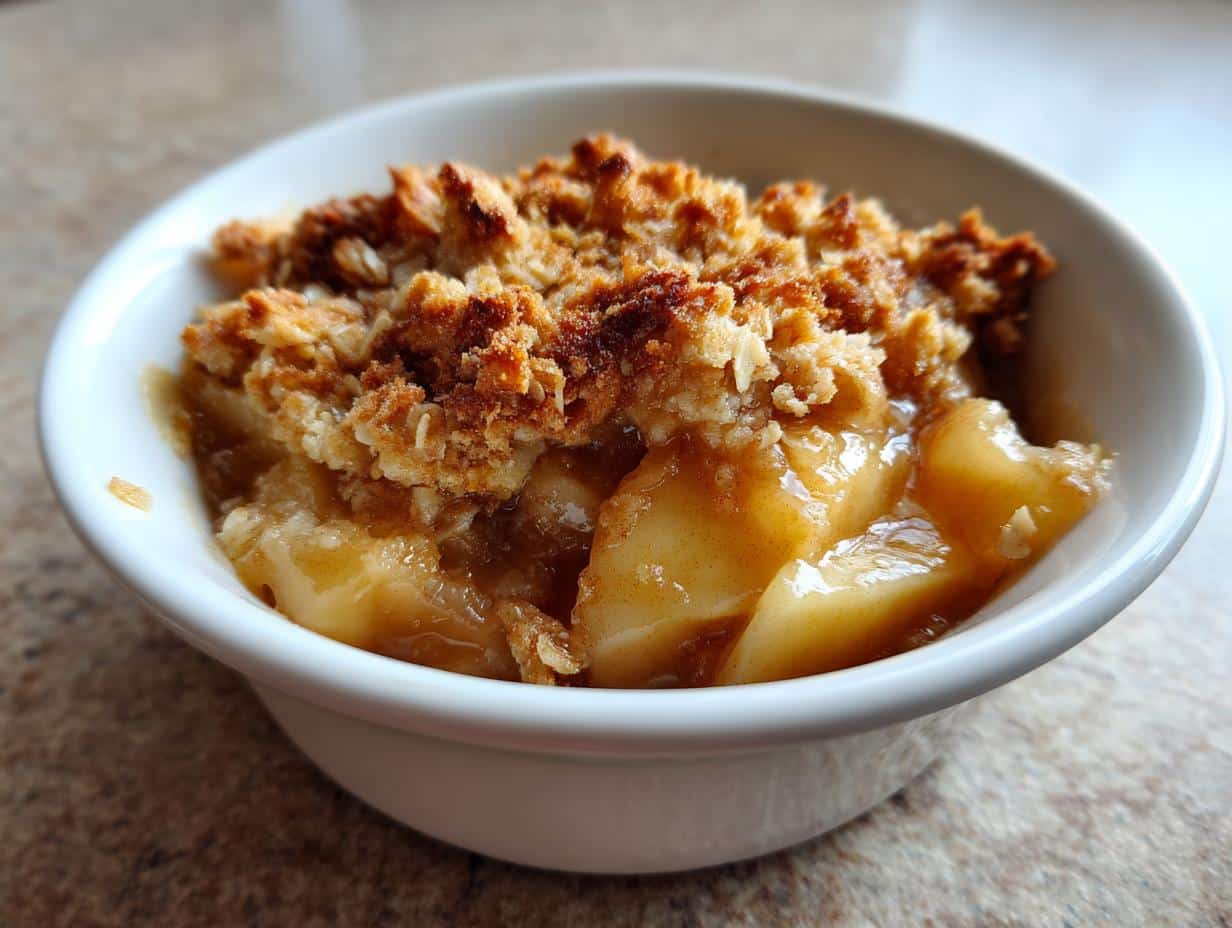
Oh, hello there! If you’re anything like me, you love a good dessert that feels like a warm hug, especially when the leaves start to turn. But finding a gluten-free apple crisp that’s both incredibly delicious *and* super easy to whip up? That’s the real prize! I’m Maxine, and my kitchen is usually filled with the scent of something wonderful. My Grandma taught me that good food doesn’t need to be complicated, and this gluten-free apple crisp is proof. It’s packed with good-for-you ingredients, tastes like pure autumn magic, and is just perfect for those cozy nights or when you need a healthy, satisfying treat. Trust me, this recipe is a keeper!
Why You’ll Love This Gluten Free Apple Crisp
This isn’t just any apple crisp; it’s a little bit of home-baked magic that’s surprisingly simple. You’re going to adore how easy it is to throw together, making it perfect for weeknights or when you need a quick dessert. Plus, it’s packed with feel-good ingredients!
Quick and Easy Preparation
- Seriously minimal prep time – you can have it ready for the oven in about 15 minutes!
- Straightforward steps that even beginners can nail.
Healthy and Wholesome Ingredients
- Uses good-for-you gluten-free rolled oats and almond flour.
- Sweetened naturally, making it a treat you can feel good about.
Irresistible Flavor and Texture
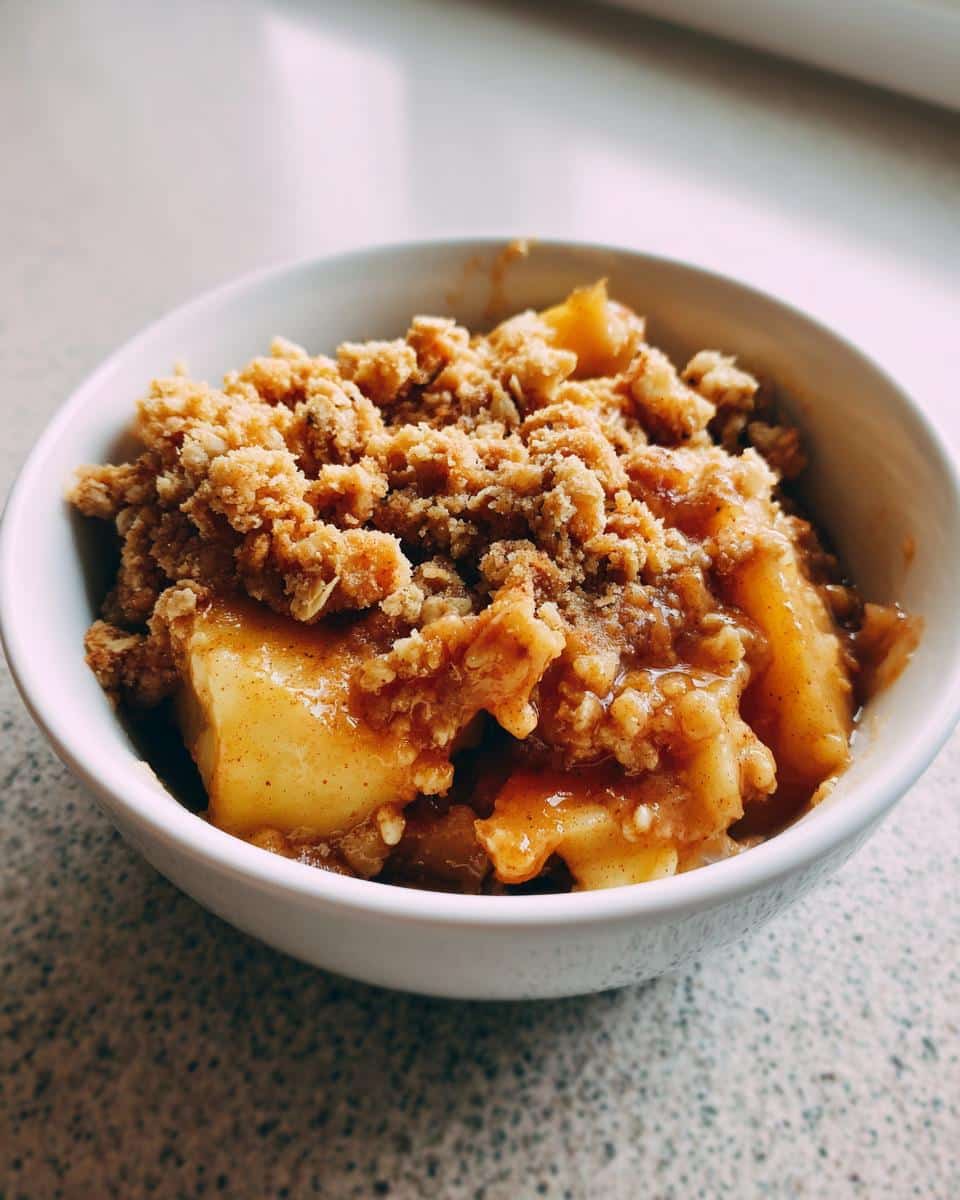
- Juicy, tender apples bursting with cinnamon and nutmeg.
- A perfectly crunchy, golden-brown topping that’s just divine.
Gather Your Ingredients for Gluten Free Apple Crisp
Alright, let’s get our kitchen ready for some apple crisp magic! Having everything measured out beforehand just makes the whole process so much smoother, you know? It’s like my Grandma always said, “A good bake starts with good prep.” This recipe is pretty forgiving, but having the right players on the field makes all the difference. Don’t worry if you don’t have *exactly* what’s listed; I’ll sprinkle in a few ideas for swaps too!
For the Apple Filling
We need about 4 cups of apples, thinly sliced. I usually go for a mix of sweet and tart, like Honeycrisp or Fuji for sweetness and Granny Smith for that little bit of tang. Granny Smiths hold their shape so well, which is lovely! A good squeeze of lemon juice (about a tablespoon) is key here. It brightens up the apples and stops them from turning brown while we get the topping ready. If you like your filling a bit thicker, a tablespoon of cornstarch or tapioca starch whisked in with the apples works wonders!
For the Gluten Free Crisp Topping
This is where the real crunch comes from! You’ll want half a cup of good quality gluten-free rolled oats – make sure they’re certified gluten-free if that’s important for you. Then, we’ll use half a cup of almond flour for that lovely richness and texture. A quarter cup of packed brown sugar gives us that classic caramel sweetness. For the spices, a teaspoon of cinnamon and a pinch of nutmeg are perfect, along with a quarter teaspoon of salt to balance everything out. And the secret to that amazing texture? Four tablespoons of COLD unsalted butter, cut into little cubes. Seriously, keep it cold!
Optional Additions
If you’re feeling fancy or just love a bit of extra crunch, a quarter cup of chopped pecans or walnuts is absolutely delicious in the topping. They toast up beautifully in the oven and add a wonderful nutty depth. Just toss them in with the dry ingredients for the topping!
How to Prepare the Best Gluten Free Apple Crisp
Alright, let’s get this deliciousness into the oven! Making this gluten-free apple crisp is really straightforward, and honestly, the process itself is part of the fun. It just smells so good while it’s baking, doesn’t it? Just follow these simple steps, and you’ll have a fantastic dessert in no time.
Getting Started
First things first, let’s get that oven preheated to 375°F (190°C). While it’s warming up, grab your thinly sliced apples. If you haven’t already, give them a good toss in a large bowl with that tablespoon of lemon juice. This little step really makes a difference, keeping the apples bright and fresh!
Crafting the Crisp Topping
Now for the best part – the crunchy topping! In a separate bowl, combine your gluten-free rolled oats, almond flour, brown sugar, cinnamon, nutmeg, and salt. Give it a quick stir to mix everything up. Then, add your cold butter pieces. This is where you want to get your hands in there! Use your fingertips or a pastry blender to cut the butter into the dry ingredients until it looks like coarse crumbs. You want some little pea-sized bits of butter still in there; that’s what makes it extra crumbly and delicious!
Assembling and Baking
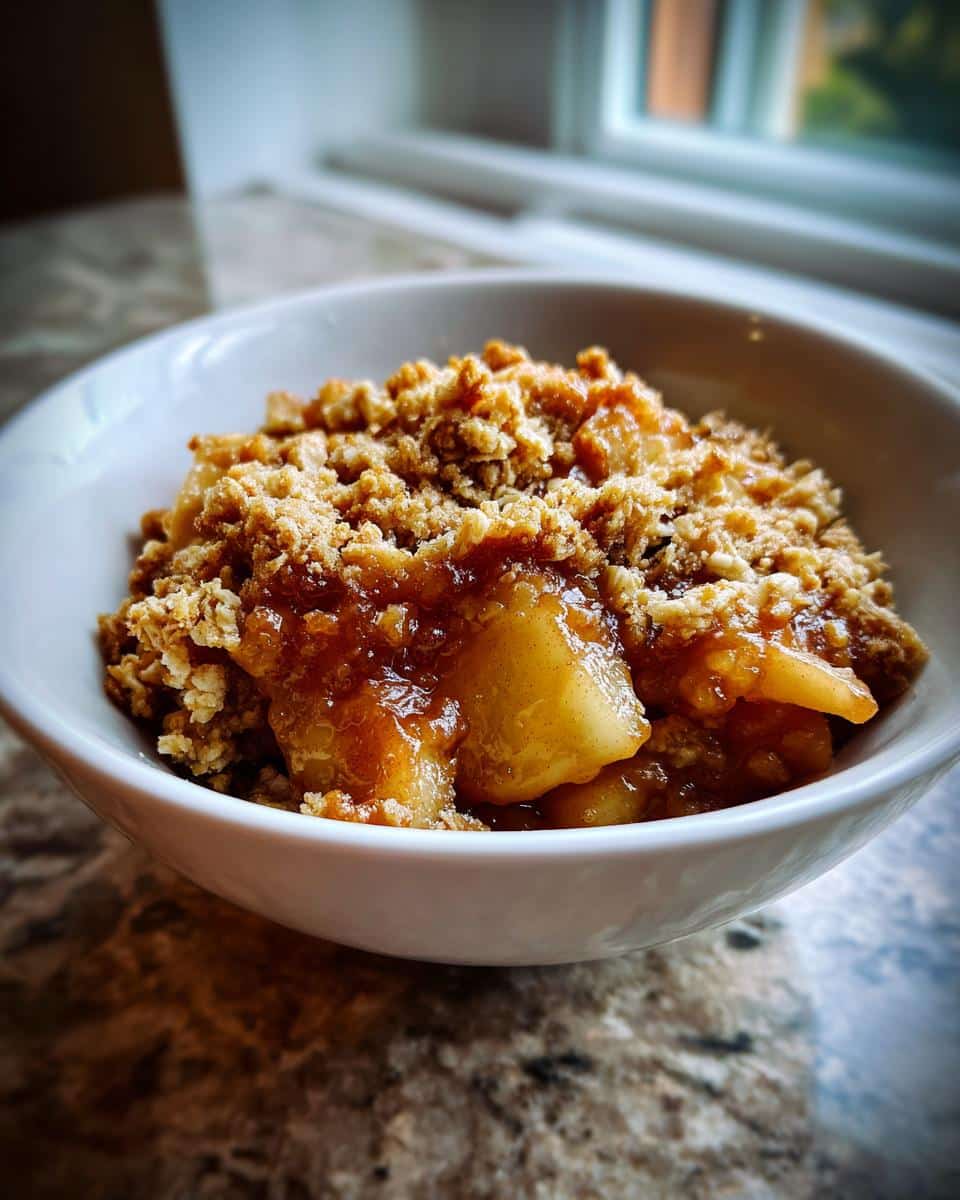
Once your oven is hot and your topping is ready, it’s time to assemble. Pour those lemony apples into your 8×8 inch baking dish and spread them out evenly. Then, sprinkle that glorious oat and almond crumble mixture all over the top. Make sure it’s covered nicely! Pop that dish into the preheated oven and let it bake for about 30 to 40 minutes. You’re looking for a beautifully golden-brown topping and for those apples underneath to be tender and bubbly. You might even smell it before you see it!
Cooling and Serving
Once it’s done, carefully take it out of the oven. It’s going to be super hot and bubbly! The hardest part is waiting, but you really want to let it cool for at least 10-15 minutes before you dig in. This lets the juices thicken up a bit. Trust me, it’s worth the wait! Serve it warm, maybe with a scoop of your favorite vanilla ice cream or some whipped cream – pure bliss!
Tips for the Perfect Gluten Free Apple Crisp
You know, even with a simple recipe like this, a few little tricks can take your gluten-free apple crisp from good to absolutely unforgettable. My Grandma always said the details matter, and she wasn’t wrong! These are the things I’ve learned over the years that really make a difference.
Choosing the Right Apples
When it comes to apples, not all are created equal for baking. You want apples that are firm and hold their shape when heated, so they don’t turn into mush. My go-to’s are Honeycrisp for sweetness, Granny Smith for that lovely tartness that cuts through the richness, or even a mix like Fuji and Gala. A good balance makes the filling taste amazing!
Achieving the Perfect Topping Texture
The secret to that irresistible crumbly topping is all about the butter. Make sure it’s super cold – like, straight from the fridge cold. When you cut it into the dry ingredients, you want to work quickly with your fingertips or a pastry blender. Don’t overmix! You’re looking for a texture that’s like coarse crumbs with some bigger, pea-sized pieces of butter still visible. Those little pockets of butter melt as it bakes, creating that perfect crunch.
Avoiding a Soggy Bottom
Nobody likes a soggy bottom on their crisp! If your apples are super juicy, or you like a really thick filling, a little trick is to sprinkle a tablespoon of cornstarch or tapioca starch over the apples after you toss them with lemon juice, before you add the topping. It helps absorb some of the extra liquid and keeps everything from getting too watery. It’s a small step that makes a big impact!
Delicious Variations for Your Gluten Free Apple Crisp
You know, the beauty of a good base recipe like this gluten-free apple crisp is how easy it is to play around with! It’s already pretty fantastic, but if you want to switch things up or cater to specific needs, I’ve got you covered. It’s all about making it your own!
Dairy-Free and Vegan Options
Making this dairy-free or even fully vegan is a breeze! Instead of the cold butter, just use cold coconut oil or your favorite dairy-free butter substitute. The recipe notes mention this, and honestly, it works like a charm. The texture and flavor are still wonderful, so no one will even guess it’s dairy-free!
Paleo-Friendly Adaptations
If you’re leaning towards a paleo lifestyle, you can easily adapt this. Just swap out the brown sugar for coconut sugar, which gives a lovely caramel note, and use coconut oil instead of butter in the topping. Ensure your oats are certified gluten-free or simply omit them and add a bit more almond flour or even some chopped nuts for that perfect crispiness.
Adding Extra Flavors
Want to jazz it up even more? Try adding a splash of vanilla extract to the apple filling, or maybe a little orange zest for a bright, citrusy twist. You could also add a handful of dried cranberries or cherries to the apple mix for a burst of tart sweetness. And don’t be afraid to play with the spices – a pinch of cardamom or ginger can be lovely!
Serving Suggestions for Gluten Free Apple Crisp
Now that you’ve got this perfect gluten-free apple crisp, what’s the best way to enjoy it? Honestly, it’s pretty amazing all on its own, warm from the oven. But if you want to elevate it just a touch, here are a couple of my favorite ways to serve it up!
Classic Pairings
You can never go wrong with the classics! A big scoop of creamy vanilla ice cream melting into the warm, spiced apples is just pure heaven. Or, a dollop of freshly whipped cream adds such a lovely lightness. Some folks even love it with a drizzle of warm custard – talk about decadent!
Healthier Accompaniments
If you’re looking for something a little lighter, try serving it with a dollop of thick, plain Greek yogurt. It gives you a nice tangy contrast to the sweet apples and crunchy topping. Or, for a dairy-free option, a spoonful of unsweetened coconut cream is absolutely delicious and adds a subtle tropical note.
Storing and Reheating Your Gluten Free Apple Crisp
Oh, leftovers! The best kind of problem to have after making something this yummy. Don’t you worry, keeping your gluten-free apple crisp tasting great is super simple.
Proper Storage Methods
Once your crisp has cooled down completely – and you’ve managed not to eat it all! – just pop any leftovers into an airtight container. You can store it in the refrigerator for up to 3-4 days. It’ll still be delicious, I promise!
Reheating for Best Results
To get that lovely crisp topping back, I highly recommend reheating it in the oven. Just pop a serving onto a small baking sheet or dish and warm it up at around 350°F (175°C) for about 10-15 minutes, or until it’s heated through and the topping is crunchy again. If you’re in a real hurry, the microwave works too, but the topping might lose a bit of its crispness.
Frequently Asked Questions About Gluten Free Apple Crisp
Got questions about this amazing gluten-free apple crisp? I totally get it! It’s one of those recipes that people love to tweak or just want to make sure they’re doing it right. Here are a few things folks often ask me:
Can I make this gluten free apple crisp ahead of time?
You sure can! You can totally prepare the apple filling and the crisp topping separately a day in advance. Keep them covered in the fridge. Then, just assemble everything in your baking dish right before you’re ready to bake. It makes getting dessert on the table even easier!
What are the best apples to use for gluten free apple crisp?
My favorites are a mix! I love using Honeycrisp or Gala for their sweetness, and Granny Smith for a nice tart kick that balances everything out. You want apples that are firm and won’t turn to mush when baked. Fuji or Braeburn are great options too!
How do I store leftover gluten free apple crisp?
Once it’s cooled down, just pop any leftovers into an airtight container and keep it in the refrigerator. It should be good for about 3 to 4 days. Honestly, it’s still delicious the next day!
Is this recipe suitable for a vegan diet?
Yes, it is! As I mentioned in the variations section, you can easily make this recipe vegan by swapping out the butter for cold coconut oil or a dairy-free butter substitute. It’s a simple switch that keeps all the delicious flavor and texture!
Nutritional Information for Gluten Free Apple Crisp
Just so you know, all the nutritional details are estimates, okay? They can change a bit depending on the exact brands you use, the ripeness of your apples, and even how you slice them! But this gives you a good idea of what you’re getting in each serving of this delightful gluten-free apple crisp. It’s a pretty wholesome treat, if I do say so myself!
Print
Amazing gluten free apple crisp in 40 mins
- Total Time: 50 minutes
- Yield: 6 servings 1x
- Diet: Gluten Free
Description
A delicious and easy gluten-free apple crisp recipe, perfect for a healthy fall dessert.
Ingredients
- 4 cups thinly sliced apples (about 2–3 medium apples)
- 1 tablespoon lemon juice
- 1/2 cup gluten-free rolled oats
- 1/2 cup almond flour
- 1/4 cup packed brown sugar
- 1/4 cup chopped pecans or walnuts (optional)
- 1 teaspoon ground cinnamon
- 1/4 teaspoon ground nutmeg
- 1/4 teaspoon salt
- 4 tablespoons cold unsalted butter, cut into small pieces
Instructions
- Preheat your oven to 375°F (190°C).
- In a large bowl, toss the sliced apples with lemon juice.
- In a separate medium bowl, combine the gluten-free rolled oats, almond flour, brown sugar, chopped nuts (if using), cinnamon, nutmeg, and salt.
- Cut in the cold butter using a pastry blender or your fingertips until the mixture resembles coarse crumbs.
- Spread the apple mixture evenly in an 8×8 inch baking dish.
- Sprinkle the oat mixture evenly over the apples.
- Bake for 30-40 minutes, or until the topping is golden brown and the apples are tender.
- Let cool slightly before serving.
Notes
- For a dairy-free version, use coconut oil or dairy-free butter substitute.
- Add a tablespoon of cornstarch or tapioca starch to the apples if you prefer a thicker filling.
- Serve warm with vanilla ice cream or whipped cream for a classic treat.
- Prep Time: 15 minutes
- Cook Time: 35 minutes
- Category: Dessert
- Method: Baking
- Cuisine: American
Nutrition
- Serving Size: 1 serving
- Calories: 350
- Sugar: 30g
- Sodium: 150mg
- Fat: 18g
- Saturated Fat: 8g
- Unsaturated Fat: 10g
- Trans Fat: 0g
- Carbohydrates: 45g
- Fiber: 5g
- Protein: 4g
- Cholesterol: 30mg