 Skip to content

Oh, friend, let me tell you! There’s nothing quite like gathering around a table with good food, right? For years, I just *dreamed* of making my own naan at home, but with my gluten sensitivity, it always felt like a faraway fantasy. Every recipe just called for wheat flour, and I’d sigh, thinking I was destined for a life without that fluffy, warm, tearable bread. But you know me, I wasn’t going to let that stop me! After countless experiments (and maybe a few flat, tough failures, oops!), I finally cracked the code, and I am SO excited to share it with you. This isn’t just any recipe; this is *the* recipe for truly soft, pliable, and utterly delicious gluten free naan dough! It’s perfect for dipping, scooping, or just, you know, eating plain right off the skillet. Trust me, you won’t believe it’s gluten-free!
Why You’ll Love This Gluten Free Naan Dough Recipe
Okay, so why should you even bother with this recipe? Because it’s amazing, that’s why! I poured my heart into making this gluten free naan dough not just good, but *truly fantastic*. Here’s the scoop on why it’s going to become your new favorite:
- No Gluten, All the Goodness: Yup, it’s completely gluten-free without sacrificing that classic naan chewiness we all adore.
- Surprisingly Easy: Don’t let homemade bread intimidate you! This dough comes together really fast, and honestly, it’s pretty forgiving.
- Pillowy Soft & Puffy: You’ll get those gorgeous bubbles and that soft, pliable texture that’s perfect for scooping up all your favorite curries or dips.
- Versatile AF: Seriously, use it for everything! Mini pizzas, wraps, or just tearing off a piece to enjoy with a sprinkle of sea salt. Mmm!

Essential Ingredients for Gluten Free Naan Dough
Alright, let’s talk ingredients! This is where the magic really starts to happen for our gluten free naan dough. I’ve tweaked and tested these until they give us that perfect, soft, and slightly chewy naan we’re aiming for. No weird stuff, just real kitchen staples, with a few gluten-free heroes thrown in. Make sure you have these babies ready to go:
- Wet Ingredients & Leavening:
- 1 cup warm water (make sure it’s 105-115°F – too hot kills the yeast, too cold and it won’t wake up!)
- 1 tbsp granulated sugar (the yeast’s breakfast!)
- 2 tsp active dry yeast
- 2 tbsp olive oil (plus a little extra for brushing later)
- 1/4 cup plain full-fat Greek yogurt (or unsweetened coconut yogurt for my dairy-free friends!)
- Dry Ingredients:
- 1 cup gluten-free all-purpose flour blend (this one should *definitely* have xanthan gum in it already! Most good blends do.)
- 1/2 cup tapioca flour (for that amazing chew!)
- 1/4 cup almond flour (adds a lovely richness and softness)
- 1 tsp baking powder (our little secret for extra lift)
- 1/2 tsp salt (never forget the salt, it brings out all the flavors!)
Step-by-Step Guide to Making Gluten Free Naan Dough
Okay, deep breaths! Making gluten free naan dough might sound intimidating, but I promise you, it’s totally doable and actually, quite fun! Just follow these steps, and you’ll be pulling warm, pillowy naan off the skillet in no time. Let’s get cooking!
- Wake Up the Yeast: Grab a small bowl, pour in that warm water (remember, not too hot, not too cold!), and stir in the sugar. Then, sprinkle your active dry yeast right on top. Don’t touch it! Just let it sit there for about 5-10 minutes. You’ll see it get all foamy and bubbly, which means it’s alive and ready to work its magic. If it doesn’t foam, your yeast might be old, or your water was the wrong temperature. Start again!
- Whisk the Dry Stuff: While your yeast is doing its thing, get a big bowl and whisk together your gluten-free all-purpose flour blend, tapioca flour, almond flour, baking powder, and salt. Make sure it’s all nicely combined, so those flavors are evenly distributed.
- Combine Wet Ingredients: Once your yeast mixture is looking happy and foamy, stir in the olive oil and the Greek yogurt (or coconut yogurt!). Give it a good mix.
- Bring It All Together: Now, pour those wet ingredients from step 3 into your bowl of dry ingredients. Using a sturdy spoon (or even your hands!), mix everything together. At first, it’ll look a bit shaggy and maybe even a little crumbly, but keep going until it starts to come together into a dough.
- Gentle Kneading: Lightly flour your counter or a clean surface with a little extra gluten-free flour. Turn your shaggy dough out onto it. Now, gently knead it for about 2-3 minutes. This isn’t like traditional bread dough; you don’t need to be aggressive! Just work it until it’s smoother. It’s going to be a softer dough than what you might be used to, and that’s perfectly okay!
- Let It Rise: Lightly oil a clean bowl – I just use a drizzle of olive oil and spread it around. Put your dough in the bowl, giving it a little turn to coat it all over. Cover the bowl tightly with plastic wrap and find a warm spot in your kitchen. Let it rise for 45-60 minutes, or until it’s roughly doubled in size. This is where patience pays off!
- kształtowanieNaan Shapes: Once your dough has risen beautifully, gently punch it down. Divide it into 6-8 equal pieces. Now comes the fun part! On a lightly floured surface, take each piece and roll it out into an oval or round shape about 1/4 inch thick. Don’t worry about perfection; rustic is charming!
- Time to Cook: Heat your trusty cast iron skillet or a good non-stick pan over medium-high heat. When it’s hot, brush a little more olive oil on the pan.
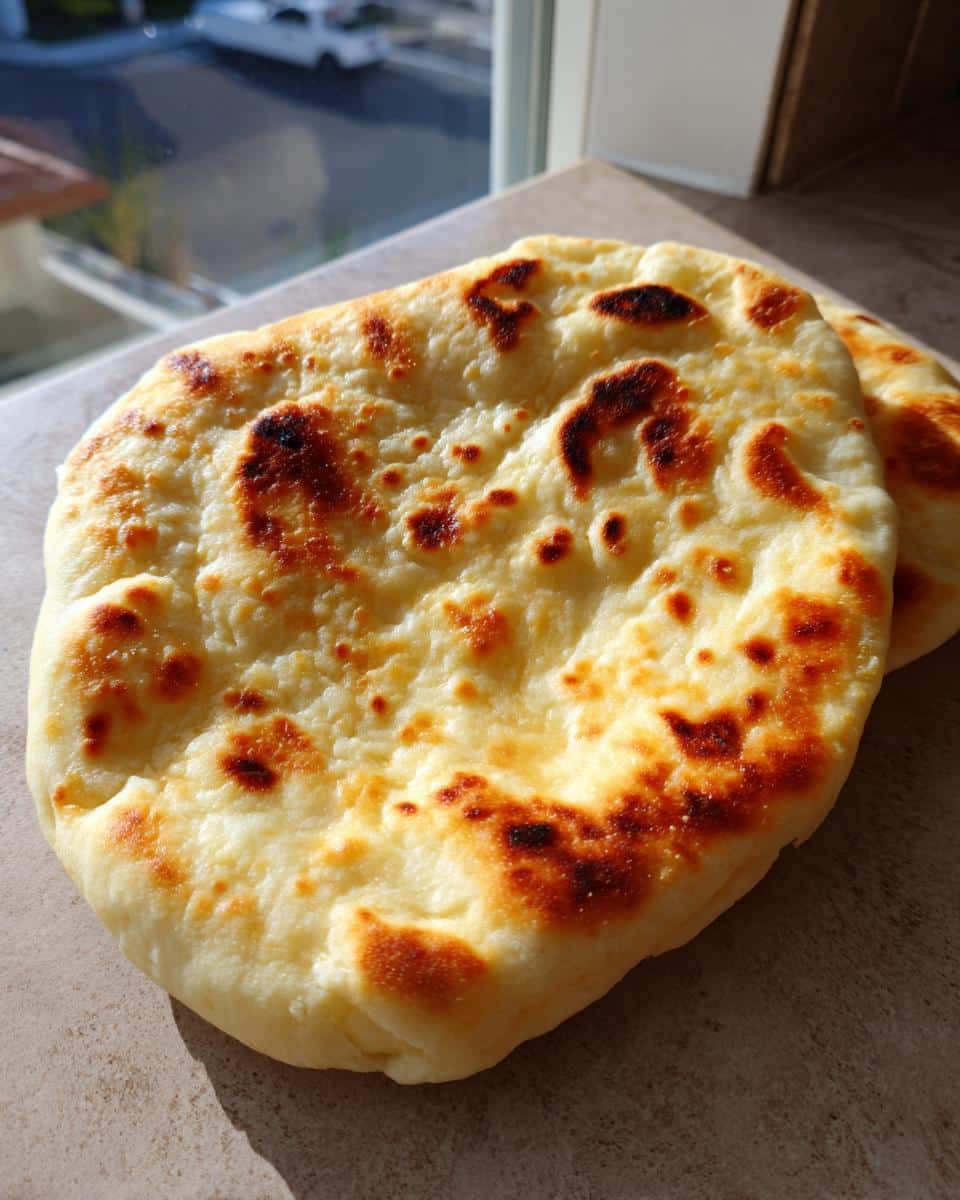
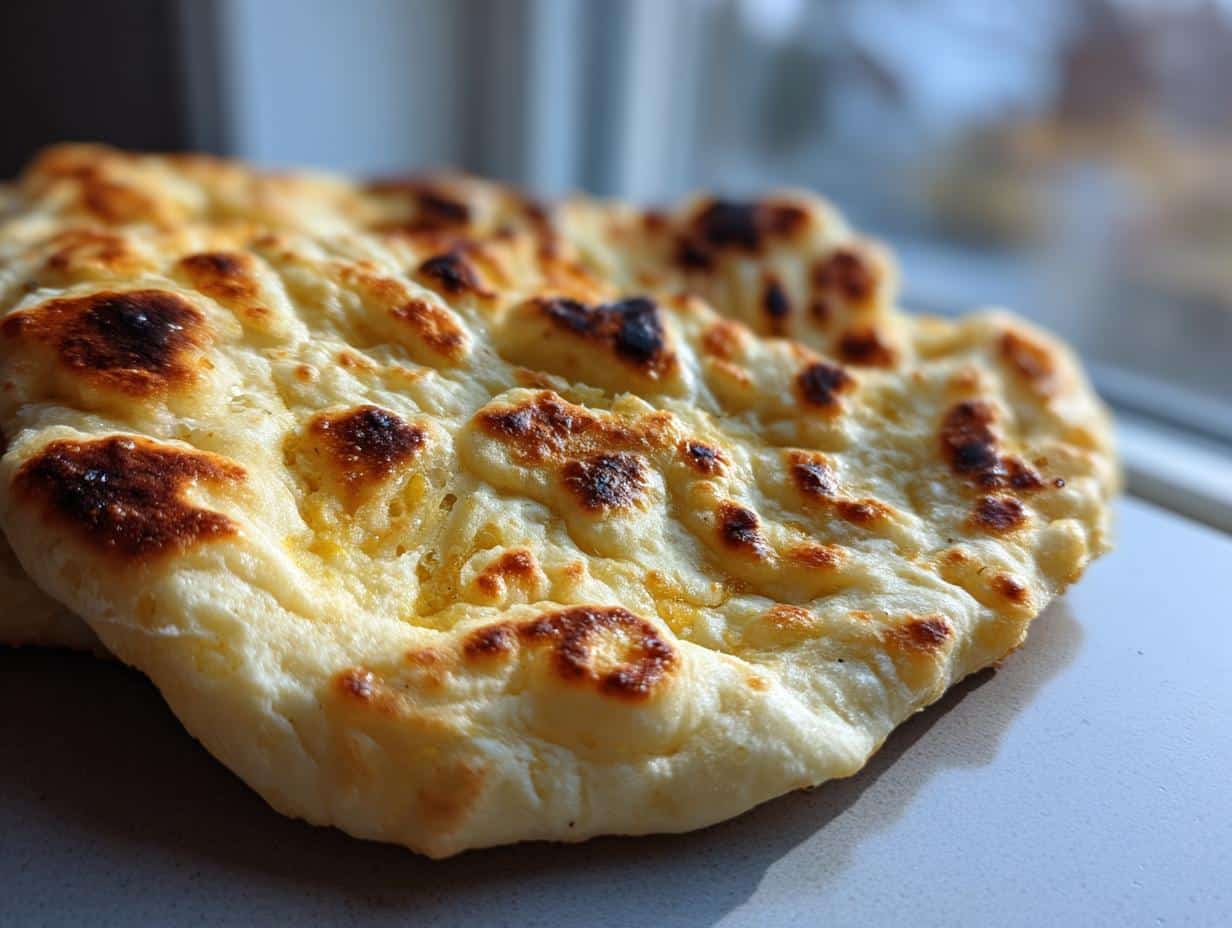
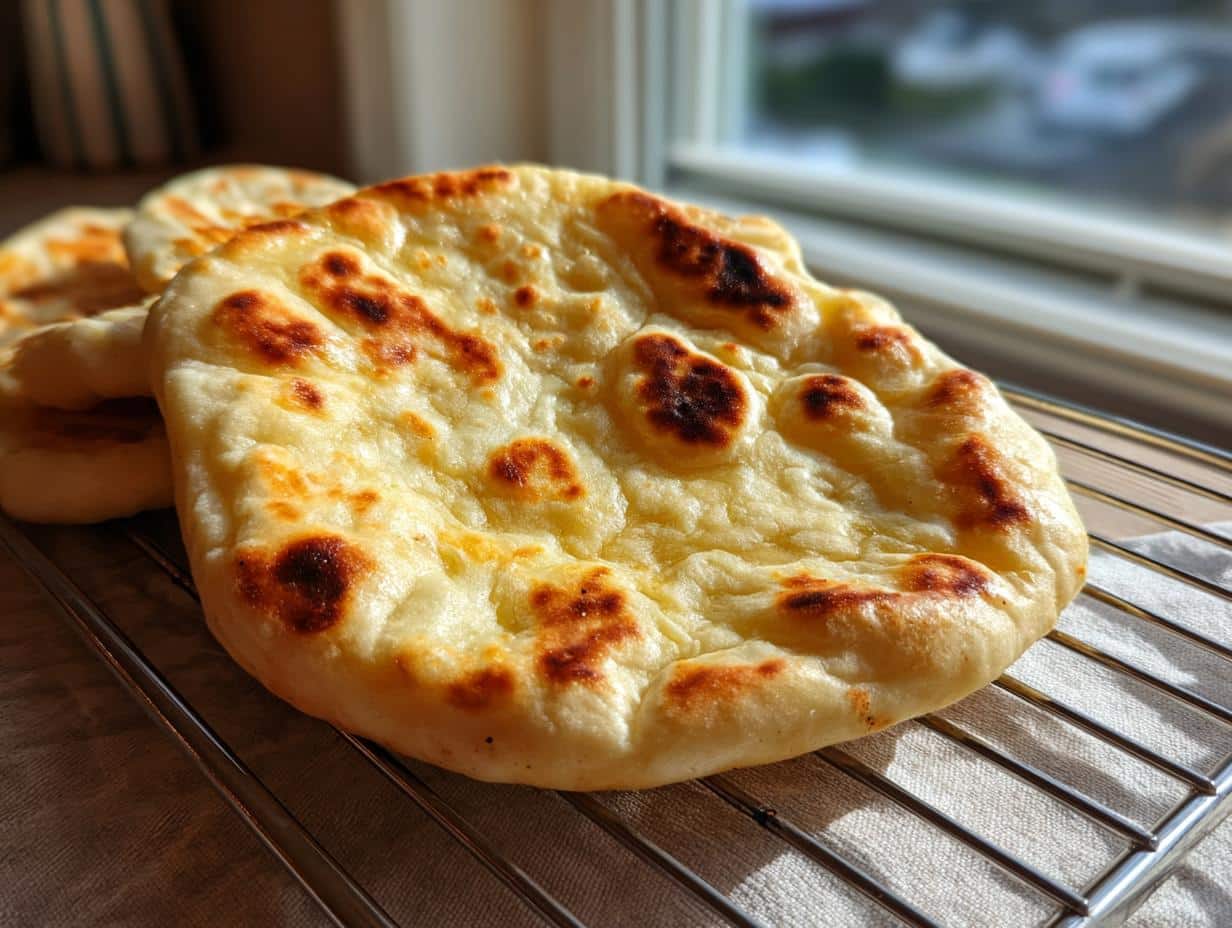
- Cook ‘Em Up: Carefully place one naan dough piece in the hot pan. Cook for about 2-3 minutes per side. You’ll see it start to puff up and get those lovely golden-brown spots – that’s what we want! Flip it over and cook the other side. As soon as it’s done, transfer it to a plate. If you want, brush it with melted butter or garlic butter right away. Warm naan is the best naan!
Tips for Perfect Gluten Free Naan Dough
Okay, you’ve got the steps down, but now for some of my personal secrets to making this gluten free naan dough absolutely sing! After all those trials and errors, I’ve picked up a few things that really make a difference. These aren’t just rules; they’re little love notes to your naan!
- Don’t Rush the Rise: I know, it’s hard to wait when you’re hungry! But that rise time (45-60 minutes) is crucial. Those little yeast buddies need their time to do their thing. A warm, draft-free spot is their happy place. Sometimes, I even preheat my oven to its lowest setting for just a minute, then turn it off and let the dough rise in there. Works like a charm!
- Embrace the Softness: This isn’t your grandma’s wheat dough, okay? This specific gluten free naan dough will be softer, even a little stickier. Don’t add a ton of extra flour trying to make it “firm.” A light dusting on your surface is all you need. That softness is actually what gives us that beautiful, pliable naan later!
- Hot Pan, Quick Cook: Get that skillet smoking hot (not literally, just well heated!). Cooking naan quickly over higher heat is key to getting those lovely puffed-up bubbles and a tender interior without drying it out. Like when I make my sourdough bread, good heat is a game-changer!
- Brush with Love: My absolute favorite part? Brushing the cooked naan with melted butter, especially garlicky butter, right when it comes off the pan. The warmth just soaks it right up, adding another layer of flavor. It’s a non-negotiable step in my kitchen!
- Don’t Overcrowd the Pan: Cook your naan one or two at a time, depending on your pan size. Overcrowding drops the pan temperature and prevents that satisfying puff, and honestly, who wants to miss out on the puff?!
Gluten Free Naan Dough: Common Questions Answered
Okay, so you’ve got questions about this amazing gluten free naan dough, and I’ve got answers! It’s totally normal to wonder about things, especially when you’re jumping into gluten-free baking. I get it, I’ve been there! Here are some of the things people often ask me about this recipe, and I hope they help you feel super confident in your kitchen.
Can I make this gluten free naan dough dairy-free?
Absolutely, yes! It’s super easy to make this gluten-free naan dough dairy-free. All you have to do is swap out the plain full-fat Greek yogurt for an unsweetened coconut yogurt. Just make sure it’s plain so you don’t end up with a sweet naan (unless that’s what you’re going for, no judgment!). It works beautifully and keeps that lovely tang and moisture.
What makes this gluten free naan dough soft and pliable?
That’s my favorite question! The secret to this soft and pliable gluten free naan dough is a magical blend of flours and good old yogurt. The tapioca flour is a superstar for chewiness and elasticity, which can be tricky in gluten-free baking. Almond flour adds a wonderful richness and helps keep things tender, and the yogurt brings acidity and moisture, which both contribute to that irresistible softness. It’s all about finding that perfect balance!
Storage and Reheating Your Gluten Free Naan Dough
So, you’ve made a glorious batch of this amazing gluten free naan dough, and maybe you have some leftovers (though I doubt it, they’re so good!). No worries, I’ve got you covered on how to keep it fresh for later. Whether it’s the dough or the cooked naan, we want to make sure every bite is as delicious as the first!
- Storing Uncooked Dough: If you’ve got extra dough, just place it in a lightly oiled, airtight container in the fridge for up to 2-3 days. When you want to use it, let it come to room temperature for about 30-60 minutes before rolling and cooking.
- Storing Cooked Naan: Let your cooked naan cool completely, then stack them in an airtight container or a Ziploc bag. They’ll stay fresh at room temperature for 1-2 days, or in the fridge for up to 4 days.
- Reheating Naan: My favorite way to reheat is a quick toss back into a hot, dry skillet for about 30 seconds to a minute per side. It brings back that lovely warmth and chewiness! You can also pop them in a toaster oven for a minute or two.
Serving Suggestions for Gluten Free Naan
Okay, so you’ve got your beautiful, fresh-off-the-skillet gluten free naan, and now what?! This, my friends, is the fun part! This naan is so versatile, you’re going to want to make it all the time just to try out new ways to eat it. Here are some of my absolute favorite ways to enjoy it – prepare for some serious deliciousness!
- The Classic Dipper: This is a no-brainer! It’s perfect for scooping up every last drop of your favorite curry sauce. My creamy butter chicken recipe is a match made in heaven with this naan. Oh man, just thinking about it!
- Dip Central: Picture this: a big platter of warm naan strips with all your favorite dips – hummus, baba ghanoush, or even a spicy feta dip. Seriously, it’s the ultimate party appetizer (or personal snack, no judgment here!).
- Mini Pizzas, Assemble!: My kids LOVE this one! Use the naan as a quick and easy base for individual pizzas. A little tomato sauce, cheese, and your favorite toppings, then pop it in the oven or toaster oven until bubbly. Dinner in a flash!
- Wrap It Up: Transform your naan into a fantastic wrap for grilled chicken, falafel, or even just a big pile of fresh veggies and a drizzle of tahini. It’s a great lunch solution that feels a little fancy.
- Garlic Naan Addict: Honestly, sometimes I just make extra of my garlic butter and brush it on, then sprinkle with fresh cilantro, and eat it plain. It’s that good!
Estimated Nutritional Information
Just a little heads-up about the nutritional info for this gluten free naan dough! While I’ve included some estimates in the recipe details, please remember these are just that – estimates. The exact numbers can totally vary depending on the specific brands of flour, yogurt, and oil you use. Think of it as a general guide, not a strict rulebook!
Share Your Gluten Free Naan Dough Creations!
So, you’ve made it! You’ve whipped up a batch of this amazing gluten free naan dough, and I bet your kitchen smells incredible. I just *have* to know how it turned out for you! Did you serve it with something delicious? Did it puff up just right? Please, please, please leave a comment below to tell me all about your experience. And if you loved it, don’t forget to rate the recipe! Even better, snap a photo and share it on Instagram or Facebook – tag me so I can see all your beautiful creations!
Print
Easy Gluten-Free Naan Dough
- Total Time: 1 hour 35 min
- Yield: 6-8 servings 1x
- Diet: Gluten Free
Description
This recipe provides instructions for making gluten-free naan dough at home. It uses a blend of gluten-free flours to achieve a soft and pliable dough, suitable for those avoiding gluten.
Ingredients
- 1 cup warm water (105-115°F)
- 1 tbsp granulated sugar
- 2 tsp active dry yeast
- 1 cup gluten-free all-purpose flour blend (with xanthan gum)
- 1/2 cup tapioca flour
- 1/4 cup almond flour
- 1 tsp baking powder
- 1/2 tsp salt
- 2 tbsp olive oil, plus more for cooking
- 1/4 cup plain full-fat Greek yogurt (dairy-free option: unsweetened coconut yogurt)
Instructions
- In a small bowl, combine warm water and sugar. Sprinkle yeast over the top and let sit for 5-10 minutes, or until foamy.
- In a large bowl, whisk together gluten-free all-purpose flour, tapioca flour, almond flour, baking powder, and salt.
- Add olive oil and yogurt to the yeast mixture, stirring well.
- Pour the wet ingredients into the dry ingredients and mix with a spoon until a shaggy dough forms.
- Turn the dough out onto a lightly floured surface (using gluten-free flour) and knead gently for 2-3 minutes until smooth. The dough will be softer than traditional naan dough.
- Place the dough in a lightly oiled bowl, turning to coat. Cover with plastic wrap and let rise in a warm place for 45-60 minutes, or until doubled in size.
- Divide the dough into 6-8 equal pieces. Roll each piece into an oval or round shape about 1/4 inch thick.
- Heat a cast iron skillet or non-stick pan over medium-high heat. Brush a little olive oil on the pan.
- Cook each naan for 2-3 minutes per side, or until golden brown and puffed up. Brush with melted butter or garlic butter after cooking, if desired.
Notes
- For a dairy-free option, use unsweetened coconut yogurt.
- The dough will be softer than traditional naan dough.
- You can brush the cooked naan with melted butter or garlic butter.
- Prep Time: 15 min
- Cook Time: 20 min
- Category: Bread
- Method: Baking
- Cuisine: Indian
Nutrition
- Serving Size: 1 naan
- Calories: 200
- Sugar: 5g
- Sodium: 250mg
- Fat: 8g
- Saturated Fat: 2g
- Unsaturated Fat: 5g
- Trans Fat: 0g
- Carbohydrates: 25g
- Fiber: 2g
- Protein: 4g
- Cholesterol: 5mg