 Skip to content

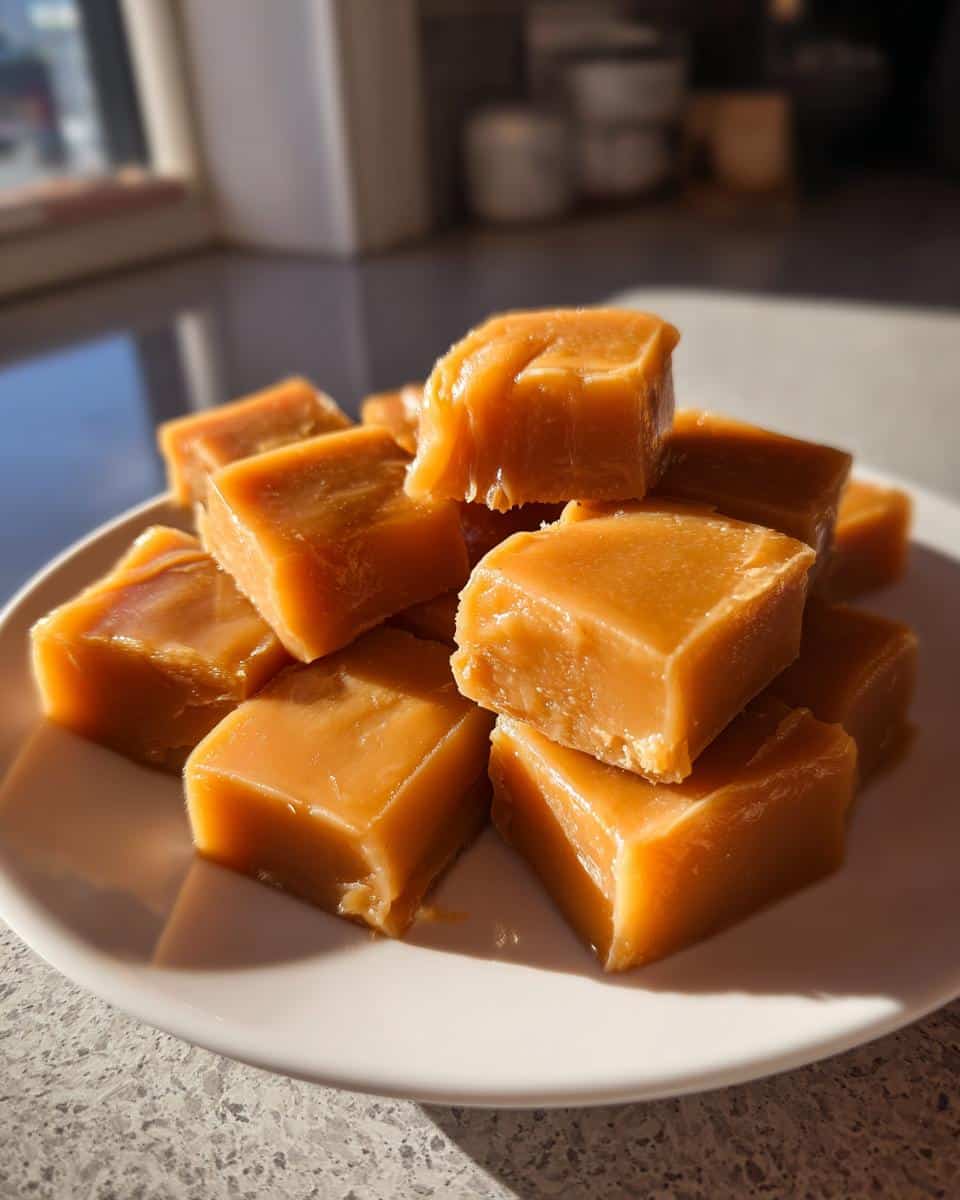
Oh, you guys, there’s just something so magical about making candy at home, isn’t there? It feels a little bit like a science experiment, a little bit like pure art, and a whole lot like pure joy. I still remember the first time I made homemade hot chocolate mix and felt that thrill of creating something so delicious from scratch! Well, get ready for that feeling all over again because today we’re diving into a project that’s surprisingly easy and incredibly rewarding: making your very own Homemade Vanilla Cream Caramels: Easy Recipe. Forget those hard, sticky store-bought ones; these are so unbelievably soft, wonderfully chewy, and just bursting with real vanilla flavor. Seriously, you won’t believe how simple it is to whip up a batch of these sweet treats, and I promise, they always disappear way too fast in my house!
Why You’ll Love This Homemade Vanilla Cream Caramels Recipe
Oh, there are so many reasons to fall head over heels for this Homemade Vanilla Cream Caramels recipe! I mean, who doesn’t love a soft, chewy caramel? But making them yourself? That’s a whole different ballgame. Here’s why I know you’re going to adore this easy recipe:
- Seriously Simple: Don’t let candy-making scare you! This is a super straightforward easy recipe, even for beginners.
- Pure Deliciousness: These caramels are incredibly rich, with that deep vanilla flavor you just can’t get from store-bought.
- So Satisfying: There’s a special kind of pride in saying, “I made these!” And trust me, everyone will be asking for your secret.
- Perfectly Chewy: We’re aiming for that ideal soft chew that melts in your mouth, not sticks to your teeth forever.
- Shareable Joy: They make fantastic edible gifts, or just a treat to hoard for yourself (no judgment here!).
Essential Ingredients for Homemade Vanilla Cream Caramels
Alright, so we’re keeping it super simple here. You won’t find any weird, hard-to-pronounce stuff on this list, promise! Just a handful of baking essentials that come together to create pure magic. Here’s what you’ll need to grab from your pantry and fridge for these amazing Homemade Vanilla Cream Caramels:
- 1 cup (that’s 2 sticks!) unsalted butter, cut into 8 pieces – trust me, those smaller pieces melt way faster!
- 1 cup granulated sugar – your basic white sugar, easy peasy.
- 1 cup packed light brown sugar – make sure you really pack it down in the measuring cup for the right amount.
- 1 cup light corn syrup – don’t substitute this, it’s key for that smooth texture!
- 1 cup heavy cream – yes, the good stuff, not half-and-half.
- 1 teaspoon vanilla extract – real vanilla, please!
- 1/2 teaspoon salt – just a tiny bit to balance all that sweetness.
How to Make Homemade Vanilla Cream Caramels: Easy Recipe Steps
Okay, deep breaths! Making candy might sound a little intimidating, but I promise you, these Homemade Vanilla Cream Caramels are super straightforward. Just follow these steps, and you’ll be a caramel-making pro in no time! Remember, the key is having everything ready and not getting distracted once you start cooking. We want a smooth, delicious journey, not a burnt-sugar disaster!
- Get Your Pan Ready: First things first, grab an 8×8 inch baking pan. Line it with parchment paper, making sure you leave a nice overhang on all sides. This is going to be your little “lift” to get the caramel out later, so don’t skip it! Then, give that parchment paper a light greasing. A little cooking spray or a pat of butter works wonders here.
- Combine the Base: In a heavy-bottomed 3-quart saucepan (seriously, heavy-bottomed is your friend here to prevent scorching!), toss in your butter pieces, both sugars (granulated and brown), the light corn syrup, and that glorious heavy cream. It’s going to look like a lot, but trust the process!
- Melt and Mix: Place your saucepan over medium heat. Now, this is important: stir constantly with a wooden spoon. You want to keep stirring until all the sugars are dissolved and the butter is completely melted. This step is about gentle coaxing, making sure everything is beautifully combined.
- Bring it to a Boil (and back off that spoon!): Once everything’s melted, clip your candy thermometer to the side of the pan. Increase the heat to medium-high. Now, here’s the crucial part: bring the mixture to a boil, but once it starts bubbling, stop stirring! Seriously, put that spoon down. Stirring after this point can lead to sugar crystallization, and we want silky smooth caramels, not grainy ones.
- Cook to Perfection: Let your caramel cook, still without stirring, until that candy thermometer hits exactly 245°F (118°C). This is the “firm ball” stage, and it’s what gives our caramels that perfect chewy texture. This usually takes about 15-20 minutes, so be patient. Don’t rush it!
- Flavor Time: As soon as it hits 245°F, immediately remove the saucepan from the heat. Carefully stir in the vanilla extract and salt. Just a heads up, it might bubble up a bit when you add the vanilla, so be careful!
- Pour it Out: Quickly pour the hot caramel into your prepared baking pan. Resist the urge to scrape the bottom of the pan – sometimes little crystals can form there, and we don’t want those in our beautiful caramels.
- Cool Down, Buttercup: Now for the hardest part: waiting! Let the caramel cool completely at room temperature. This will take at least 2 hours, or until it’s super firm. I know it’s tempting, but do not put it in the fridge! That can mess with the texture.
- Lift and Cut: Once it’s firm, use those parchment paper overhangs you strategically left to lift the whole caramel slab right out of the pan. Place it on a cutting board.
- Slice and Dice: Grab a very sharp, lightly greased knife or even a pizza cutter (my secret weapon for perfect squares!). Cut the caramel into 1-inch squares. If your knife starts sticking, just grease it again.
- Wrap ‘Em Up: This is a fun, slightly meditative step! Wrap each caramel individually in wax paper or little parchment paper twists. It keeps them from sticking together and makes them look super professional.
- Store and Savor: Store your beautifully wrapped caramels in an airtight container at room temperature. They’ll stay fresh and delicious for up to 2 weeks. If you can make them last that long, that is! You might also love storing other homemade goodies, like making a batch of homemade hot chocolate mix or even some homemade cinnamon rolls.
Tips for Perfect Homemade Vanilla Cream Caramels
Alright, you’ve got the steps down, but sometimes a few insider tips can make all the difference between good caramels and absolutely *perfect* Homemade Vanilla Cream Caramels! Trust me, I’ve learned these the hard way, so you don’t have to.
- Calibrate Your Thermometer! This is HUGE. A candy thermometer that’s even a few degrees off can completely change your caramel texture from chewy to rock hard, or runny. Stick it in boiling water – it should read 212°F (100°C). If it doesn’t, you’ll need to adjust your target temperature.
- The No-Stir Rule is Sacred: Once that mixture comes to a boil, hands off that spoon! Stirring can introduce sugar crystals back into the mix, making your caramels grainy. We want smooth and luxurious, like my classic peppermint fudge!
- Don’t Scrape the Pot: When you pour the caramel into the pan, just let it flow out. Don’t scrape the bottom or sides of the saucepan. Sometimes, sugar crystals can cling there, and scraping them into your lovely batch can cause crystallization in the whole pan.
- Grease Your Blade: For perfectly clean cuts, lightly grease your knife or pizza cutter with a little cooking spray or butter. You’ll thank me later when you’re not battling sticky caramel slices!
- Patience, My Friend: Seriously, resist the urge to peek or move the caramel while it’s cooling. Letting it set up completely at room temperature is crucial for the best texture.
Storing Your Homemade Vanilla Cream Caramels
So, you’ve made these incredible Homemade Vanilla Cream Caramels, and now you want to make sure they stay fresh and delicious, right? Good news! These little beauties are pretty forgiving, but a few simple tips will keep them perfect. Once you’ve individually wrapped each caramel in wax paper or parchment twists (which, let’s be honest, is the most satisfying part!), pop them into an airtight container. Keep that container at room temperature, away from direct sunlight or crazy temperature swings. They’ll stay wonderfully soft and chewy for up to two weeks. If you can make them last that long!
Frequently Asked Questions About Homemade Vanilla Cream Caramels
Got questions about whipping up these delightful Homemade Vanilla Cream Caramels? Don’t worry, you’re not alone! People always have a few common concerns when it comes to making homemade candies, and I’m here to clear them up. Making this easy candy recipe is such a fun project, and I want you to feel totally confident. Let’s tackle some of those burning questions, shall we?
Can I use a different type of sugar for these vanilla cream caramels?
For these vanilla cream caramels, I really, *really* recommend sticking to the light brown sugar and granulated sugar combo the recipe calls for. Brown sugar brings that rich, molasses-y flavor and a touch more moisture that’s crucial for the chewy texture. If you swap it out or only use white sugar, you might end up with a caramel that’s too hard, too pale, or missing that deep, complex flavor we love!
What if my Homemade Vanilla Cream Caramels are too soft or too hard?
Oh, this is a classic caramel conundrum! If your Homemade Vanilla Cream Caramels are too soft and gooey, it usually means you didn’t cook the mixture to a high enough temperature. Going just a few degrees under 245°F can make a big difference. If they’re too hard, almost like a toffee, then you likely overshot the temperature. Even a couple of degrees too high can result in a really firm set. That’s why an accurate candy thermometer is your best friend for this easy recipe!
Nutritional Information for Your Homemade Vanilla Cream Caramels
Just a little friendly reminder about the good stuff here! The nutritional information for these Homemade Vanilla Cream Caramels is always an estimate. It can totally vary based on the exact brands of butter, sugar, and cream you choose to use. So, just take it as a general guide, alright?
Share Your Homemade Vanilla Cream Caramels Success!
So, you’ve made these incredible Homemade Vanilla Cream Caramels, and now your kitchen smells absolutely divine, right? I’d love to hear how it went! Drop a comment below and tell me about your caramel-making adventure. Did you try a new trick? Did everyone gobble them up? Don’t forget to rate the recipe too! And if you share your creations on social media, tag me! Let’s build a little community of caramel lovers!
Print
Homemade Vanilla Cream Caramels
- Total Time: 2 hr 35 min
- Yield: 64 caramels 1x
- Diet: Vegetarian
Description
This recipe makes soft, chewy vanilla cream caramels. It is an easy recipe for homemade candy.
Ingredients
- 1 cup (2 sticks) unsalted butter, cut into 8 pieces
- 1 cup granulated sugar
- 1 cup packed light brown sugar
- 1 cup light corn syrup
- 1 cup heavy cream
- 1 teaspoon vanilla extract
- 1/2 teaspoon salt
Instructions
- Line an 8×8 inch baking pan with parchment paper, leaving an overhang on all sides. Lightly grease the parchment paper.
- In a heavy-bottomed 3-quart saucepan, combine the butter, granulated sugar, brown sugar, corn syrup, and heavy cream.
- Cook over medium heat, stirring constantly with a wooden spoon, until the sugars dissolve and the butter melts.
- Attach a candy thermometer to the side of the pan. Increase the heat to medium-high and bring the mixture to a boil without stirring.
- Continue to cook, without stirring, until the thermometer reaches 245°F (118°C), which is the firm ball stage. This usually takes 15-20 minutes.
- Remove the saucepan from the heat. Stir in the vanilla extract and salt. Be careful as the mixture may bubble up.
- Pour the caramel into the prepared baking pan. Do not scrape the bottom of the pan.
- Let the caramel cool completely at room temperature for at least 2 hours, or until firm. Do not refrigerate.
- Once firm, use the parchment paper overhang to lift the caramel out of the pan.
- Place the caramel on a cutting board and cut into 1-inch squares using a sharp, greased knife or a pizza cutter.
- Wrap each caramel individually in wax paper or parchment paper twists.
- Store caramels in an airtight container at room temperature for up to 2 weeks.
Notes
- Use a heavy-bottomed saucepan to prevent scorching.
- Do not stir the caramel once it begins to boil, as this can cause crystallization.
- Ensure your candy thermometer is accurate for best results.
- For easier cutting, lightly grease your knife or pizza cutter.
- Prep Time: 15 min
- Cook Time: 20 min
- Category: Dessert
- Method: Boiling
- Cuisine: American
Nutrition
- Serving Size: 1 caramel
- Calories: 80
- Sugar: 12g
- Sodium: 30mg
- Fat: 4g
- Saturated Fat: 2g
- Unsaturated Fat: 1g
- Trans Fat: 0g
- Carbohydrates: 15g
- Fiber: 0g
- Protein: 0g
- Cholesterol: 10mg