 Skip to content

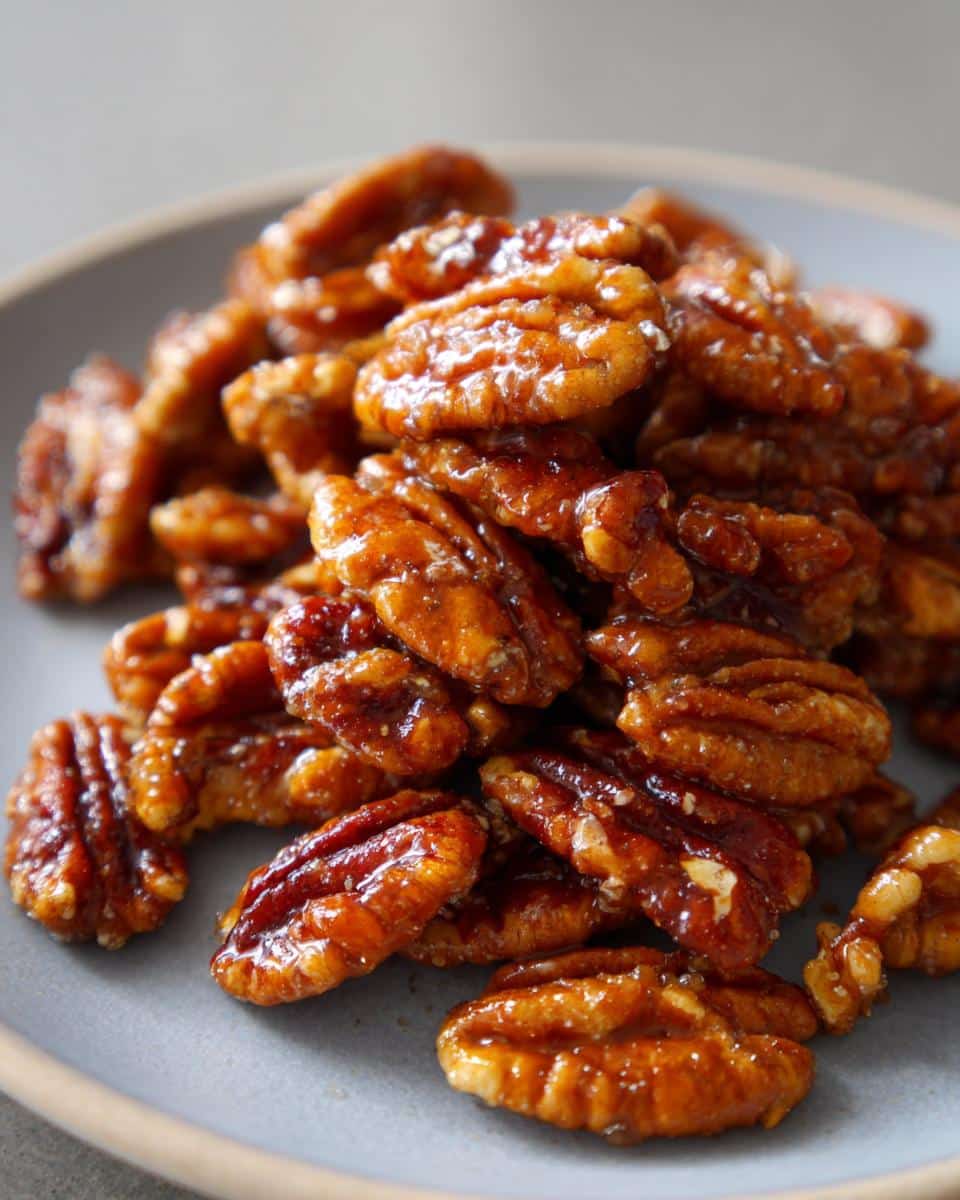
Oh my goodness, let me tell you, there’s just something magical about that first bite of a warm, crunchy, sweet glazed pecan! I remember the first time I made maple glazed pecans. It was a cozy autumn afternoon, and I was looking for a little something special, something easy, but still super satisfying to nibble on while reading a book. I stumbled upon a simple recipe, and honestly, the aroma that filled my kitchen was absolutely divine. Within minutes, my whole home smelled like a cozy, maple-scented dream! And the taste? Pure heaven. They’re sweet, they’re savory, they’re got that perfect crunch, and they just melt in your mouth. You’d think something this good would be complicated, right? But nope! This recipe is unbelievably simple and yields the most delicious maple glazed pecans you could ever imagine. Trust me, once you try these, you’ll be making them all the time!
Why You’ll Love These Maple Glazed Pecans
Okay, so why are these maple glazed pecans an absolute must-make? Let me tell you! They’re not just yummy; they’re a total kitchen win. You’ll fall head over heels for them because:
- Seriously Quick & Easy: We’re talking minimal prep and bake time. You can whip these up for an unexpected visitor or a sudden craving without breaking a sweat!
- Flavor Explosion: That gorgeous blend of sweet maple, a hint of spice, and the natural nuttiness? Oh, it’s just *chef’s kiss*. So much flavor in every bite!
- Super Versatile: They’re not just a snack (though they make an amazing one!). Sprinkle them on salads, yogurt, oatmeal, or even desserts. They elevate everything!
- The Perfect Crunch: That satisfying, crisp bite is just addictive. They get perfectly caramelized, making them irresistibly crunchy.
- Simple Ingredients: You probably have most of what you need in your pantry right now. No fancy, hard-to-find stuff here!
Essential Ingredients for Maple Glazed Pecans
Alright, so what do you need to whip up these incredible maple glazed pecans? The beauty here is how simple the list is! You probably have most of these beauties hanging out in your pantry already. No obscure ingredients, just pure, wholesome goodness!
- 2 cups pecan halves: Fresh, good quality pecans make all the difference, trust me!
- 1/4 cup pure maple syrup: This is key! Make sure it’s *pure* maple syrup, not that pancake syrup stuff.
- 2 tablespoons unsalted butter, melted: Butter adds that lovely richness and helps the glaze stick.
- 1 tablespoon granulated sugar: Just a touch more sweetness and crunch!
- 1/2 teaspoon ground cinnamon: For that warm, cozy, spiced goodness.
- 1/4 teaspoon salt: Don’t skip this! It balances all the sweet and really makes the flavors pop.

Step-by-Step Guide: How to Make Maple Glazed Pecans
Okay, friend, now for the fun part! Making these maple glazed pecans is honestly so ridiculously easy, it feels like cheating. But don’t worry, I won’t tell anyone. Just follow these steps, and you’ll have a batch of crunchy, sweet perfection in no time.
- Get Prepped (and Preheat!): First things first, let’s get that oven ready. Crank it up to 300°F (150°C). While it’s heating, grab a baking sheet. You absolutely want to line this with parchment paper or a silicone baking mat. Trust me on this one – it makes cleanup a breeze and prevents any sticky glaze disasters!
- Mix it All Up: In a nice big bowl, toss in your pecan halves. Now, pour over that golden maple syrup, your melted butter, the granulated sugar, that lovely ground cinnamon, and a tiny dash of salt. Stir, stir, stir! You want those pecans to be beautifully and evenly coated. Every single one should look glistening and ready for its maple-y transformation.
- Spread ‘Em Out: Once they’re all coated, tip those gorgeous pecans onto your prepared baking sheet. Make sure they’re in a single layer. This is super important! If they’re piled up, they won’t toast evenly, and we want perfection here, right?
- Bake to Golden Goodness: Pop that baking sheet into your preheated oven. Let them bake for about 15-20 minutes. Here’s your little secret tip: halfway through, around the 8-10 minute mark, give them a good stir with a spatula. This helps them toast evenly and stops them from sticking together too much. Keep a close eye on them towards the end – pecans can go from perfectly toasted to burnt pretty quickly! We’re looking for fragrant, lightly toasted, and just starting to deepen in color.
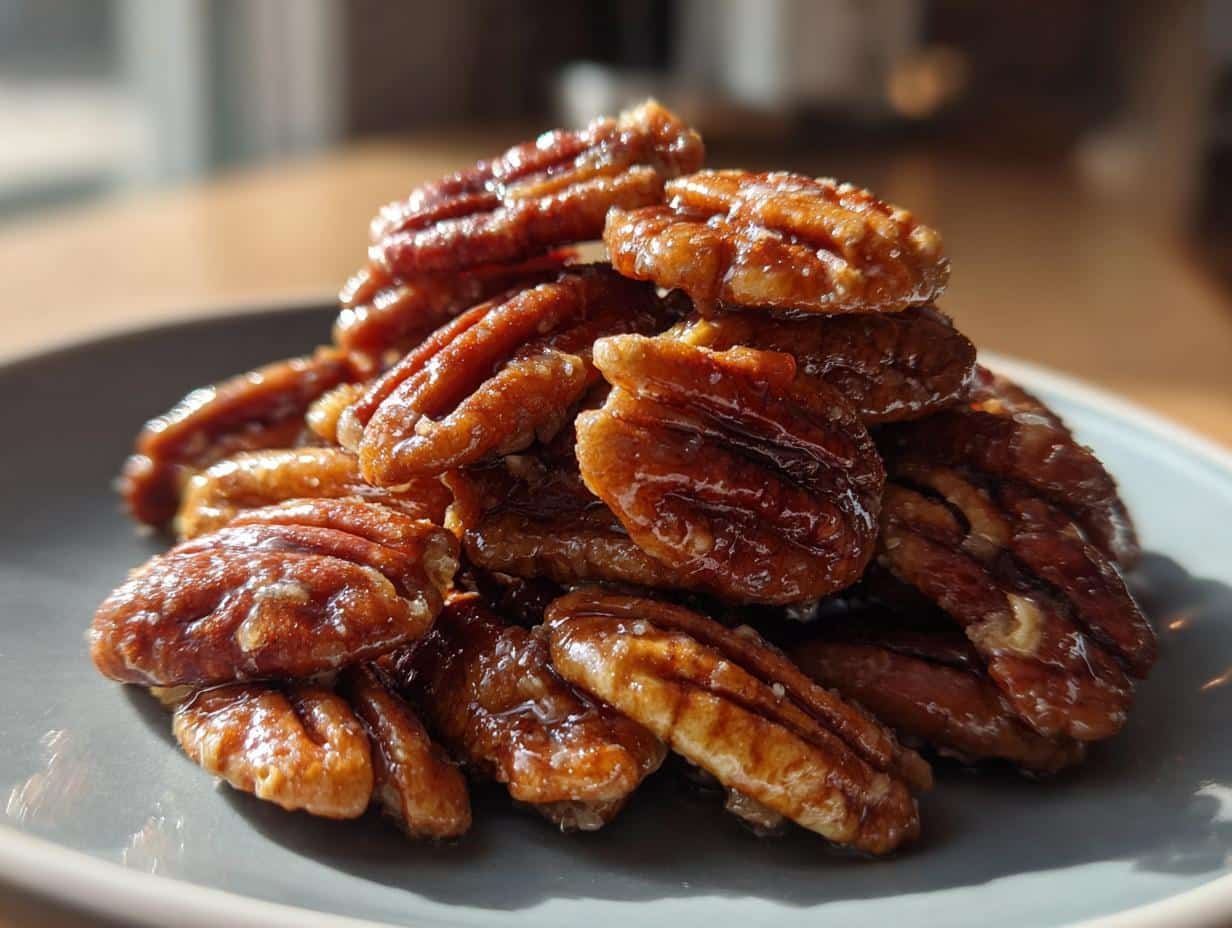
- Cool Down, Crisp Up: Once they’re out of the oven, do not touch them! (Well, you can admire them, but don’t try to eat them hot yet.) Let them cool completely on that baking sheet. As they cool, something magical happens: the maple glaze will harden and become wonderfully crisp. This is crucial for that satisfying crunch!
- Break and Store: Once totally cool (and yes, it’s hard to wait!), break up any little clumps. Now you’ve got homemade maple glazed pecans! Store these beauties in an airtight container at room temperature. They’ll stay perfectly delicious for up to two weeks, though I’d be shocked if they last that long in your house! They’re just like cinnamon roasted pecans, but with that lovely maple twist!
Tips for Perfect Maple Glazed Pecans Every Time
Okay, so you’ve got the basic recipe down, but I’m going to share a few little secrets with you to make sure your maple glazed pecans are absolutely, positively perfect every single time. These aren’t just good tips; they’re *essential* for that irresistible crunch and perfectly balanced flavor!
- Don’t Skimp on the Syrup (But use pure!): Make sure you’re using high-quality, pure maple syrup. The fake stuff just won’t give you that rich, natural caramelization and depth of flavor. Plus, those cheaper syrups often have other weird ingredients that can make your pecans sticky instead of crisp.
- Coat Them Generously and Evenly: When you’re mixing everything in that bowl, take your time! You want every single pecan half to be glistening with that maple-butter goodness. An even coat means an even glaze, and that means ultimate deliciousness.
- Single Layer is Your Best Friend: I mentioned it in the steps, but it bears repeating: spread those maple glazed pecans out in a true single layer on your baking sheet. If they’re crowded, they’ll steam instead of toast, and you’ll end up with chewy nuts instead of gloriously crisp ones.
- Watch ‘Em Like a Hawk! Seriously, ovens can be quirky, and nuts can burn in a blink. Keep an eye on them, especially after that 10-minute mark. You want them fragrant and lightly browned, not smoking or dark. A burnt pecan is a sad pecan.
- The Cool-Down is CRITICAL: I know, I know, resisting hot, fragrant maple glazed pecans right out of the oven is tough. But that cooling time is where the magic happens! As they cool on the baking sheet, that glaze solidifies and becomes wonderfully crunchy. Resist the urge to pick at them too soon if you want that perfect crispness.
Creative Ways to Enjoy Your Maple Glazed Pecans
So, you’ve got this glorious batch of maple glazed pecans – now what?! While I could happily munch on them by the handful all day (and sometimes do, oops!), they are *so* much more versatile than just a snack. These beauties can seriously elevate almost any dish. Let’s get creative!
- Dessert Topping Extraordinaire: My absolute favorite! Crumble them over a scoop of vanilla ice cream, sprinkle them generously on a berry crumble, or even add them to your morning pancakes. You really can’t go wrong.
- Salad’s Best Friend: Trust me on this one. A sprinkle of maple glazed pecans adds an unbelievable sweet crunch to a plain green salad with some goat cheese and apple slices. It’s a total game-changer!
- Breakfast Boost: Stir them into your oatmeal or yogurt for a delicious textural and flavor pop. Or, if you’re feeling fancy, chop them up and sprinkle them over your Pumpkin Spice Latte foam!
- Cheese Board Star: Hosting? Add a small bowl of these to your cheese and charcuterie board. They pair wonderfully with creamy cheeses and fresh fruit.
- Baking Buddy: Fold them into muffin batter, cookie dough, or even your favorite quick bread for an added layer of flavor and texture.
Storage and Make-Ahead Tips for Maple Glazed Pecans
Okay, so you’ve just made a glorious batch of maple glazed pecans, and somehow, by some miracle, you haven’t eaten them all yet! Good job resisting! Now, let’s talk about keeping them fresh and perfectly crisp. Once they’re completely cool (this is key for that crunch!), pop them into an airtight container. A glass jar or a good sealable plastic container works wonders. Stored at room temperature, these beauties will stay wonderfully fresh and crunchy for up to two weeks. They’re totally make-ahead friendly, so feel free to whip up a batch a few days before a party or when you know you’ll want them for snacking all week long!
Frequently Asked Questions About Maple Glazed Pecans
Okay, so you’ve got questions about these amazing maple glazed pecans, and I’ve got answers! It’s totally normal to wonder about tweaks or common mishaps, and I’m here to help you nail this recipe every single time. Let’s dig in!
Can I make maple glazed pecans without butter?
You know, butter adds such a lovely richness and helps with that golden crisp, but if you’re avoiding it, you *can* try a neutral oil like melted coconut oil (which also firms up nicely when cool) or even a plant-based butter alternative. Just be aware the flavor profile might shift a little, and the texture might not be *quite* as perfectly luscious, but they’ll still be delicious and crunchy!
Are these maple glazed pecans suitable for special diets?
Well, this specific recipe isn’t strictly keto or sugar-free because of the maple syrup and granulated sugar. HOWEVER, you absolutely can adapt this! For a keto maple glazed pecans version, you’d swap the maple syrup for a sugar-free maple-flavored syrup and use an erythritol or monk fruit sweetener instead of granulated sugar. They’d still be sweet and crunchy, just without the carbs! For a healthy maple glazed pecans option, focus on keeping the pure maple syrup, as it’s a more natural sweetener than refined sugar, and enjoy them in moderation.
How do I prevent my maple glazed pecans from becoming sticky?
Ah, the sticky pecan dilemma! The biggest culprits are usually not baking them quite long enough (that glaze needs to fully dry out) or not letting them cool completely. Make sure they’re spread in a single layer, bake until truly golden and fragrant, and be super patient with the cooling process. They need to cool *completely* at room temperature on the baking sheet for that glaze to harden and become perfectly crisp. If they’re still a bit tacky even after cooling, pop them back in a very low oven (around 200°F/95°C) for another 10-15 minutes, then cool again.
Nutritional Information
Just a quick note on the nutritional front! I’m all about nourishing a happy body, but please remember that any nutritional values for these maple glazed pecans (or really, any homemade treat!) are always estimates. Things like the exact brand of maple syrup, the size of your pecans, or even how much butter ended up in your bowl can shift those numbers a bit. So, take it all with a grain of salt, and enjoy these delicious pecans as part of a balanced diet!
Share Your Maple Glazed Pecans Experience!
Well, there you have it, folks! My absolute favorite way to make maple glazed pecans. Seriously, I just know you’re going to love these as much as I do. When you whip up a batch, please, *please* don’t keep it a secret! I absolutely adore hearing from you. Come back here and leave a comment, tell me how it went, or what fun things you did with them. Did you put them on ice cream? Sprinkle them on a salad? Or just gobble them up straight from the baking sheet (no judgment here!). And if you snap a pic, tag me on social media – nothing makes my day more than seeing your kitchen creations! Happy baking!
Print
Maple Glazed Pecans
- Total Time: 30 min
- Yield: 4 servings 1x
- Diet: Vegetarian
Description
Make sweet and crunchy maple glazed pecans at home. This recipe is simple to follow and results in a delicious snack or topping.
Ingredients
- 2 cups pecan halves
- 1/4 cup maple syrup
- 2 tablespoons unsalted butter, melted
- 1 tablespoon granulated sugar
- 1/2 teaspoon ground cinnamon
- 1/4 teaspoon salt
Instructions
- Preheat your oven to 300°F (150°C). Line a baking sheet with parchment paper or a silicone baking mat.
- In a large bowl, combine the pecan halves, maple syrup, melted butter, granulated sugar, cinnamon, and salt. Stir until the pecans are evenly coated.
- Spread the glazed pecans in a single layer on the prepared baking sheet.
- Bake for 15-20 minutes, stirring halfway through, until the pecans are fragrant and lightly toasted. Watch them to prevent burning.
- Remove from the oven and let cool completely on the baking sheet. As they cool, the glaze will harden and become crisp.
- Once cooled, break up any clumps and store the maple glazed pecans in an airtight container at room temperature for up to two weeks.
Notes
- Ensure pecans are spread in a single layer for even baking.
- Stirring halfway through baking helps prevent sticking and promotes even toasting.
- Allow pecans to cool completely for the glaze to set and become crisp.
- Prep Time: 10 min
- Cook Time: 20 min
- Category: Snack
- Method: Baking
- Cuisine: American
Nutrition
- Serving Size: 1/4 cup
- Calories: 250
- Sugar: 12g
- Sodium: 70mg
- Fat: 22g
- Saturated Fat: 4g
- Unsaturated Fat: 18g
- Trans Fat: 0g
- Carbohydrates: 14g
- Fiber: 2g
- Protein: 3g
- Cholesterol: 8mg