
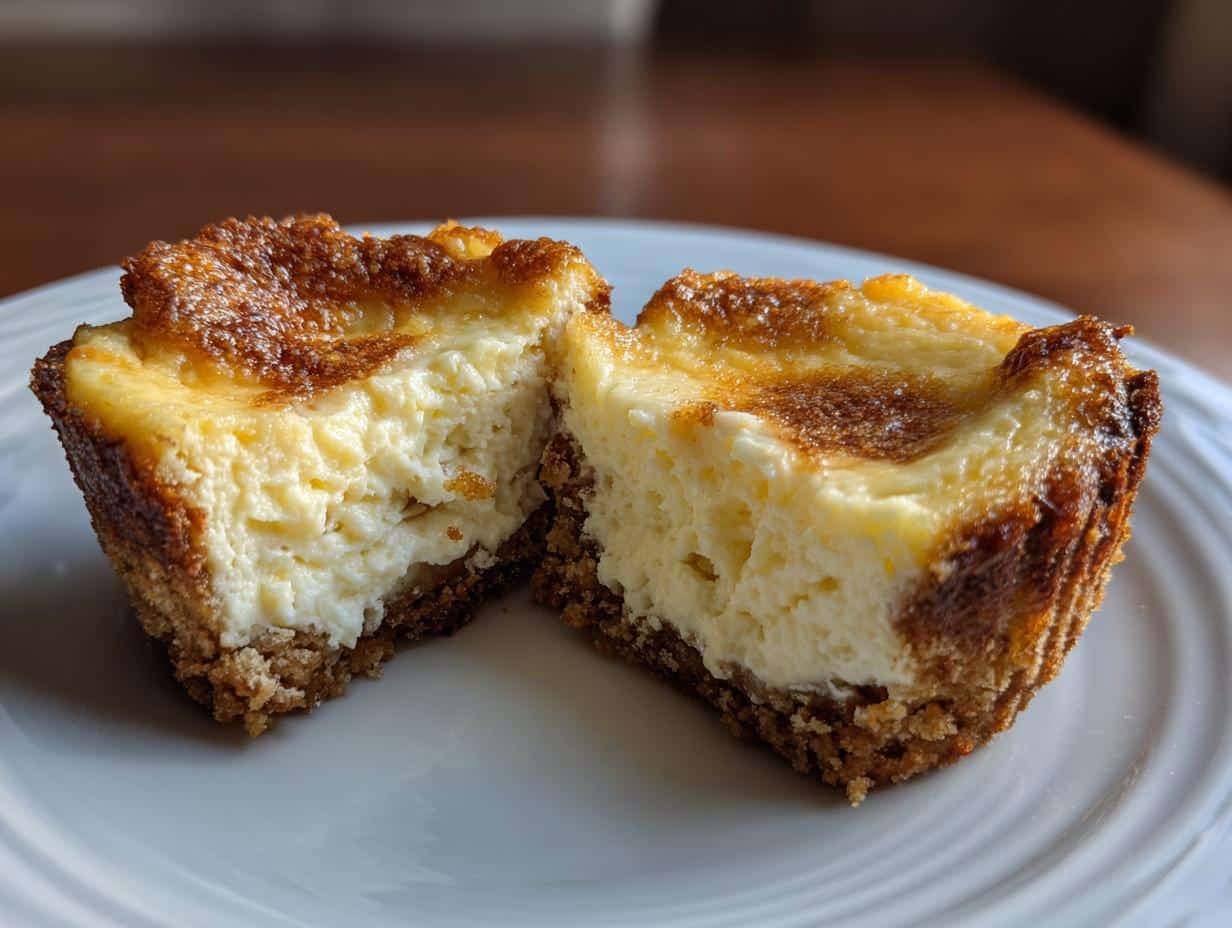
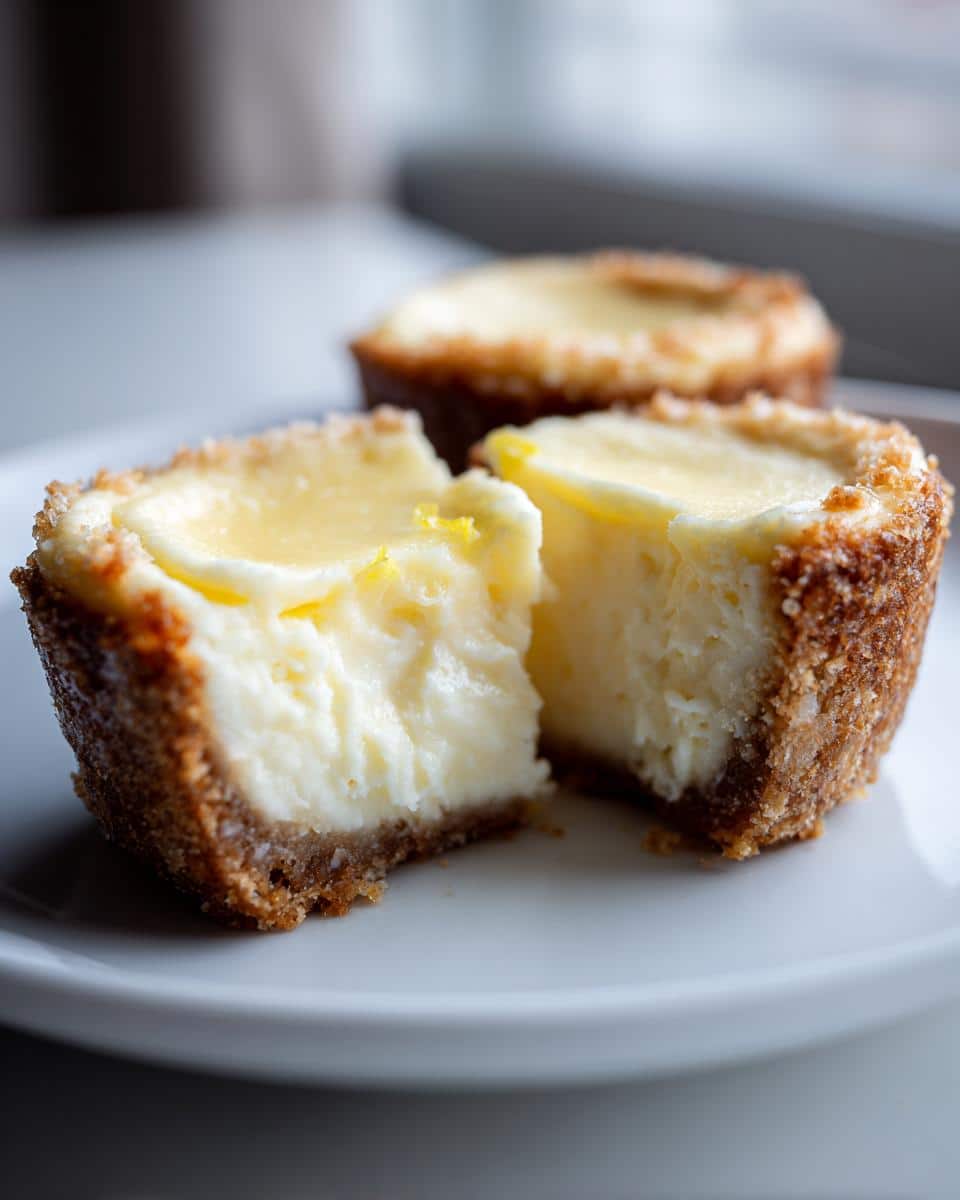
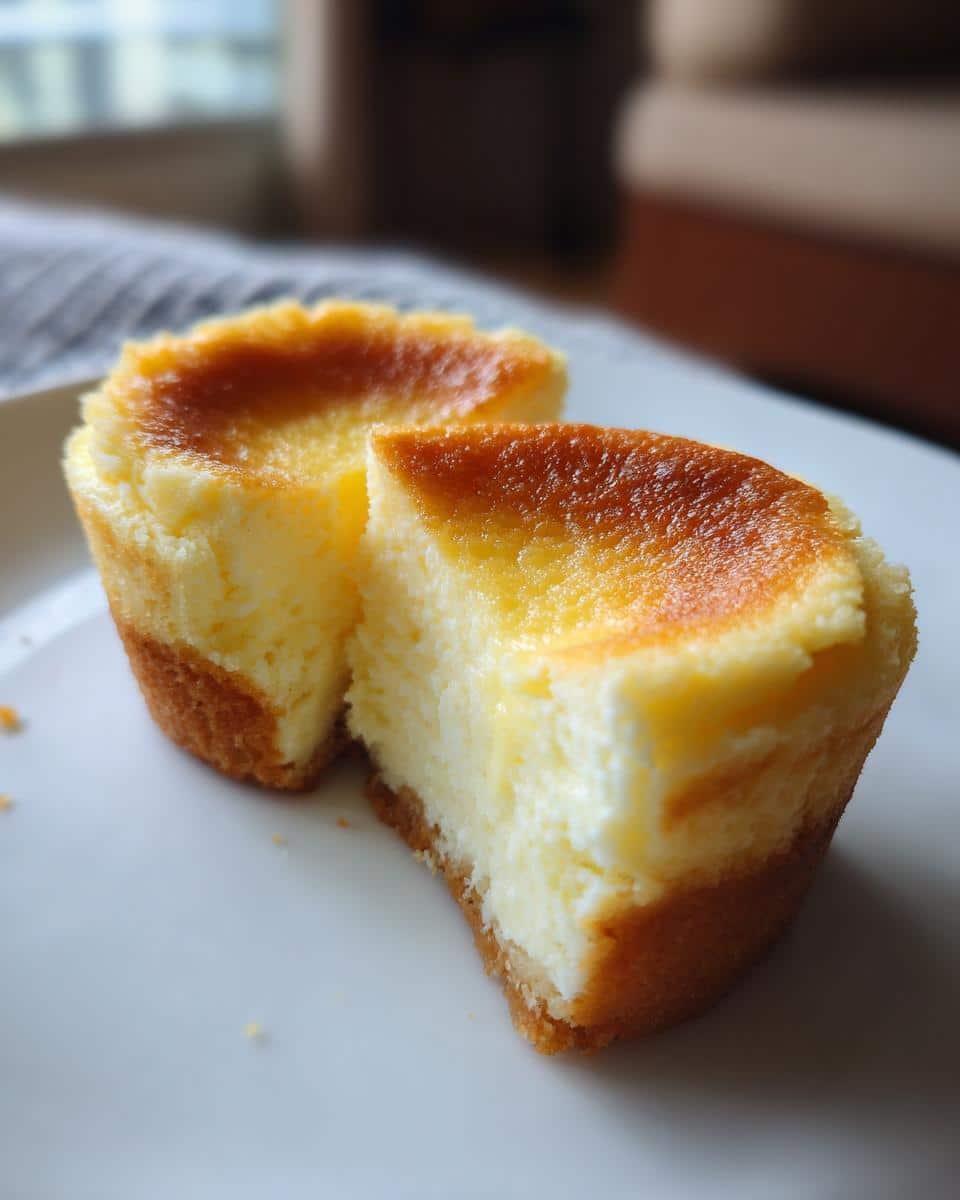
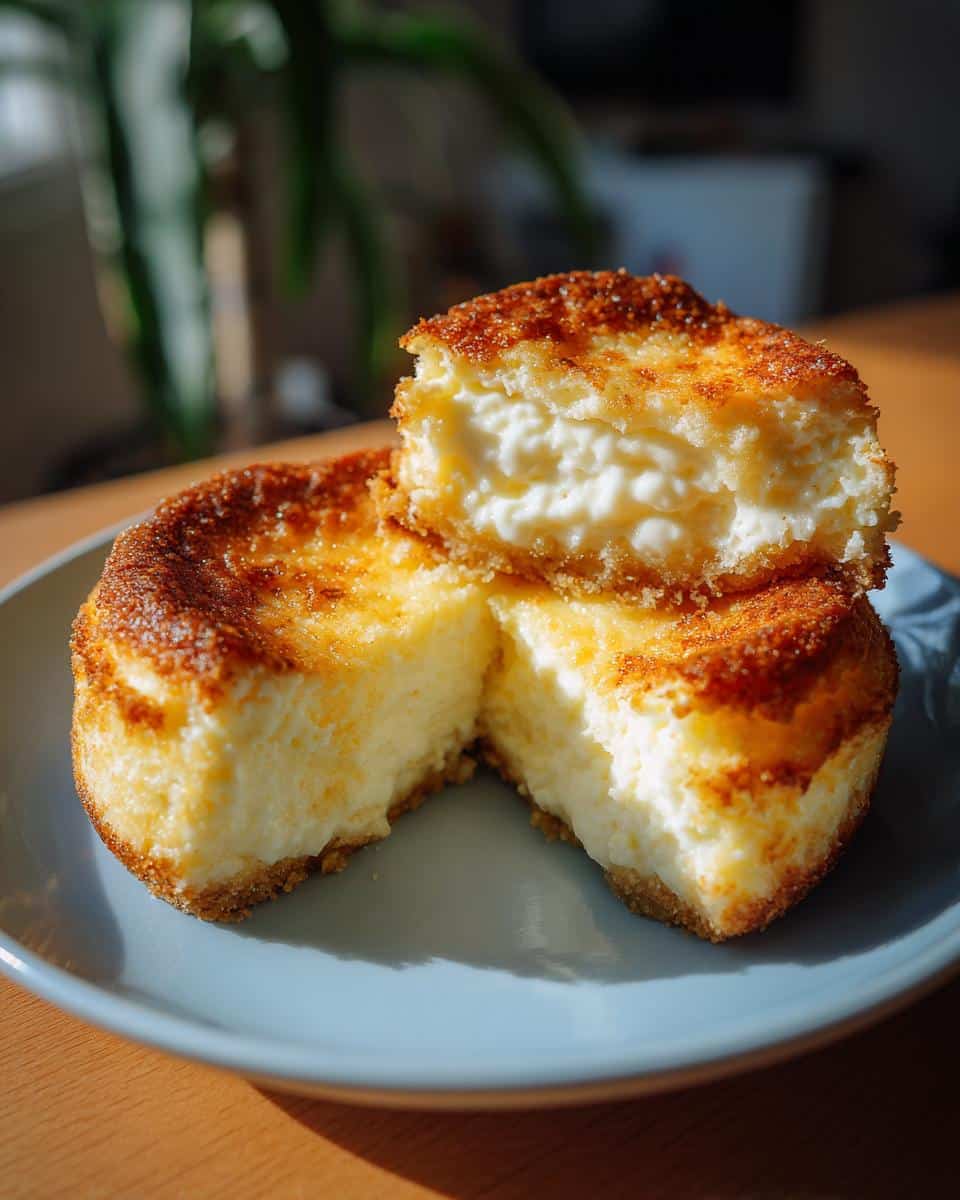
Okay, so confession time: I’m a *little* obsessed with individual desserts. There’s just something so perfect about having your own little treat, right? And these **Mini Lemon Cheesecakes**? They’re seriously the best. The bright, zesty lemon flavor just sings, and honestly, who can resist a creamy, dreamy cheesecake? I first made these for a spring picnic, and they were gone in minutes! Everyone raved about them. Now, they’re my go-to for parties, potlucks—you name it. They’re ridiculously easy to whip up, which is a major bonus in my book. Plus, these **Mini Lemon Cheesecakes** are just the right size – not too much, not too little. Just pure lemony bliss in every bite!

Why You’ll Love These Mini Lemon Cheesecakes
Okay, listen up, because you’re about to discover your new favorite dessert! These little cheesecakes are seriously amazing, and here’s why you’ll be obsessed:
- **Easy peasy prep:** No fancy techniques needed! Even if you’re a beginner baker, you can totally nail this recipe.
- **Perfect portions:** Individual servings mean no fighting over who gets the bigger slice (hooray!).
- **Zingy lemon flavor:** That bright, refreshing lemon taste is *everything*. It’s like sunshine in a cheesecake!
- **Party-perfect:** These are total crowd-pleasers. Bring ’em to any gathering and watch them disappear.
- **Make-ahead magic:** Need a dessert in advance? These can be made a day or two ahead of time. Talk about convenient!
Ingredients for the Best Mini Lemon Cheesecakes
Alright, let’s gather our goodies! Here’s what you’ll need to make these dreamy **Mini Lemon Cheesecakes**. Honestly, it’s a pretty standard list, but trust me, the quality of your ingredients makes a HUGE difference. So grab:
- 1 ½ cups graham cracker crumbs
- ¼ cup granulated sugar
- ½ cup unsalted butter, melted
- 2 (8-ounce) packages cream cheese, softened
- 1 cup granulated sugar
- 2 large eggs
- ¼ cup fresh lemon juice
- 1 tablespoon lemon zest
- 1 teaspoon vanilla extract
- Whipped cream (optional)
- Lemon slices or twists (optional)
- Fresh berries (optional)
See? Nothing too scary! Let’s get baking!
How to Make Mini Lemon Cheesecakes: Step-by-Step Instructions
Okay, friend, let’s get down to business! These **Mini Lemon Cheesecakes** are easier than you think, I promise. Just follow these simple steps, and you’ll be snacking on lemony goodness in no time. Ready? Let’s do this!
-
First things first, get that oven preheating to 350°F (175°C). And don’t forget to line a 12-cup muffin tin with those cute little paper liners. Trust me; you’ll thank me later for easy cleanup! If you’re feeling extra fancy, you can even use foil liners.
-
Time for the crust! In a medium bowl, mix together 1 ½ cups of graham cracker crumbs, ¼ cup of granulated sugar, and ½ cup of melted unsalted butter. Mix it all until it looks like wet sand. It should hold together when you squeeze it. That’s how you know it’s ready!
-
Now, press about 1-2 tablespoons of that crumb mixture into the bottom of each muffin liner. I like to use the bottom of a measuring cup to really pack it in there. We want a nice, firm crust. Then, pop those babies into the oven for 5-7 minutes. You just want them lightly golden. Take them out and let them cool slightly while we whip up the filling. Did you know you can also make delicious mini pumpkin cheesecake bites using this method? Just swap the lemon for pumpkin and voila!
-
Alright, for the star of the show – the filling! In a large mixing bowl, beat 2 (8-ounce) packages of softened cream cheese with 1 cup of granulated sugar until it’s smooth and creamy. Make sure your cream cheese is *really* soft. Lumps are NOT our friends. I usually let mine sit out for at least an hour.
-
Add 2 large eggs, one at a time, beating well after each addition. But be careful not to overmix! We just want everything combined. Overmixing can lead to cracks in your cheesecakes, and nobody wants that!
-
Now for the good stuff! Stir in ¼ cup of fresh lemon juice, 1 tablespoon of lemon zest (that’s where all the amazing lemon flavor comes from!), and 1 teaspoon of vanilla extract. Mix until everything is beautifully smooth.
-
Pour that luscious filling over the cooled crusts, filling each liner about ¾ full. This gives them room to puff up a little without overflowing. Careful, it can be a little tricky not to spill!
-
Bake for 18-22 minutes. Keep a close eye on them! You want the edges to be set, but the centers should still be just slightly jiggly. Remember, do NOT overbake! Overbaking = dry cheesecakes = sad face.
-
Now comes the hard part: Let the cheesecakes cool *completely* in the muffin tin on a wire rack. I know, it’s torture, but trust me, it’s worth it. Cooling slowly helps prevent cracking. And whatever you do, don’t try to rush it by putting them in the freezer! We’re going for patience here.
-
Once they’re cool, cover the muffin tin and refrigerate for at least 2 hours, or preferably overnight. This is KEY! The chilling time allows the cheesecakes to set properly and develop that perfect texture. Overnight is best, so plan ahead if you can!
-
Finally! Serving time! Carefully remove the **Mini Lemon Cheesecakes** from the muffin tin, and garnish with a dollop of whipped cream, a lemon slice or twist, and a few fresh berries, if desired. Boom! You’re a cheesecake superstar!
Tips for Perfect Mini Lemon Cheesecakes
Want to take your **Mini Lemon Cheesecakes** from good to *OMG-amazing*? I’ve got you covered! These little tricks make all the difference, trust me:
- **Soft Cream Cheese is Key:** Seriously, your cream cheese *needs* to be super soft. Like, leave-it-out-for-hours soft. This ensures a smooth, lump-free filling.
- **Don’t Overmix:** Overmixing incorporates too much air and can cause cracks. Mix until *just* combined.
- **Bake Low and Slow:** A lower baking temp and a slightly longer baking time helps prevent those dreaded cracks.
- **Cooling is Crucial:** Let those cheesecakes cool *completely* in the oven (with the door ajar!) before refrigerating. This slow cooling prevents sudden temperature changes that lead to cracking.
- **Zest is Best:** Don’t skimp on the lemon zest! It’s where all that bright, lemony flavor comes from.
Variations for Your Mini Lemon Cheesecakes
Okay, so you’ve mastered the basic recipe…now let’s get a little wild! These **Mini Lemon Cheesecakes** are like a blank canvas, ready for your creative touch. My favorite part is experimenting with different flavors and toppings. Here are a few ideas to get you started:
- **Berry Bliss:** Swirl in some fresh raspberry or blueberry jam into the filling before baking. Or, top with a mountain of mixed berries after they’ve chilled. Yum!
- **Crust Crazy:** Feeling adventurous? Swap the graham cracker crust for a gluten-free almond flour crust, or even a gingersnap crust for a little kick!
- **Extract Magic:** Add a few drops of almond extract to the filling for a subtle, nutty flavor that complements the lemon perfectly.
- **Lemon Curd Swirl:** Gently swirl a spoonful of store-bought or homemade lemon curd on top of each cheesecake *after* baking. It’s extra lemony and looks gorgeous!
Don’t be afraid to get creative and make these **Mini Lemon Cheesecakes** your own!
Make-Ahead and Storage Tips for Mini Lemon Cheesecakes
These little guys are PERFECT for making ahead – which is a lifesaver when you’re prepping for a party! You can bake them up to 2 days in advance and just keep them covered in the fridge. For longer storage, these **Mini Lemon Cheesecakes** freeze beautifully. Just wrap them individually in plastic wrap, then pop them into a freezer bag. They’ll keep for up to a month! When you’re ready to enjoy, thaw them in the fridge overnight. Easy peasy lemon squeezy!
Frequently Asked Questions About Mini Lemon Cheesecakes
Got questions about making these adorable **Mini Lemon Cheesecakes**? Don’t worry; I’ve got answers! Here are some of the most common things people ask (and a few secrets I’m happy to share!):
Can I use a different type of crust?
Absolutely! While the traditional graham cracker crust is classic, feel free to experiment. Gingersnap cookies, crushed Oreos (without the filling!), or even a gluten-free cookie like almond shortbread would all be delicious. Just make sure to adjust the amount of butter accordingly. A little experimenting never hurt anyone!
Can I use bottled lemon juice?
Okay, listen… Technically, yes, you *can*. But fresh lemon juice makes a HUGE difference in the final flavor. Bottled juice often has a slightly metallic taste. If you’re going for that bright, sunshiney lemon flavor, fresh is the way to go! Plus, you’ll need the zest anyway, so why not get the juice while you’re at it?
How do I prevent cracks in my cheesecakes?
Ah, the million-dollar question! Cracks happen, even to the best of us. But the keys are: don’t overmix the batter, bake at a low temperature, and let them cool *slowly* in the oven with the door ajar. Trust me; that slow cooling is a game-changer!
Can these be made gluten-free?
Yep! Just swap out the graham crackers for your favorite gluten-free cookie crumbs. There are tons of great options out there these days. Just make sure to check the labels to be 100% sure they’re gluten-free. These **Gluten-Free Mini Lemon Cheesecakes** will be just as delicious!
How long do these last?
These **Mini Lemon Cheesecakes** will keep in the fridge for up to 3-4 days, covered. But let’s be real…they probably won’t last that long! They are SO addictive!
Estimated Nutritional Information for Mini Lemon Cheesecakes
Alright, so here’s the skinny on what’s *probably* in these **Mini Lemon Cheesecakes.** Keep in mind, this is just an estimate, but each cheesecake packs about 250 calories, 15g fat, 4g protein, and 25g carbs. You’ll also get around 20g of sugar. So worth it, though, right?
Enjoy Your Homemade Mini Lemon Cheesecakes!
Okay, my friend, it’s your turn to shine! Seriously, these **Mini Lemon Cheesecakes** are just waiting for you to make them. So, whip up a batch, and let me know what you think! Don’t forget to rate the recipe and leave a comment – I love hearing from you! And if you’re feeling social, snap a pic of your gorgeous creations and tag me! You can learn more about me and my love for sharing recipes. Happy baking!
Print
Mini Lemon Cheesecakes
- Total Time: 2 hours 45 min
- Yield: 12 servings 1x
- Diet: Vegetarian
Description
Enjoy these zesty mini lemon cheesecakes, perfect for individual servings and easy to make.
Ingredients
- 1 ½ cups graham cracker crumbs
- ¼ cup granulated sugar
- ½ cup unsalted butter, melted
- 2 (8-ounce) packages cream cheese, softened
- 1 cup granulated sugar
- 2 large eggs
- ¼ cup fresh lemon juice
- 1 tablespoon lemon zest
- 1 teaspoon vanilla extract
- Whipped cream (optional)
- Lemon slices or twists (optional)
- Fresh berries (optional)
Instructions
- Preheat oven to 350°F (175°C). Line a 12-cup muffin tin with paper liners.
- In a medium bowl, combine graham cracker crumbs, ¼ cup sugar, and melted butter. Mix until well combined. Press about 1-2 tablespoons of the mixture evenly into the bottom of each muffin liner.
- Bake the crusts for 5-7 minutes, then remove from oven and let cool slightly.
- In a large mixing bowl, beat softened cream cheese and 1 cup sugar with an electric mixer until smooth and creamy.
- Add eggs one at a time, beating well after each addition until just combined.
- Stir in lemon juice, lemon zest, and vanilla extract until smooth.
- Pour the filling over the cooled crusts, filling each liner about ¾ full.
- Bake for 18-22 minutes, or until the edges are set and the centers are just slightly jiggly. Do not overbake.
- Let the cheesecakes cool completely in the muffin tin on a wire rack.
- Once cooled, refrigerate for at least 2 hours, or preferably overnight, before serving. Garnish with whipped cream, lemon, or berries if desired.
Notes
- For best results, refrigerate the cheesecakes overnight.
- Garnish with whipped cream, lemon slices, or fresh berries for an elegant presentation.
- Prep Time: 20 min
- Cook Time: 25 min
- Category: Dessert
- Method: Baking
- Cuisine: American
Nutrition
- Serving Size: 1 cheesecake
- Calories: 250
- Sugar: 20g
- Sodium: 150mg
- Fat: 15g
- Saturated Fat: 9g
- Unsaturated Fat: 5g
- Trans Fat: 0g
- Carbohydrates: 25g
- Fiber: 1g
- Protein: 4g
- Cholesterol: 75mg