
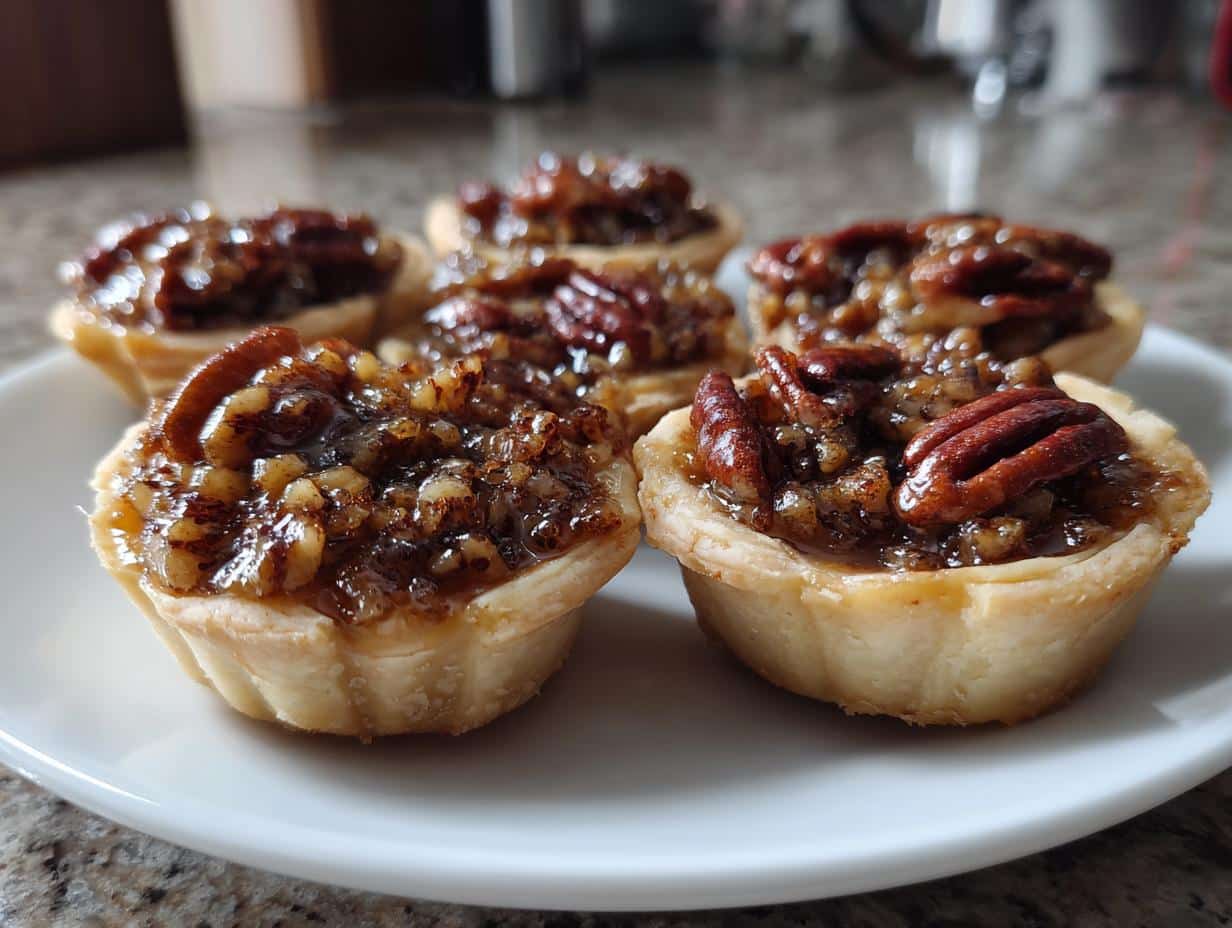
Oh, you are going to *love* these little gems! Pecan Tassies are just about the cutest, most delightful way to get your pecan pie fix, especially when you want something a little special but not too fussy. My Grandma always said that good food should make you smile, and these tiny, sweet treats, packed with that rich, nutty flavor and nestled in a buttery crust, definitely do that for me. They’re like little bites of Southern comfort, perfect for when you want to share a bit of homemade love without needing a whole pie.
Why You’ll Love These Pecan Tassies
Seriously, these little pecan tassies are a game-changer, especially when you’re busy. They’re just so darn good and surprisingly easy to whip up!
- Super Easy: You don’t need to be a pastry chef to make these. The dough comes together with just a couple of ingredients, and the filling is a simple mix-and-pour situation. Perfect for when you need some easy holiday desserts in a pinch!
- Irresistibly Delicious: That buttery, slightly tangy crust with the sweet, nutty pecan filling? It’s pure magic. They’re the ultimate bite-sized pecan treats that everyone just devours.
- Festive & Fun: They look so pretty on a dessert table, whether it’s for Thanksgiving, Christmas, or just because. They’re the perfect little something to add to your holiday cookie platters too!
- Crowd-Pleasers: Trust me, these disappear faster than you can say “more pecans!” They’re a guaranteed hit for parties and gatherings, no matter who you’re serving.
Gather Your Ingredients for Pecan Tassies
Alright, let’s get our goodies together for these amazing Pecan Tassies! It’s really not much, and having everything ready makes the whole process just zip by. Think of it like setting up your station before a fun project. You’ll need your pantry staples and a couple of things that just make these tassies sing.
Crust Ingredients for Your Pecan Tassies
For that perfect little buttery hug around our pecan filling, we’re keeping it simple. You’ll need a cup of all-purpose flour, just a pinch of salt, and the real stars: half a cup of unsalted butter and three ounces of cream cheese. Now, the secret here is making sure both the butter and cream cheese are really softened. Like, leave them on the counter for a good hour or two so they’re super spreadable and creamy. It makes all the difference!
Luscious Filling Ingredients for Pecan Tassies
Now for the heart of our tassies! You’ll want a whole cup of chopped pecans – I like to use pecans that are chopped pretty fine so you get that nutty goodness in every single bite. Then, we’ve got half a cup of packed light brown sugar for that lovely caramel sweetness, one large egg to bind it all together, a teaspoon of vanilla extract for that warm aroma, and just a quarter teaspoon of salt to balance everything out. That’s it! Simple ingredients, but oh boy, do they make magic happen for the best pecan tassies.
Crafting Perfect Pecan Tassies: Step-by-Step
Alright, let’s get down to business and make these little pecan tassies! It’s really not complicated, I promise. Just follow along, and you’ll see how easy it is to create these wonderful little treats. Think of it as building something delicious, layer by layer.
Preparing the Pecan Tassies Dough
First things first, get that oven preheated to 350°F (175°C). While it’s warming up, you’ll want to lightly grease your mini muffin tins. Trust me, this step is crucial for easy removal later! Now, grab a medium bowl and whisk together your flour and that first little bit of salt. In *another* bowl, cream together your softened butter and cream cheese. You want it super smooth and creamy, like a delicious spread. Then, gradually add that flour mix to the butter and cream cheese. Just mix it until everything comes together nicely. Don’t overmix it! Then, take about a tablespoon of this dough and press it into the bottom and up the sides of each mini muffin cup. You’re basically making tiny tart shells here.
Mixing the Rich Pecan Filling
This is the easy part! Grab a clean bowl and toss in your chopped pecans, that lovely light brown sugar, your egg, vanilla extract, and that final pinch of salt. Give it all a good stir until it’s well combined. You want everything nicely mixed so you get that perfect sweet, nutty flavor in every single bite of these bite-sized pecan treats.
Assembling and Baking Your Pecan Tassies
Now for the fun part: filling those little shells! Spoon that glorious pecan mixture right into each of the tart shells you made. Don’t fill them *too* full, just enough to reach the top of the dough. Pop them into your preheated oven and bake for about 20 to 25 minutes. You’ll know they’re ready when the crust starts looking golden brown and the filling is nicely set. These are like little mini pecan pies, so they don’t need too long!
Cooling and Finishing Your Pecan Tassies
Once they’re baked to perfection, let those beautiful Pecan Tassies cool in the muffin tins for just a few minutes. This helps them firm up a bit. Then, carefully transfer them to a wire rack to cool completely. Patience here is key! Trying to pull them out too soon can make them fall apart, and nobody wants sad, broken little tarts. Letting them cool fully ensures they hold their shape and makes them easier to handle, perfect for your pecan tassies recipe.
Tips for the Best Pecan Tassies
Now, I’ve made a *lot* of these little beauties over the years, and I’ve picked up a few tricks that really make them shine. It’s all about those little details that turn good tassies into the *best* Pecan Tassies!
Enhancing Pecan Tassies Flavor
For a real flavor boost, try toasting your pecans first! Just spread them on a baking sheet and pop them in the oven for about 5-7 minutes until they smell amazing. It deepens their nutty flavor so much. And if you love a little extra warmth, a tiny pinch of cinnamon in the filling is just heavenly, especially for those Southern pecan tassies!
Achieving the Perfect Crust for Pecan Tassies
That tender, flaky crust is totally achievable. The biggest thing is making sure your butter and cream cheese are *really* softened – almost room temperature. This helps them cream together beautifully without overworking the dough. Oh, and don’t press the dough too thin in the muffin cups; a little thickness helps prevent them from getting soggy, which is key for those lovely cream cheese pecan tassies.
Variations and Serving Suggestions for Pecan Tassies
Now, while these Pecan Tassies are just about perfect as they are, don’t be afraid to play around a little! Sometimes a little tweak makes them even more special, especially for holidays like Christmas or Thanksgiving. You can add a pinch of cinnamon or even a tiny bit of nutmeg to the filling – it gives them a lovely warmth that’s just divine.
Creative Pecan Tassies Twists
If you’re feeling fancy, try adding a little citrus zest, like orange or lemon, to the filling. It brightens up the sweetness and really makes the pecan flavor pop! For a bit of crunch and visual appeal, you could even sprinkle a few extra chopped pecans or a tiny bit of coarse sugar on top before baking. These little touches turn your already amazing homemade pecan tarts into something truly spectacular.
What to Serve with Your Pecan Tassies
These little darlings are fantastic on their own, of course, but they’re also wonderful as part of a larger spread for your easy holiday desserts. They pair beautifully with a dollop of fresh whipped cream or a small scoop of vanilla bean ice cream. For a festive drink, a warm spiced cider or a rich coffee complements them perfectly. They really shine on a dessert table alongside other cookies and treats!
Storing and Reheating Your Delicious Pecan Tassies
Got leftovers? Lucky you! These Pecan Tassies are pretty sturdy, but you’ll want to store them right to keep them tasting their best. Just pop them into an airtight container once they’re completely cool. They’ll stay yummy at room temperature for about 3 days, which is pretty great for us busy folks. If you want them to last a little longer, you can pop that container in the fridge, but I find they’re best enjoyed at room temp or just slightly warmed. If you do want to reheat them, just pop a few on a baking sheet in a warm oven (around 250°F or 120°C) for about 5 minutes. It just perks them right up!
Frequently Asked Questions about Pecan Tassies
Got questions about these little darlings? I get it! It’s always good to have a few pointers. Here are some things folks often ask me about making the best Pecan Tassies.
Can I make Pecan Tassies ahead of time?
Oh, absolutely! These are fantastic make-ahead treats. You can prepare the dough and press them into the muffin tins a day in advance and keep them covered in the fridge. Or, bake them completely and store them in an airtight container at room temperature for up to 3 days. They’re perfect for getting a head start on your holiday baking!
How do I prevent my Pecan Tassies from sticking?
This is a common worry, but it’s easily solved! Make sure you grease your mini muffin tins really well before you start. I like to use a little baking spray or melted butter and then dust them with a tiny bit of flour. Pressing the dough in firmly also helps create a bit of a barrier. Letting them cool in the tin for those few minutes after baking makes a big difference too, allowing them to release cleanly.
Can I freeze Pecan Tassies?
Yes, you certainly can! Once your Pecan Tassies are completely cooled, you can freeze them. Place them on a baking sheet in a single layer until they’re firm, then transfer them to a freezer-safe container or bag. They should keep well for about 2-3 months. To enjoy them, just let them thaw at room temperature. They’re still wonderful little bite-sized pecan treats even after freezing!
Share Your Pecan Tassies Creations!
Now I’d just *love* to see what you all whip up! Did you try adding a pinch of cinnamon? Did your family devour them in minutes? Snap a picture of your beautiful Pecan Tassies and tell me all about it in the comments below. I can’t wait to hear how they turned out for you!
Print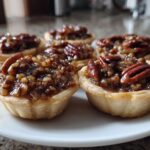
Tempting Pecan Tassies: 1 Bite-Sized Bliss
- Total Time: 45 minutes
- Yield: 24 tassies 1x
- Diet: Vegetarian
Description
Pecan Tassies are delightful bite-sized pecan pies with a rich, buttery crust and a sweet, nutty filling. Perfect for holidays and special occasions, these mini tarts offer a taste of Southern comfort in every bite.
Ingredients
- 1 cup all-purpose flour
- 1/4 teaspoon salt
- 1/2 cup (1 stick) unsalted butter, softened
- 3 ounces cream cheese, softened
- 1 cup chopped pecans
- 1/2 cup packed light brown sugar
- 1 large egg
- 1 teaspoon vanilla extract
- 1/4 teaspoon salt
Instructions
- Preheat your oven to 350°F (175°C). Grease mini muffin tins.
- In a medium bowl, whisk together the flour and 1/4 teaspoon salt.
- In a separate bowl, cream together the softened butter and cream cheese until smooth.
- Gradually add the flour mixture to the butter and cream cheese mixture, mixing until just combined.
- Press about 1 tablespoon of dough into each mini muffin cup, forming a tart shell.
- In another bowl, combine the chopped pecans, brown sugar, egg, vanilla extract, and 1/4 teaspoon salt. Stir until well mixed.
- Spoon the pecan filling into each tart shell.
- Bake for 20-25 minutes, or until the crust is golden brown and the filling is set.
- Let the pecan tassies cool in the muffin tins for a few minutes before transferring them to a wire rack to cool completely.
Notes
- For a smoother crust, ensure your butter and cream cheese are fully softened.
- You can toast the pecans lightly before chopping for a deeper flavor.
- These tassies can be stored in an airtight container at room temperature for up to 3 days.
- Add a pinch of cinnamon to the filling for extra warmth.
- Prep Time: 20 minutes
- Cook Time: 25 minutes
- Category: Dessert
- Method: Baking
- Cuisine: Southern
Nutrition
- Serving Size: 1 tassie
- Calories: approx. 150
- Sugar: approx. 8g
- Sodium: approx. 40mg
- Fat: approx. 10g
- Saturated Fat: approx. 4g
- Unsaturated Fat: approx. 6g
- Trans Fat: 0g
- Carbohydrates: approx. 14g
- Fiber: approx. 1g
- Protein: approx. 2g
- Cholesterol: approx. 20mg