
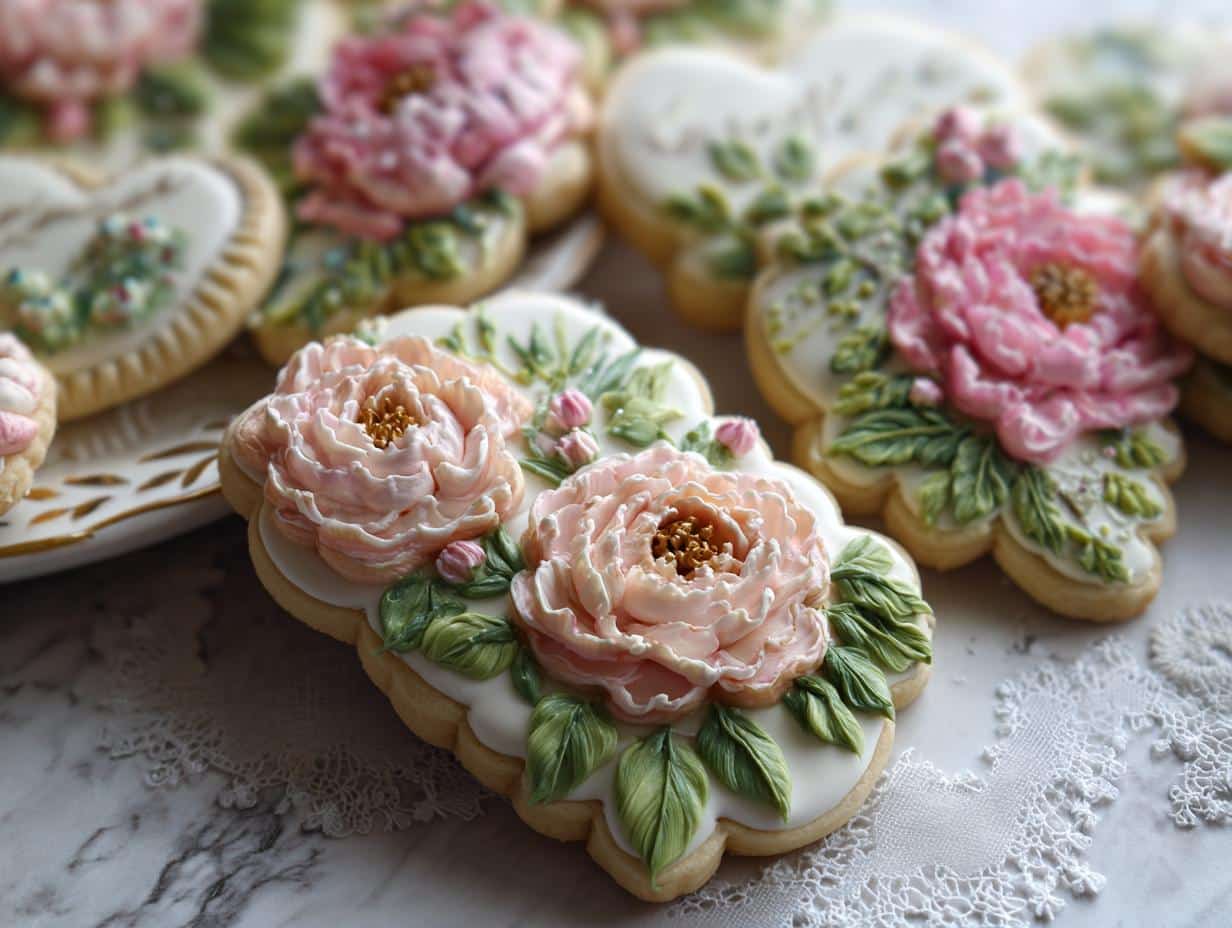
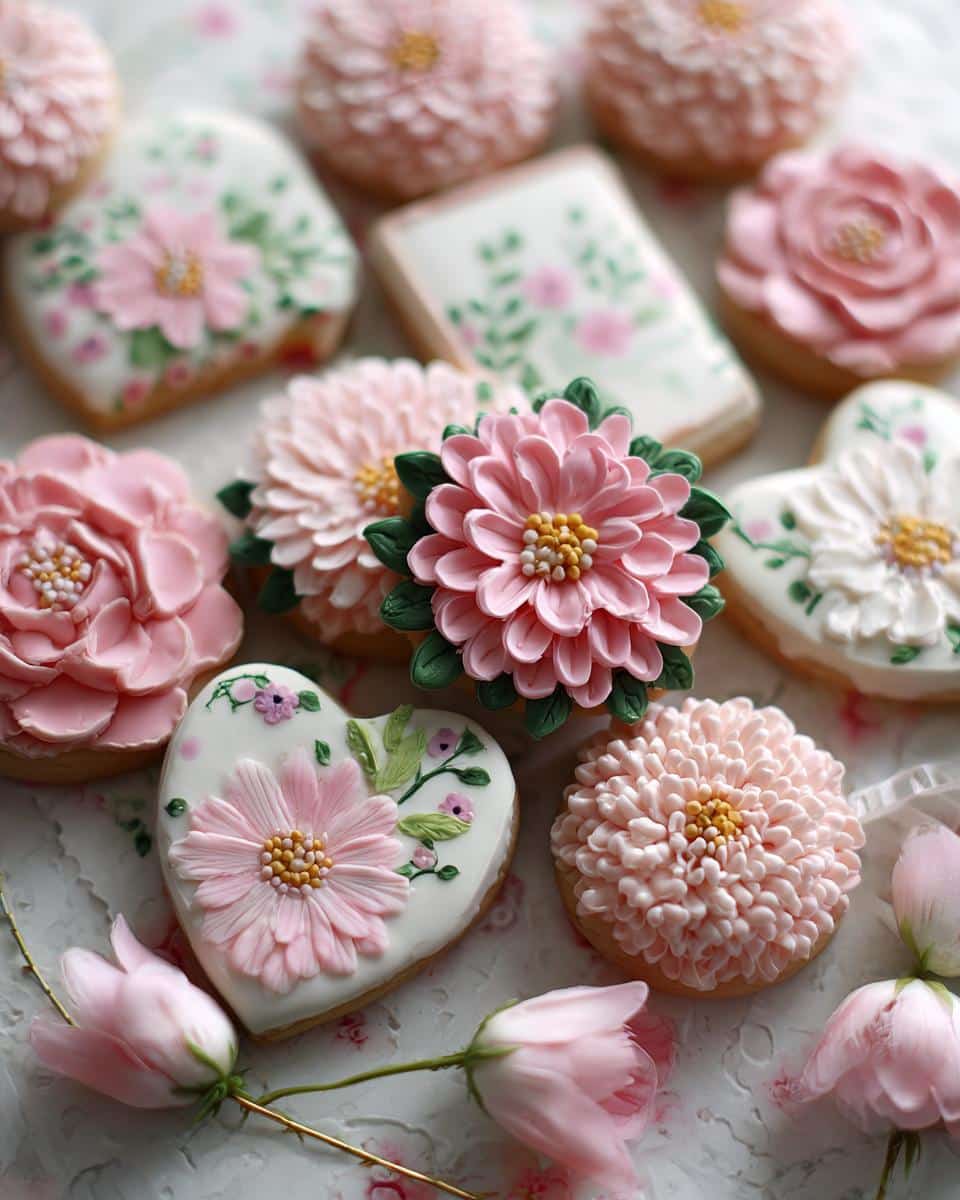
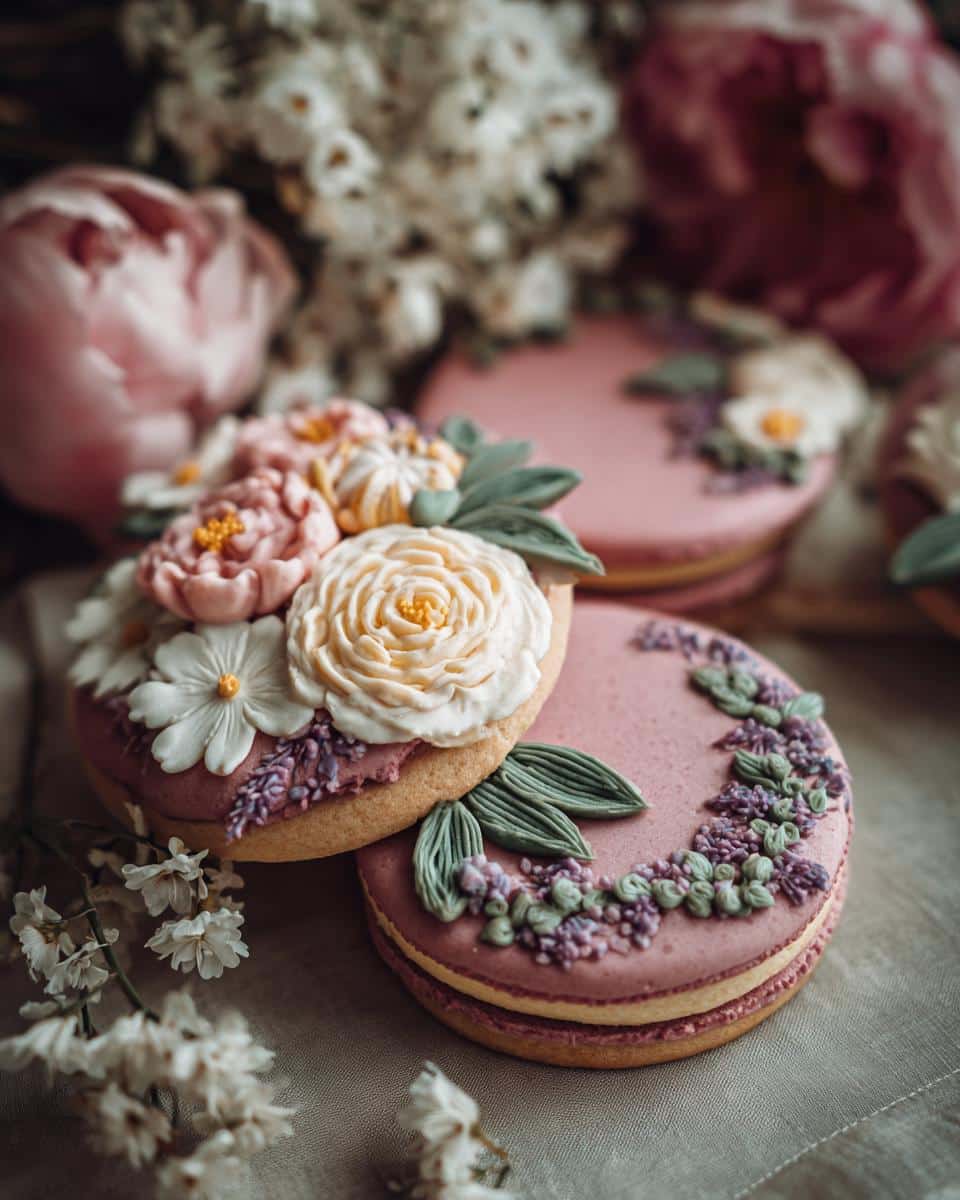
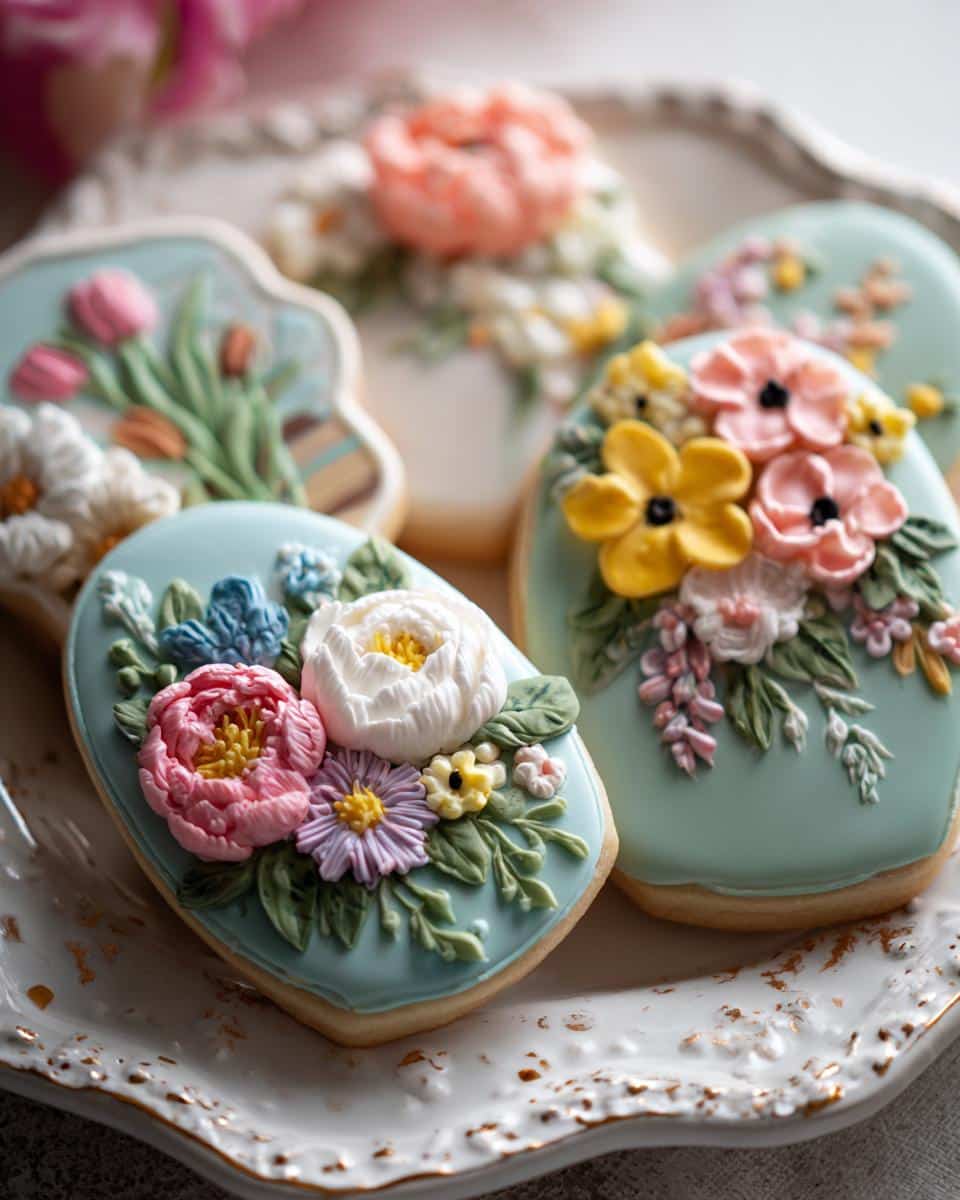
Oh, a spring bridal shower! Is there anything sweeter? Well, maybe these spring bridal shower cookies decorated just perfectly! When spring is in the air, and love is blooming, nothing says “celebration” quite like a batch of beautifully decorated cookies. I think the real magic is presenting a platter of edible art. It’s like saying, “Congratulations!” in the most delicious and delightful way possible.
I remember baking cookies for my cousin Sarah’s bridal shower years ago. I stressed and worried! I was determined to make them absolutely perfect, even trying out a brand new royal icing recipe the day before. Long story short, the icing was a disaster! It was way too runny. Luckily, with a quick trip to the store and a deep breath (or five!), I managed to whip up a new batch just in time. The cookies were adorned with tiny edible flowers and monograms. They were a hit! So, trust me when I say, a little love and a lot of sprinkles go a long way when you are making your own spring bridal shower cookies decorated.
Why You’ll Adore These Spring Bridal Shower Cookies Decorated
Okay, seriously, here’s why you’re gonna *love* making these cookies for a spring bridal shower. I promise it’s worth it!
- Easy to customize: Seriously, unleash your inner artist! Any color, any sprinkle, any design goes.
- They’re SO springy: I mean, pastel colors? Edible flowers? Butterflies? It just screams “spring bridal shower!”
- Delicious flavor that everyone loves: Who can resist a yummy cookie? It’s a guaranteed crowd-pleaser.
- Perfect for gifting: Stack ’em in a cute box, tie a ribbon around it? Boom! Adorable and delicious present.
- Just plain fun: Seriously, grab your girlfriends, put on some music, and get decorating. It’s a party in itself!
Ingredients for Your Spring Bridal Shower Cookies Decorated
Alright, gather ’round, cookie creators! Here’s what you’ll need to make these gorgeous spring bridal shower cookies decorated. I like to get everything prepped and measured before I even *think* about turning on the oven. It makes things so smooth…usually!
For the Cookies:
- 3 cups all-purpose flour, plus more for dusting (trust me, you’ll need it!)
- 1 cup (2 sticks) unsalted butter, softened– really, truly softened, not melted!
- 1 cup granulated sugar
- 1 large egg
- 2 teaspoons vanilla extract – the good stuff!
- 1 teaspoon baking powder
- ½ teaspoon salt
For the Royal Icing:
- 4 cups powdered sugar, sifted (don’t skip this, or you’ll have lumps!)
- 3 tablespoons meringue powder
- ½ cup warm water
- Gel food coloring, in the prettiest spring shades you can find!
How to Make Spring Bridal Shower Cookies Decorated: Step-by-Step Instructions
Okay, my dears, let’s get down to the nitty-gritty! Here’s how we transform simple ingredients into stunning spring bridal shower cookies decorated. Don’t worry, I’ll walk you through every step. And remember, even if they aren’t “perfect,” they’re made with love, and that’s what counts!
- Make the Cookie Dough: In a large bowl, cream together the softened butter and granulated sugar until light and fluffy. Beat in the egg and vanilla extract. In a separate bowl, whisk together the flour, baking powder, and salt. Gradually add the dry ingredients to the wet ingredients, mixing until just combined. Don’t overmix!
- Chill the Dough: Wrap the dough in plastic wrap and refrigerate for at least 30 minutes. This is ESSENTIAL! Cold dough is easier to roll out and will prevent your cookies from spreading too much in the oven. Trust me; you don’t wanna skip this.
- Cut Out the Cookies: Preheat your oven to 350°F (175°C). On a lightly floured surface, roll out the chilled dough to about ¼ inch thickness. Use your favorite cookie cutters to cut out shapes. I love using floral shapes, hearts, and even little dress shapes.
- Bake the Cookies: Place the cut-out cookies onto ungreased baking sheets. Bake for 8-10 minutes, or until the edges are lightly golden brown. Keep a close eye on them – they can burn quickly.
- Cool the Cookies: Let the cookies cool on the baking sheets for a few minutes before transferring them to a wire rack to cool completely. This is important, don’t ice warm cookies!
- Make the Royal Icing: In a large bowl, beat together the powdered sugar and meringue powder. Gradually add the warm water, mixing until smooth. Beat for 5-7 minutes, or until the icing forms stiff peaks.
- Color the Icing: Divide the royal icing into separate bowls and add gel food coloring to each bowl, mixing until you achieve your desired shades. I’m talking petal pink, baby blue, lemon yellow, you know, all the spring fancies!
- Decorate! Now for the fun part! Transfer the colored icing to piping bags or squeeze bottles. Decorate the cooled cookies with the royal icing. Add sprinkles, edible glitter, or any other decorations you like.
Safety Note: Food coloring can stain, so be careful! I always wear an apron. - Let the Icing Set: Allow the icing to dry completely before storing the cookies. This can take several hours, or even overnight. I usually just leave them out on the counter, uncovered. Be patient; a steady hand wins the race!
Essential Tips for Perfect Spring Bridal Shower Cookies Decorated
Want to make sure your spring bridal shower cookies decorated are *chef’s kiss* perfect? Of course, you do! Here are a few tips and tricks I’ve learned over the years that make a huge difference.
- Dough Consistency Is Key: If your dough is too sticky, add a little more flour, a tablespoon at a time. If it’s too dry, add a teaspoon of water. You want it to be smooth and easy to roll.
- Piping Perfection: Practice your icing techniques on a piece of parchment paper before you start decorating your cookies. It’s all about getting that steady hand!
- Sprinkle Smart: Add sprinkles while the icing is still wet, or they won’t stick. And don’t be afraid to get creative with sprinkle combinations!
- Baking Time Matters: Keep a close eye on your cookies while they’re baking. Overbaked cookies will be dry and brittle. You want them to be just lightly golden around the edges.
Creative Ideas for Decorating Your Spring Bridal Shower Cookies Decorated
Alright, my creative cookie friends, it’s time to talk decorating! This is where you really get to make these spring bridal shower cookies decorated sparkle. And hey, If you’re short on ideas, check out these bridal shower desserts! But I’ve got some ideas too. Let’s jump right in:
- Pastel Paradise: Think soft pinks, baby blues, mint greens, and lavender. These colors scream “spring!” Use different shades of each color to create a subtle ombre effect.
- Edible Flowers: You can find edible flowers online or at specialty baking stores. Press them gently into the wet icing for a super elegant look.
- Monogram Magic: Use a fine-tipped piping bag to write the bride’s initials or a simple “Mr. & Mrs.” It’s personal and oh-so-chic!
- Lacy Lovely: Practice your lace piping skills! A delicate lace pattern around the edge of the cookie looks absolutely stunning. Don’t worry if your lines wiggle a little – it adds character!
- Sprinkle Sensations: Don’t underestimate the power of sprinkles! Use a mix of different shapes, sizes, and colors for a playful and festive touch. Think of it as edible confetti!
Make-Ahead and Storage Tips for Your Spring Bridal Shower Cookies Decorated
Okay, so you’re planning a bridal shower, and let’s be real, life gets hectic! Good news: You can absolutely get a head start on these spring bridal shower cookies decorated! The cookie dough can be made up to 3 days in advance. Just keep it wrapped tightly in the fridge. You can even freeze it for later. As for the icing, whip it up a day ahead and store it in an airtight container in the fridge. When you’re ready to decorate, just bring it to room temperature and give it a good stir!
Once those cookies are iced and decorated, store them in an airtight container at room temperature. They’ll stay fresh for about a week… if they last that long! I always sneak a few extra right after I ice them–oops!
Frequently Asked Questions About Spring Bridal Shower Cookies Decorated
Got questions about making these adorable spring bridal shower cookies decorated? I thought you might! Here are some answers to common questions I get asked all the time. And hey, if you’re looking for more inspo, check out these baby in bloom cookies —the techniques are totally transferrable!
Can I use a different type of flour?
While all-purpose flour gives the best texture, you *can* experiment! For a slightly denser cookie, try using whole wheat pastry flour. Just be aware that it might affect the color and flavor a bit. I say, give it a try for one batch! Just don’t do the whole shower with it without “testing” it once or twice. Err… tasting, not testing!
What’s the best way to prevent the icing from cracking?
Cracked icing is a bummer, I know! The key is humidity. Make sure your icing isn’t too thick, and let the cookies dry in a room with moderate humidity. Avoid placing them near a vent or in direct sunlight. Sometimes, a *tiny* spritz of water over the icing can help too. I live in the south, so humidity is rarely a problem *sigh*!
Can these cookies be frozen?
Yesiree, you sure can! Decorated cookies freeze surprisingly well. Just make sure the icing is completely dry first. Wrap them individually in plastic wrap and then place them in an airtight container. They’ll keep in the freezer for up to 2-3 months. To thaw, just let them sit at room temperature for a few hours. Easy peasy!
How far in advance can I make these spring bridal shower cookies decorated ?
As mentioned before, the dough and the icing can definitely be done ahead of time. Once the cookies are completely decorated, they are best within a week. If you’re giving these as gifts, keep that 1-week timeframe in mind so that your beautiful and delicious art is at its best!
Nutritional Information Disclaimer for Spring Bridal Shower Cookies Decorated
Heads up, cookie lovers! Just a little note that all nutritional info’s an estimate. It *really* depends on the brands and amounts you use. So, ya know, don’t hold me to it!
Enjoyed This Recipe? Leave a Comment Below!
Hey there! Did you have a blast making these spring bridal shower cookies decorated? I’d just love to hear about your experience! Seriously, it makes my day.
Why not whip up a batch of my world famous chocolate chip cookies next? Be sure to check out about us section!
Leave a comment below sharing your tips, tricks, or any fun variations you tried. And hey, don’t forget to rate the recipe too! Happy baking, y’all!
Print
Spring Bridal Shower Decorated Cookies
- Total Time: 70 min
- Yield: 24 cookies
- Diet: Vegetarian
Description
Decorated cookies for a spring bridal shower.
Ingredients
- Cookie dough
- Royal icing
- Food coloring
- Sprinkles
Instructions
- Prepare cookie dough.
- Cut out cookies.
- Bake cookies.
- Prepare royal icing.
- Color icing.
- Decorate cookies.
- Let icing set.
Notes
- Use your favorite cookie dough recipe.
- Experiment with different icing colors and sprinkle combinations.
- Prep Time: 60 min
- Cook Time: 10 min
- Category: Dessert
- Method: Baking
- Cuisine: Mediterranean
Nutrition
- Serving Size: 1 cookie
- Calories: 150
- Sugar: 10g
- Sodium: 50mg
- Fat: 7g
- Saturated Fat: 4g
- Unsaturated Fat: 3g
- Trans Fat: 0g
- Carbohydrates: 20g
- Fiber: 0g
- Protein: 1g
- Cholesterol: 20mg