
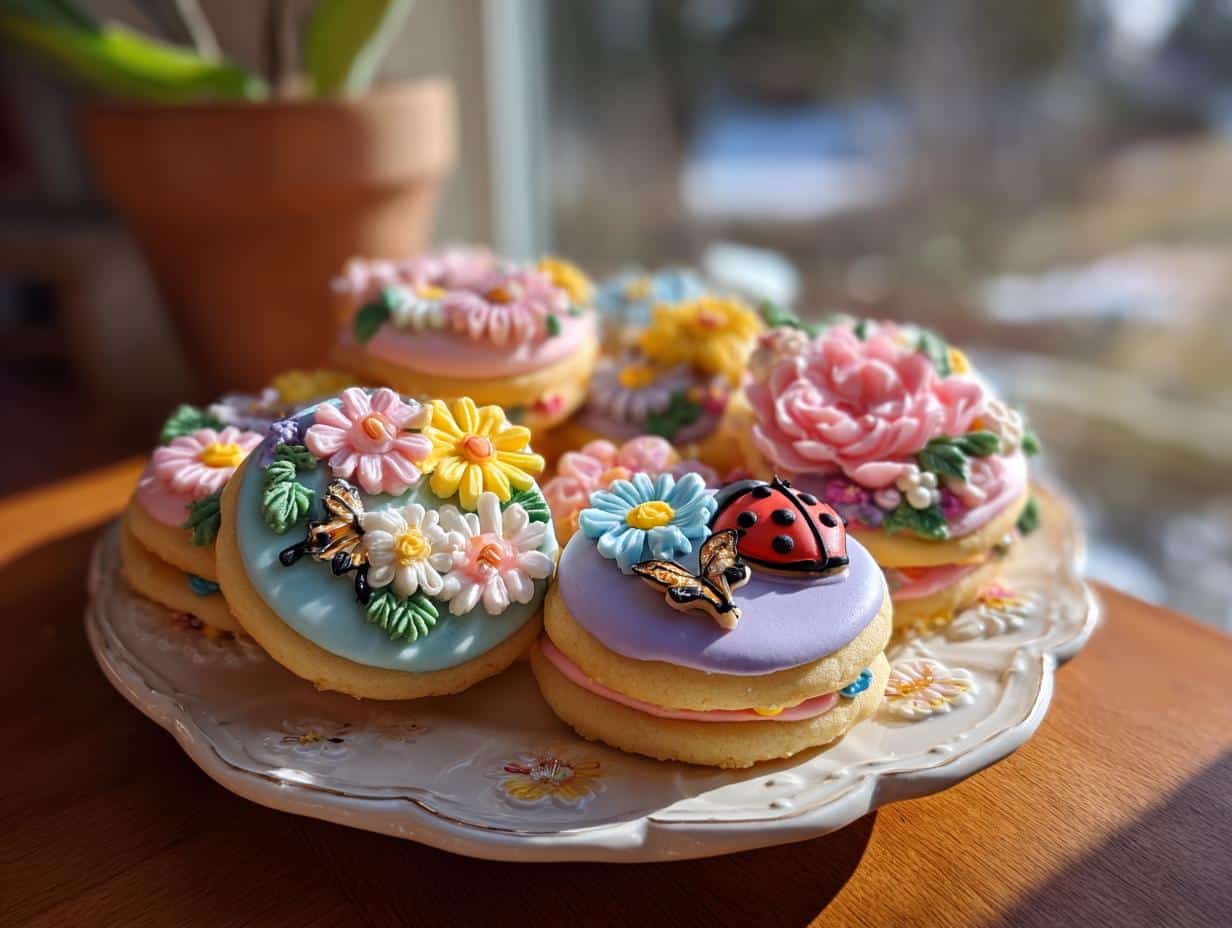
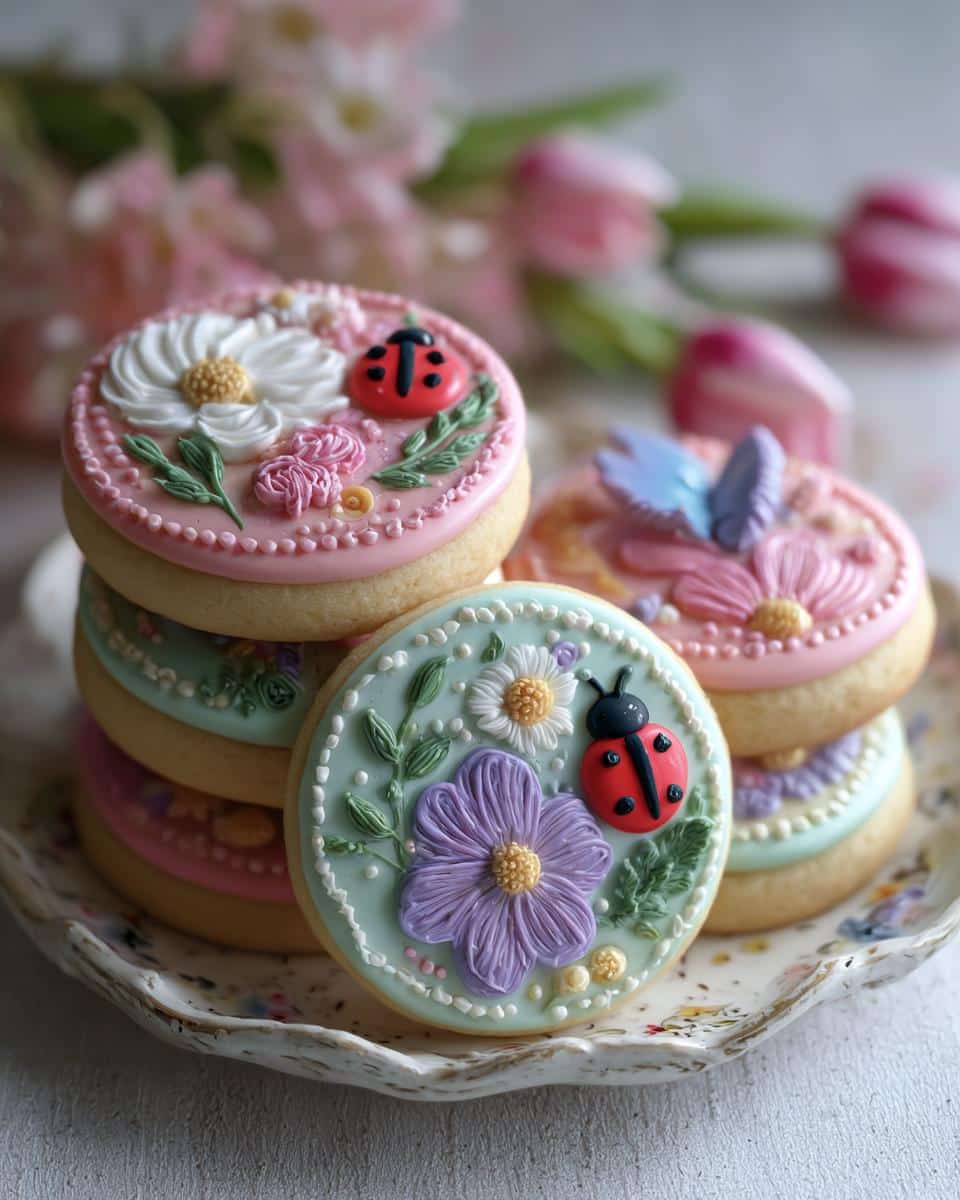
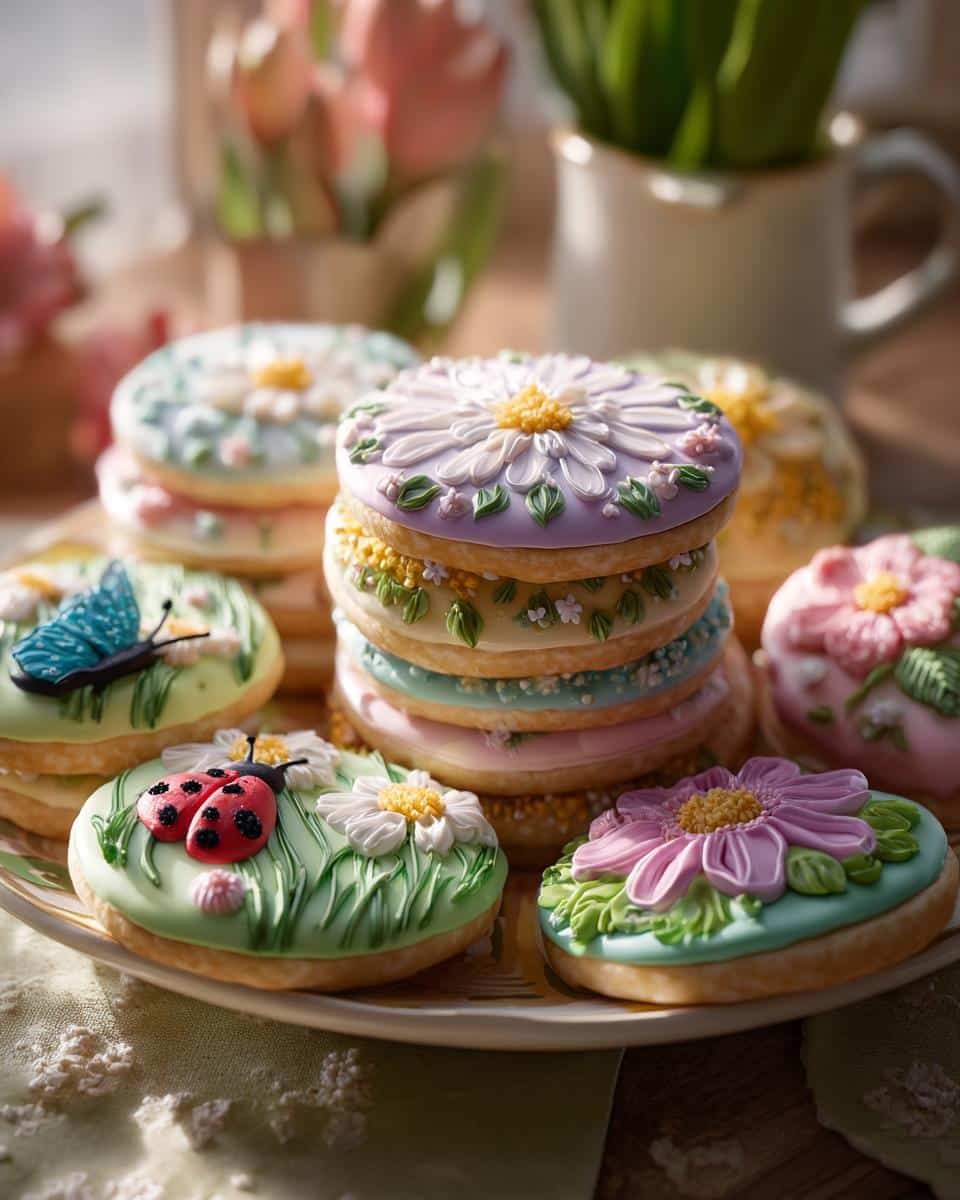
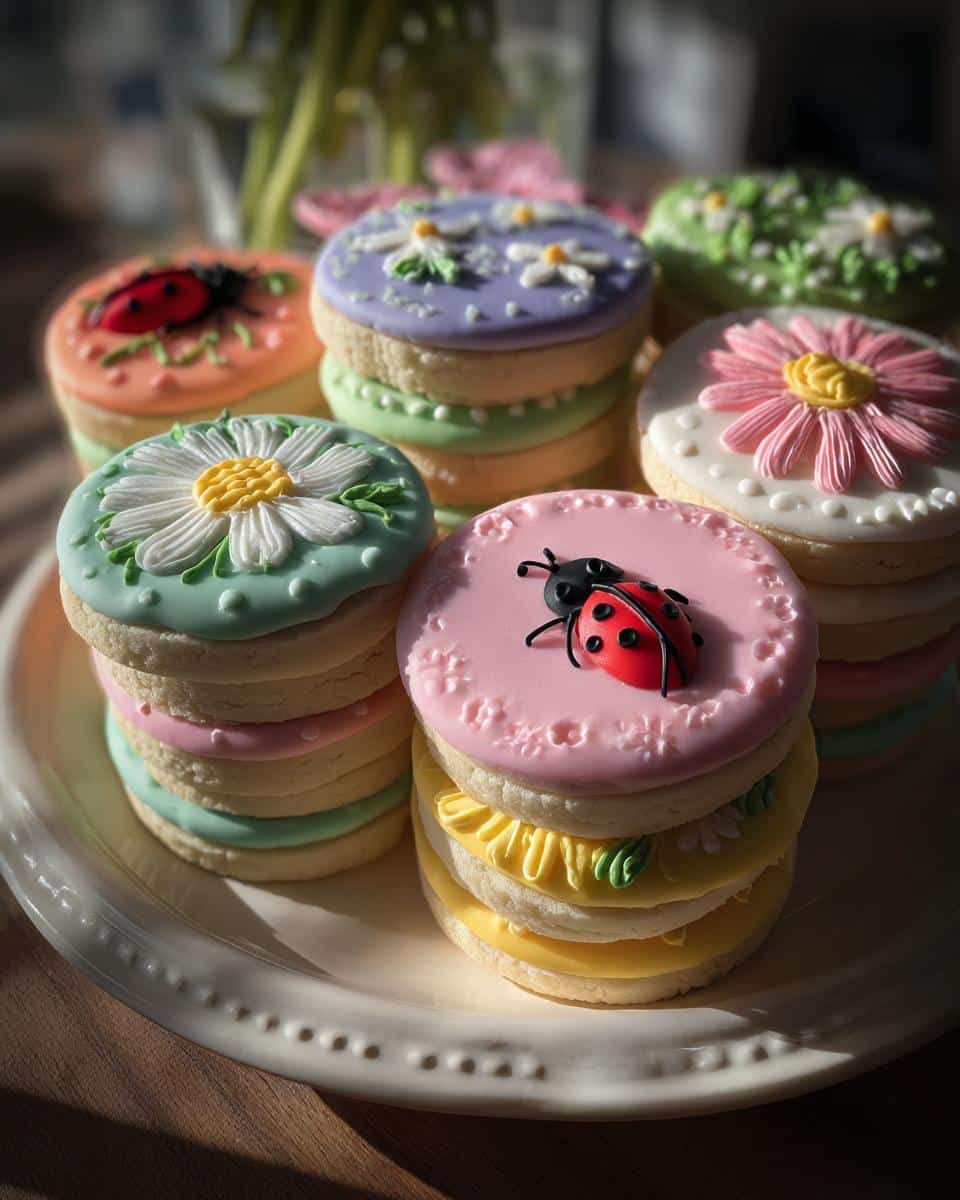
Oh, spring! Doesn’t it just make you wanna bake? And what’s more fun than whipping up a batch of *spring cookies decorated circle* style?! Seriously, this recipe is *the one* – super simple, totally doable, and gets everyone involved. I still remember when my littlest niece, bless her heart, helped me make these one year. Her “decorating” ended up being mostly eating sprinkles straight from the jar, but hey, that’s part of the charm, right? That’s why I adore *spring cookies decorated circle*; They’re fun, festive, and make for delicious memories!
Why You’ll Love These *Spring Cookies Decorated Circle*
Okay, so why should you even bother making these spring decorated circle cookies? Lemme tell ya, these ain’t your average cookies! You’ll love them because:
- They’re seriously easy – even if you’re a total beginner!
- Perfect for any spring holiday – Easter, Mother’s Day, you name it!
- The kids will go crazy decorating – it’s a total blast!
- That vanilla flavor? Trust me, it’s addictive.
- And the best part? They look absolutely gorgeous all decorated!
Ingredients for *Spring Cookies Decorated Circle*
Alright, gather ’round, cookie bakers! Here’s what you’ll need to make these delightful spring cookies decorated circle masterpieces. First, you will need 3 cups of all-purpose flour, 1 cup of unsalted butter (make sure it’s softened – so important!), 1 cup of granulated sugar, 1 large egg, 1 teaspoon of vanilla extract, and ½ teaspoon of baking powder. Oh, almost forgot! You definitely need Royal icing for decorating – either store-bought or you can whip up your own (I usually buy mine!). Lastly, some gel food coloring for the icing works best for vibrant colors, trust me!
How to Make *Spring Cookies Decorated Circle*: Step-by-Step
Okay, cookie lovers, let’s get down to business! Here’s how you’re gonna make these adorable spring cookies decorated circle, step by glorious step. Don’t worry, I’ll walk you through it!
- First things first: Preheat your oven to 350°F (175°C). This is super important – you want that oven nice and ready!
- In a large bowl (and I mean large!), cream together your softened butter and sugar until it’s light and fluffy. This usually takes a few minutes with an electric mixer. You can do it by hand, but, whew, your arm might get tired!
- Next, beat in that egg and vanilla extract. Just until combined, nothing crazy.
- Now, in a separate bowl (yes, another one!), whisk together the flour and baking powder. This makes sure the baking powder is evenly distributed, which is key.
- Gradually add the dry ingredients to the wet ingredients. Mix it slowly until a dough forms. Be careful not to overmix! Overmixing = tough cookies, and nobody wants that.
- Roll out the dough on a lightly floured surface. About ¼ inch thick is perfect. If the dough is too sticky, just add a little more flour.
- Cut out circles using your favorite cookie cutter. I use a simple round one for these, but feel free to get fancy! You can use little flower ones too.
- Place the cookies on a baking sheet lined with parchment paper. Parchment paper is your friend! It prevents sticking and makes cleanup a breeze.
- Bake for 8-10 minutes. Keep a close eye on them! You want the edges to be lightly golden.
- Let the cookies cool completely on a wire rack. And I mean COMPLETELY. This is crucial before you start decorating, or your icing will melt. And nobody wants melted icing disasters!
- While the cookies are cooling, prepare your royal icing. Divide it into separate bowls, one for each color you want to use.
- Add your food coloring to each bowl of icing, mixing until you achieve your desired colors. Remember – gel food coloring is the way to go for vibrant hues!
- Now for the fun part: Decorate those cooled cookies with your royal icing. Get creative! Use sprinkles, edible glitter, whatever makes your heart sing!
- Finally, let the icing set completely before serving. This can take a few hours, so be patient! Trust me, it’s worth it.
Tips for Perfect *Spring Cookies Decorated Circle*
Want your spring cookies decorated circle to be total showstoppers? Of course, you do! Here are a few of my tried-and-true tips to make sure they turn out just right:
- **Dough consistency is key:** Your dough should be firm but not dry. If it’s too sticky, add a *teensy* bit more flour.
- **Rolling it out:** Roll evenly for uniform baking. Uneven cookies? No thanks!
- **Baking time matters:** Keep a close eye! Ovens vary, so start checking at 7 minutes.
- **Icing Tips:** Work with a piping bag for more detailed designs! Don’t worry if you mess up; icing is forgiving!
- Cool Cookies = Happy Icing: I can’t stress this enough – Cookies MUST be cool before icing, or you’ll have a melty mess on your hands!
Ingredient Notes and Substitutions for *Spring Cookies Decorated Circle*
Okay, let’s chat ingredients! Knowing a little more can seriously up your cookie game. Plus, sometimes you gotta make do with what’s in the pantry, right?
- Flour Power: I always use all-purpose flour for these. It gives the cookies a nice, tender crumb. But, if you’re feeling adventurous, you could try a 50/50 mix of all-purpose and cake flour. Just don’t use *only* cake flour – they’ll be too delicate!
- Better Butter: Unsalted butter is my go-to ’cause you can control the saltiness. Softened is key! If it’s melted, oops! Your cookies will spread too thin.
- Sugar & Spice: Plain ol’ granulated sugar works perfectly. Don’t go swapping it for brown sugar unless you want a totally different cookie!
- Gel Food Coloring: Trust me on this one! Gel food coloring gives you the *most* vibrant colors without adding extra liquid to your icing. Liquid food coloring can make your icing runny, and ain’t nobody got time for that!
Make-Ahead and Storage Tips for *Spring Cookies Decorated Circle*
Want to get a jump start on those *spring cookies decorated circle*? Smart move! You can totally make the dough ahead of time. Just wrap it up tight in plastic wrap and pop it in the fridge for up to 2 days. When you’re ready to bake, let it sit at room temperature for about 30 minutes to soften slightly. As for the baked cookies, store them in an airtight container. Undecorated cookies will stay fresh for about a week. Decorated ones? Maybe 3-4 days, depending on your icing. But, let’s be real, they’ll probably disappear way before that!
Frequently Asked Questions About *Spring Cookies Decorated Circle*
Got questions about making these adorable spring cookies decorated circle? Don’t worry, I’ve got answers! Here are a few of the most common questions I get asked:
Can I use a different type of flour?
Well, you *can*, but all-purpose flour really is the best for these. It gives them the perfect texture! If you experiment, just keep in mind it might change the final result.
Can I freeze the cookies?
Absolutely! You can freeze the baked, *undecorated* cookies for up to 3 months. Just thaw them completely before decorating. Freezing decorated cookies isn’t ideal – the icing might get a little wonky.
How do I prevent the icing from cracking?
Cracked icing can be such a bummer, right? To avoid it, make sure your icing isn’t too thick! A slightly thinner consistency is less likely to crack. Also, don’t put the cookies in the fridge to speed up the drying process. Let them air dry at room temperature.
My dough is too sticky! What do I do?
Oops! Don’t panic! Just add a little more flour, a tablespoon at a time, until it’s easier to handle. But be careful – You don’t want to add *too* much or your cookies will be tough!
Can I make the royal icing from scratch?
Of course, you can! While I normally grab the pre-made stuff to save me some time, if you have a favorite royal icing recipe and are ready to go all in on these spring cookies decorated circle, follow your heart!
Estimated Nutritional Information for *Spring Cookies Decorated Circle*
Okay, so here’s the deal – this is just a rough estimate, but each lovely spring cookies decorated circle probably has around 150 calories, 7g of fat, 1g of protein, and 20g of carbs. Just figured you’d wanna know!
Enjoy Your *Spring Cookies Decorated Circle*
Alright, my friends, what are you waiting for? Get in that kitchen and bake up some spring cookies decorated circle goodness! Seriously, you won’t regret it. And hey, when you do, come on back here and leave a comment to tell me how they turned out (I *love* hearing from you guys!). Snap a picture and share it on social media too! Happy baking!
Print
Spring Decorated Circle Cookies
- Total Time: 40 min
- Yield: 24 cookies 1x
- Diet: Vegetarian
Description
Simple circle cookies decorated for spring.
Ingredients
- 3 cups all-purpose flour
- 1 cup unsalted butter, softened
- 1 cup granulated sugar
- 1 large egg
- 1 teaspoon vanilla extract
- 1/2 teaspoon baking powder
- Royal icing for decoration
- Food coloring for icing
Instructions
- Preheat oven to 350°F (175°C).
- In a large bowl, cream together butter and sugar until light and fluffy.
- Beat in egg and vanilla extract.
- In a separate bowl, whisk together flour and baking powder.
- Gradually add dry ingredients to wet ingredients, mixing until a dough forms.
- Roll out dough on a lightly floured surface and cut out circles using a cookie cutter.
- Place cookies on a baking sheet lined with parchment paper.
- Bake for 8-10 minutes, or until edges are lightly golden.
- Let cookies cool completely on a wire rack.
- Prepare royal icing and divide into separate bowls. Add food coloring to each bowl to achieve desired colors.
- Decorate cooled cookies with royal icing.
- Let icing set completely before serving.
Notes
- For best results, use gel food coloring for icing.
- Store decorated cookies in an airtight container at room temperature.
- Prep Time: 30 min
- Cook Time: 10 min
- Category: Dessert
- Method: Baking
- Cuisine: Mediterranean
Nutrition
- Serving Size: 1 cookie
- Calories: 150
- Sugar: 10g
- Sodium: 20mg
- Fat: 7g
- Saturated Fat: 4g
- Unsaturated Fat: 3g
- Trans Fat: 0g
- Carbohydrates: 20g
- Fiber: 0g
- Protein: 1g
- Cholesterol: 25mg