 Skip to content

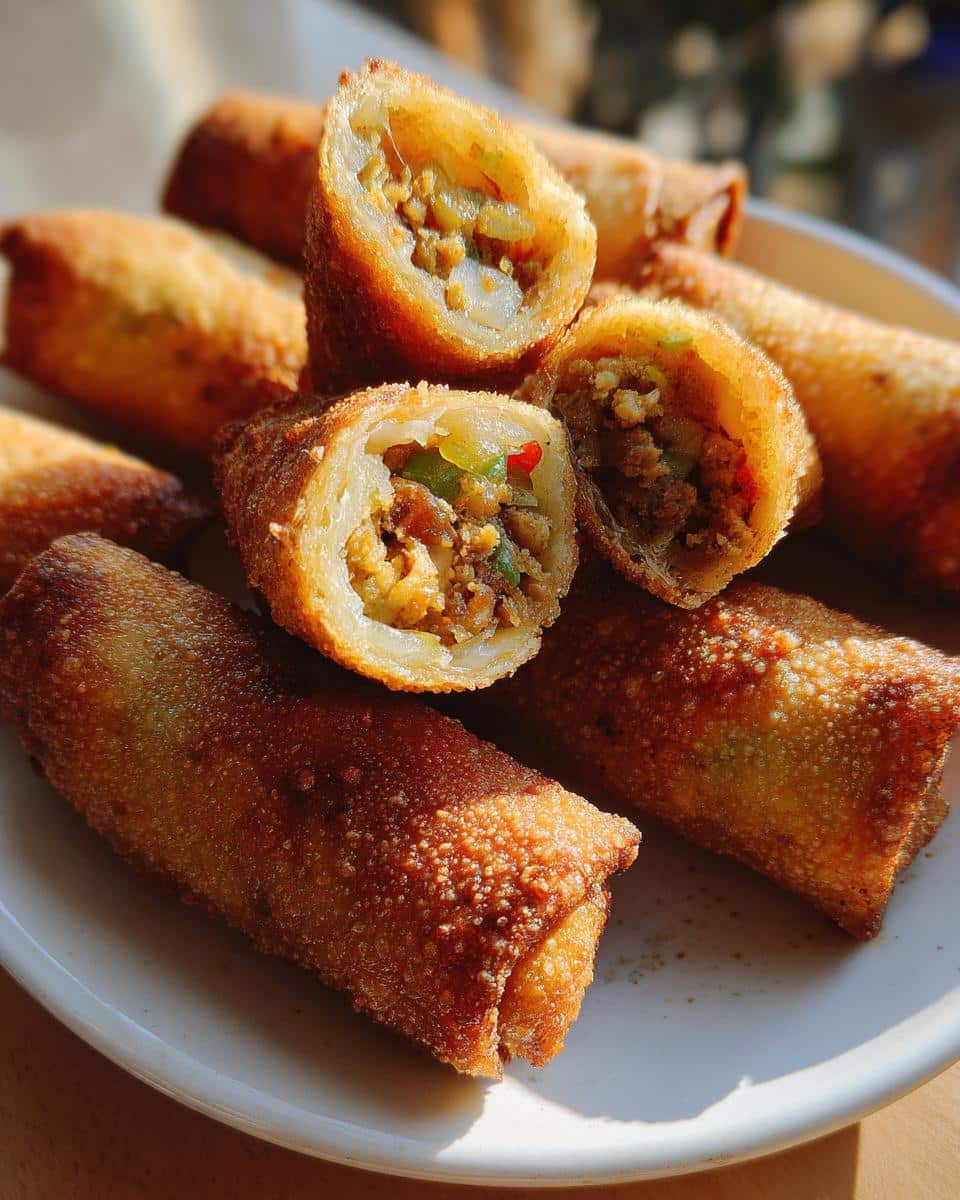
Oh my goodness, let me tell you about one of my absolute favorite things to make, and eat, and just obsess over – a truly amazing, crispy, utterly irresistible batch of traditional Filipino lumpia! Seriously, if you’ve never had homemade lumpia, you’re in for such a treat. There’s just something magical about those perfectly golden, crunchy spring rolls, filled with savory deliciousness. I remember the first time I tried a truly authentic lumpia at a potluck, and I just *had* to learn how to make them myself. It became a bit of a mission, trying different recipes until I landed on this one, which, trust me, is the real deal. It’s comforting, it’s exciting, and it’s always a huge hit. This traditional Filipino lumpia recipe isn’t just food; it’s a celebration in crispy, savory bites, and I can’t wait for you to experience it!
Why You’ll Love This Traditional Filipino Lumpia Recipe
Okay, so why *this* lumpia recipe? Because it’s honestly the best! You’re going to fall head over heels for it, just like I did. Here’s why this recipe is going to be your new go-to:
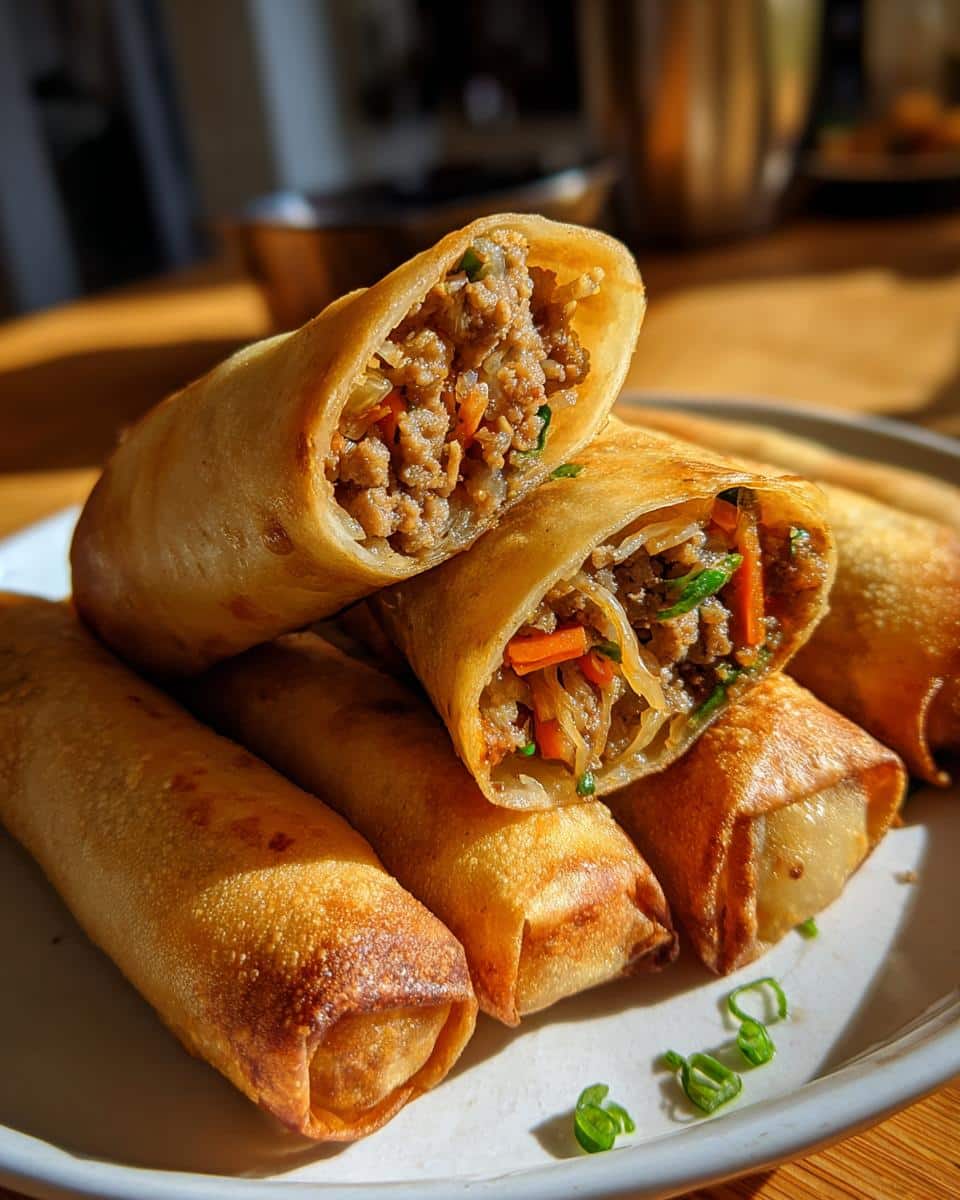
- Unbeatable Crispy Goodness: We’re talking golden-brown perfection, with that satisfying crunch that just screams, “Eat me!”
- Authentic Flavor Bomb: This isn’t some watered-down version. Every bite is packed with that classic, savory Filipino taste that makes lumpia so beloved.
- Crowd-Pleaser Extraordinaire: Seriously, make a batch of these, and watch them disappear. They’re perfect for parties, family dinners, or just a really good snack.
- Surprisingly Versatile: While we’re going traditional, you’ll see how easy it is to tweak things just a little to make them your own.
- So Rewarding to Make: There’s just something so satisfying about rolling these beauties and then seeing them fry up perfectly. You’ll feel like a kitchen wizard!
Essential Ingredients for Traditional Filipino Lumpia
Alright, let’s get down to the nitty-gritty – what you’ll need to make these amazing lumpia! Trust me, these ingredients are pretty straightforward, and most of them you probably have on hand or can grab easily at any grocery store. The magic really happens when they all come together. I like to lay everything out before I start, it just makes the whole process so much smoother and less chaotic! Here’s your shopping list for the filling and the rest of the magic:
- For the Filling:
- 1 lb ground pork (lean or regular, your choice!)
- 1 cup carrots, finely chopped (we want small, almost undetectable pieces here)
- 1/2 cup celery, finely chopped (same as the carrots, tiny bits!)
- 1/2 cup jicama, finely chopped (this is optional, but it adds a lovely, subtle crunch and freshness – totally worth it if you can find it!)
- 1/2 cup onion, finely chopped
- 3 cloves garlic, minced (don’t skimp on the garlic, it’s essential!)
- 1 egg, beaten (our little binder)
- 2 tablespoons soy sauce (for that umami punch)
- 1 teaspoon black pepper (freshly ground, if you’re feeling fancy!)
- 1 teaspoon salt (adjust to your taste, of course!)
- For Assembling and Frying:
- 50 sheets lumpia wrappers (look for spring roll wrappers in the refrigerated section, usually near tofu or produce)
- Oil for deep frying (vegetable, canola, or peanut oil works great)
- Sweet chili sauce or a vinegar-garlic dipping sauce (for serving – my absolute favorite part!)
Step-by-Step: How to Make Traditional Filipino Lumpia
Alright, friends, this is where the magic happens! Don’t be intimidated; making lumpia is actually really straightforward and so much fun. It’s a bit like an assembly line, but a delicious one! Just follow along with me, and you’ll be a lumpia-rolling master in no time. I promise!
-
Get Your Filling All Mixed Up: Grab a big bowl – the bigger, the better, for easy mixing. Toss in your ground pork, all those finely chopped carrots, celery, jicama (if you’re using it!), onion, and minced garlic. Then, crack in that beaten egg, splash in the soy sauce, and sprinkle in the black pepper and salt. Now, get in there with your hands (or a sturdy spoon, but hands are better for really getting it mixed!) and combine everything thoroughly. You want to make sure all those flavors are
well distributed throughout the meat. Nobody wants a bland bite of lumpia! -
Set Up Your Rolling Station: Find a clean, dry surface – your counter or a big cutting board works perfectly. Lay one lumpia wrapper down with one point facing you, like a diamond. Keep the rest of your wrappers covered with a damp paper towel so they don’t dry out. Trust me on this, dry wrappers crack, and we don’t want that!
-
Time to Fill and Fold: Spoon about 1 to 2 tablespoons of your meat mixture onto the corner closest to you. Shape it into a small log, leaving a bit of space around the edges. Now, take that bottom corner and fold it tightly over the filling. Next, fold in the side corners towards the center, like you’re wrapping a little present. It should look like a neat envelope at this point.
-
Roll ‘Em Up Tight: Start rolling the lumpia away from you, keeping it as tight as possible, until you reach the top corner. Before you complete the roll, dab a tiny bit of water on that top corner. This acts like glue and seals your lumpia securely. Repeat this process for all the remaining filling and wrappers. This is a great step to do with a buddy or your kids (if they’re old enough to be careful!).
-
Get Ready to Fry: In a deep pan, pot, or even a Dutch oven, pour in enough oil for deep frying. You want at least 2-3 inches of oil so your lumpia can swim! Heat it over medium heat until it reaches around 350-375°F (175-190°C). If you don’t have a thermometer, you can test it by dropping a tiny bit of filling in; it should sizzle immediately and rise to the top.
-
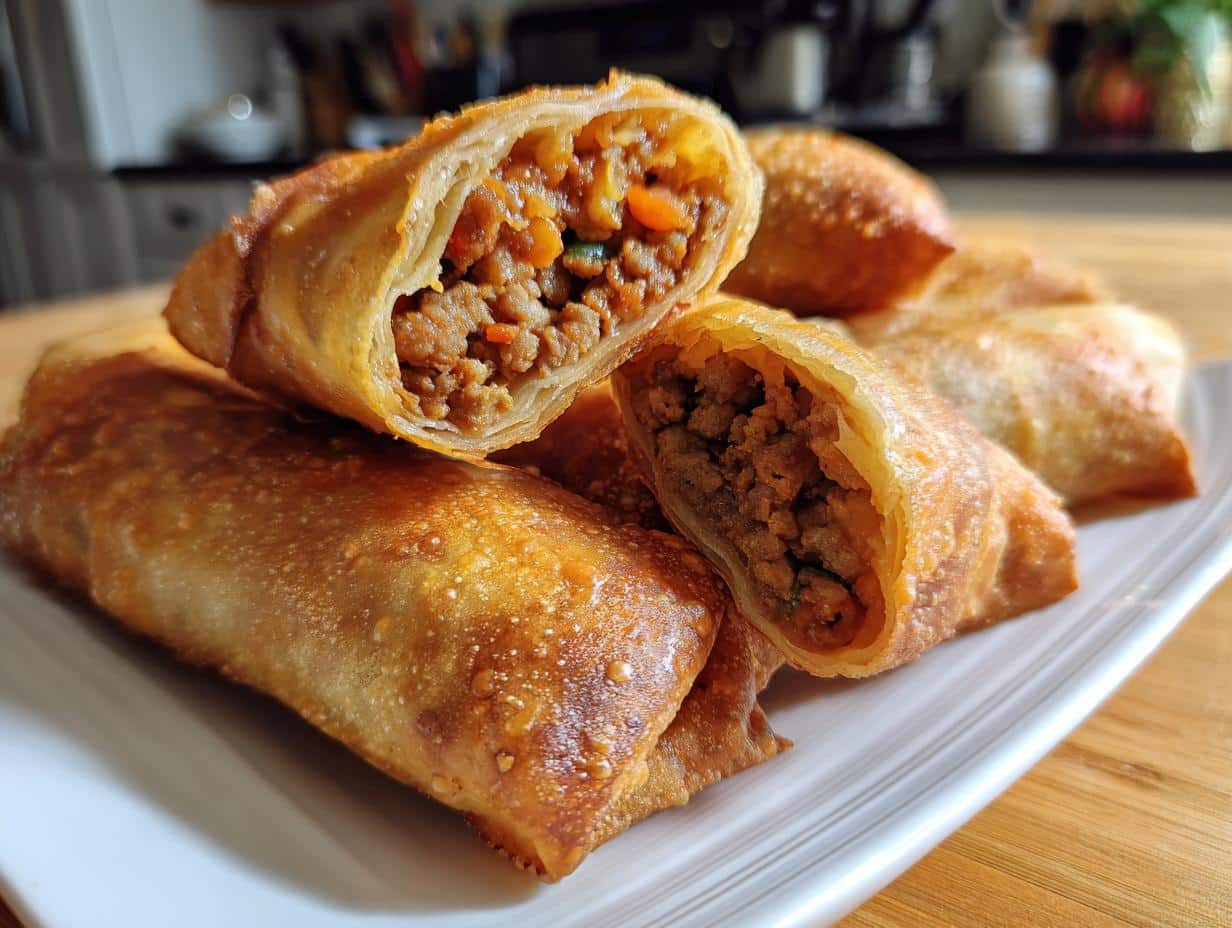
Fry to Golden Perfection: Carefully, and I mean *carefully*, place a few lumpia into the hot oil. Don’t overcrowd the pan, or the oil temperature will drop, and your lumpia won’t get crispy (they’ll be greasy, and nobody wants that!). Fry them in batches for about 5-7 minutes, turning them occasionally, until they’re beautifully golden brown and crispy on all sides. The meat inside will be cooked through at this point.
-
Drain and Serve: Use a slotted spoon or tongs to remove the fried lumpia from the oil. Place them on a wire rack that’s been lined with paper towels underneath. This lets all that excess oil drip off, keeping them super crispy! Serve these hot, right away, with your favorite sweet chili sauce or that tangy vinegar-garlic dipping sauce. Enjoy!
Tips for Perfect Traditional Filipino Lumpia
So, you’ve got your ingredients, you’re ready to roll, but let me share a few little secrets I’ve picked up along the way to make your traditional Filipino lumpia absolutely perfect. These aren’t just rules, they’re little bits of wisdom that make all the difference between good lumpia and, well, *OMG-I-need-more* lumpia!
- Keep Those Wrappers Moist! This is huge. Lumpia wrappers dry out *so fast* and then they crack when you try to fold them. Keep your unused wrappers under a slightly damp paper towel. Trust me, it’s a game-changer!
- Don’t Be Shy with the Filling (But Don’t Overstuff Either): You want a nice, plump lumpia, but if you put too much filling, it’s harder to roll tightly and might burst while frying. Aim for 1-2 tablespoons, forming a neat log. Just enough hearty goodness!
- Roll ‘Em Tight, Seal ‘Em Right: A good, tight roll keeps the filling securely inside and gives you that perfect shape. And that little dab of water on the end? Essential! It’s like magic glue for your lumpia.
- Heat That Oil Just Right: This is probably the most crucial part for crispiness. If the oil isn’t hot enough, your lumpia will soak up too much oil and be greasy instead of crispy. Too hot, and they’ll burn before the inside cooks. Around 350-375°F is ideal. No thermometer? Drop a tiny piece of filling in. If it sizzles and floats, you’re good to go!
- Don’t Crowd the Pan! I know it’s tempting to get them all done at once, but seriously, resist! Frying too many lumpia at once drops the oil temperature and leads to soggy results. Fry in batches, giving each one plenty of room. This is also how I make my crispy Brussels sprouts, by the way – giving everything space!
- Drain, Drain, Drain: Once they’re golden and beautiful, get them out of that oil and onto a wire rack lined with paper towels. This helps amazing excess oil drip off, keeping them perfectly crisp.
Traditional Filipino Lumpia: Ingredient Notes and Variations
Okay, so while this is a *traditional* Filipino lumpia recipe (and truly, it’s perfect as is!), part of the fun of home cooking is making it your own, right? I totally get that! Here are a few notes and variations you can try while still keeping that amazing, authentic spirit alive. Don’t be afraid to play around a little; cooking should be an adventure!
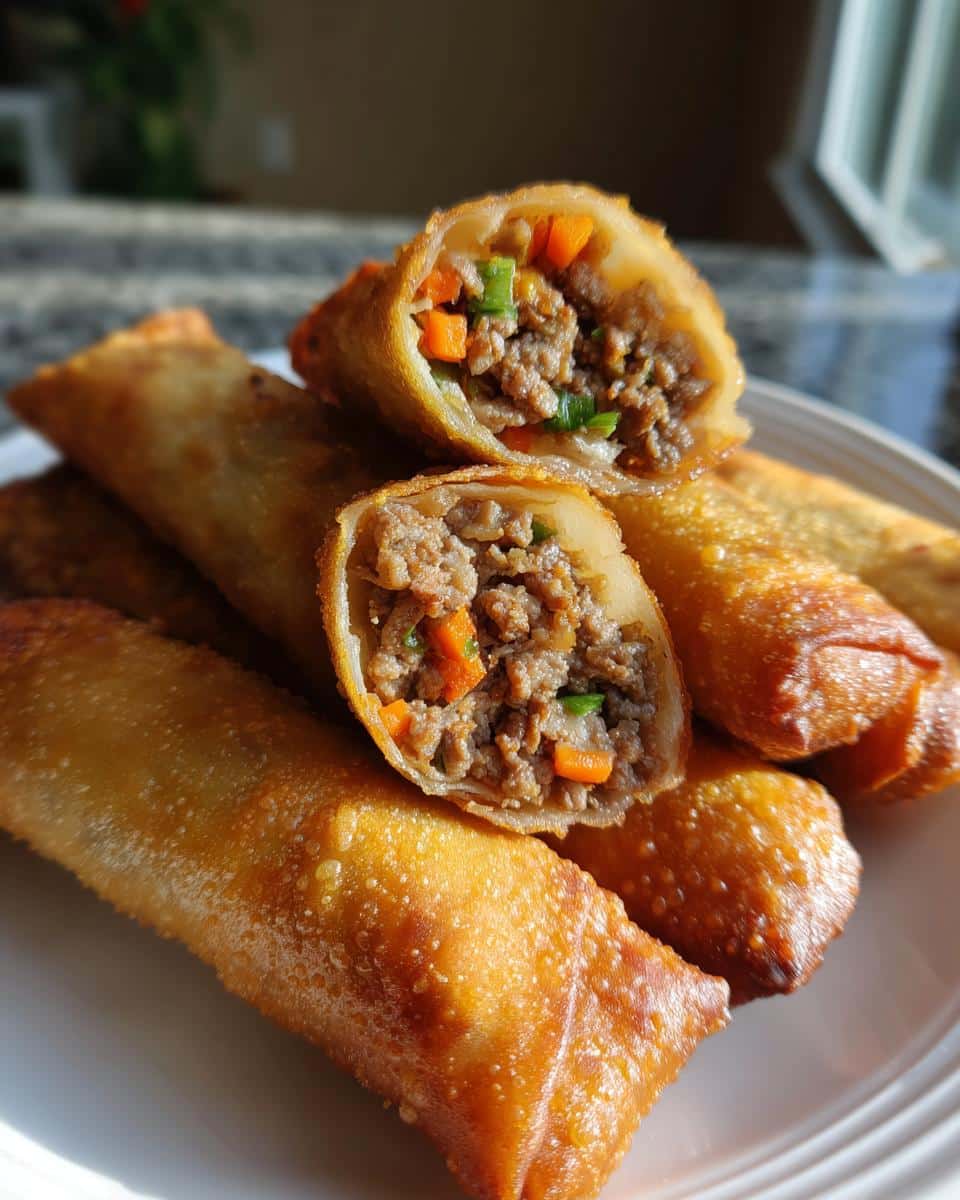
- Meat Alternatives: Not a pork fan? No problem! This recipe works beautifully with ground beef, ground chicken, or even a mix of meats. Just make sure whatever you choose is relatively lean so you don’t end up with too much grease.
- Veggie Boost: Want to sneak in some more goodness? Finely chopped water chestnuts add an extra crunch, or a bit of finely shredded cabbage or green beans can be a nice addition. Just don’t go overboard, or you’ll change the texture too much.
- Seasoning Swaps: While I love the classic soy sauce and pepper combo, you can always adjust the salt to your taste, or even add a tiny pinch of garlic powder if you’re a serious garlic lover like me!
- For the Spicy Folks: If you like a little heat, a tiny dash of red pepper flakes or a finely minced bird’s eye chili in the mix wouldn’t hurt. Just a little, to wake things up!
Serving Suggestions for Your Traditional Filipino Lumpia
Okay, so your kitchen probably smells absolutely incredible right now, right? Those golden, crispy lumpia are fresh out of the oil, all perfect and waiting! Now comes the fun part: serving them up! My absolute favorite way to enjoy these beauties is hot, right away, with a fantastic dipping sauce. That’s really all you need!
- The Classic Dippers: You absolutely cannot go wrong with good old sweet chili sauce. It’s that perfect balance of sweet and a little bit spicy that just *works* with the savory lumpia. But if you want to get super traditional, a simple vinegar-garlic dipping sauce (just vinegar, minced garlic, a pinch of sugar, and soy sauce to taste!) is out of this world.
- Make it a Meal: While lumpia are amazing appetizers, they also make a fantastic main course! Serve them alongside a warm bowl of steamed jasmine rice and maybe a fresh, crisp cucumber salad. It’s simple, satisfying, and authentically delicious. You could even pair them with something fresh like my chimichurri sauce on the side for a little zing!
Storage and Reheating Your Traditional Filipino Lumpia
Okay, so you’ve somehow managed to not eat every single lumpia hot out of the fryer! Amazing self-control, friend! Now, what to do with the leftovers, or even better, how to prep some ahead of time? Don’t worry, I’ve got you covered – we want those beauties to stay as crispy as freshly made!
For leftovers, just pop any cooked lumpia into an airtight container and store them in the fridge for up to 3-4 days. To reheat them, *please* don’t use the microwave unless you like sad, soggy lumpia. The absolute best way to bring them back to life is in a toaster oven, air fryer, or a hot oven (around 375°F or 190°C) for 8-10 minutes, until they’re hot and crispy again. You can also freeze uncooked lumpia! Just arrange them in a single layer on a baking sheet, freeze until solid, then transfer to a freezer-safe bag for up to 2-3 months. Fry them directly from frozen, adding a few extra minutes to the cooking time.
Frequently Asked Questions About Traditional Filipino Lumpia
Okay, I know you might have a few burning questions about getting these lumpia just right! That’s totally normal. Here are some of the most common things people ask me when they’re tackling their first batch of traditional Filipino lumpia:
What kind of wrappers should I use for traditional Filipino lumpia, and how do I handle them?
Oh, this is an important one! You’ll want to look for “lumpia wrappers” or “spring roll wrappers” in the refrigerated section of your Asian grocery store, often near the tofu or fresh noodles. They’re usually thin and round or square. The key to handling them? Keep them covered! They dry out super fast, so always keep the stack you’re not actively using under a damp paper towel. This prevents them from cracking as you roll, which is just the most frustrating thing ever!
Can I make pork lumpia recipe ahead of time? And how do I store un-fried lumpia?
Absolutely! That’s one of the best things about these! You can roll your lumpia ahead of time. Just arrange the un-fried lumpia in a single layer on a baking sheet lined with parchment paper, making sure they don’t touch. Then, pop that sheet into the freezer until they’re solid. Once frozen, transfer them to a freezer-safe bag or container. They’ll stay good for up to 2-3 months! You can fry them straight from frozen, just add a few extra minutes to the cooking time until they’re golden and cooked through. This makes them perfect for parties or a quick weeknight treat, much like a batch of Christmas appetizers you can prep ahead!
What’s the difference between lumpia shanghai recipe and other lumpia?
Great question! When most people talk about “traditional Filipino lumpia” or “lumpia shanghai recipe,” they’re often referring to these exact savory, slender fried rolls filled with ground meat (usually pork) and finely chopped vegetables. There are other kinds of lumpia in Filipino cuisine, like fresh lumpia (lumpiang sariwa), which aren’t fried, or even larger vegetable-only versions. But the kind we’re making here, the small, crispy, meat-filled ones, are what usually comes to mind with “lumpia shanghai.” They’re universally loved for that irresistible crunch!
What’s the best lumpia dipping sauce?
Okay, this is where personal preference really shines! For me, a classic sweet chili sauce is always a winner – that balance of sweet, tangy, and a little bit of heat just complements the savory lumpia perfectly. But if you want to go the authentic Filipino route, try a simple vinegar-garlic dipping sauce! Just mix white vinegar, minced garlic, a pinch of sugar, and a dash of soy sauce to taste. It’s tangy, a little pungent, and seriously addictive. Sometimes I even add a few thinly sliced chilies to it for an extra kick!
Estimated Nutritional Information for Traditional Filipino Lumpia
Just a quick heads-up about the nutritional info for these delicious traditional Filipino lumpia! While I’ve given you some estimates in the recipe card, please remember that these are just that – estimates. Things like the exact type of ground pork you use, how much oil your lumpia absorb, or even slight variations in vegetable amounts can change these numbers. So, think of them as a general guide, not a strict calculation!
Print
Traditional Filipino Lumpia Recipe
- Total Time: 65 min
- Yield: 50 pieces 1x
- Diet: Halal
Description
This recipe provides instructions for making traditional Filipino lumpia, a popular fried spring roll dish. It includes a detailed ingredient list and step-by-step instructions for preparation and cooking.
Ingredients
- 1 lb ground pork
- 1 cup finely chopped carrots
- 1/2 cup finely chopped celery
- 1/2 cup finely chopped jicama (optional)
- 1/2 cup finely chopped onion
- 3 cloves garlic, minced
- 1 egg, beaten
- 2 tablespoons soy sauce
- 1 teaspoon black pepper
- 1 teaspoon salt
- 50 sheets lumpia wrappers
- Oil for deep frying
- Sweet chili sauce or vinegar-garlic dipping sauce, for serving
Instructions
- In a large bowl, combine ground pork, carrots, celery, jicama (if using), onion, garlic, beaten egg, soy sauce, black pepper, and salt. Mix thoroughly until all ingredients are well combined.
- Lay one lumpia wrapper flat on a clean, dry surface with one corner pointing towards you.
- Place about 1-2 tablespoons of the meat mixture near the corner closest to you, forming a log shape.
- Fold the corner closest to you over the filling, tucking it tightly. Then, fold in the side corners towards the center.
- Roll the lumpia tightly away from you until you reach the opposite corner. Moisten the end corner with a little water to seal the wrapper securely.
- Repeat the process with the remaining mixture and wrappers.
- In a deep pan or pot, heat enough oil for deep frying over medium heat (around 350-375°F or 175-190°C).
- Carefully place a few lumpia into the hot oil, making sure not to overcrowd the pan. Fry the lumpia in batches until they are golden brown and crispy on all sides, and the meat filling is cooked through (about 5-7 minutes).
- Remove the fried lumpia with a slotted spoon or tongs and place them on a wire rack lined with paper towels to drain excess oil.
- Serve hot with sweet chili sauce or a vinegar-garlic dipping sauce.
Notes
- You can use ground beef, chicken, or a mixture of meats instead of pork.
- Adjust salt to your taste.
- Do not overcrowd the pan when frying to ensure even cooking and crispiness.
- Prep Time: 30 min
- Cook Time: 35 min
- Category: Appetizer
- Method: Deep Frying
- Cuisine: Filipino
Nutrition
- Serving Size: 1 piece
- Calories: 80
- Sugar: 1
- Sodium: 150
- Fat: 5
- Saturated Fat: 2
- Unsaturated Fat: 3
- Trans Fat: 0
- Carbohydrates: 6
- Fiber: 0.5
- Protein: 4
- Cholesterol: 15