 Skip to content

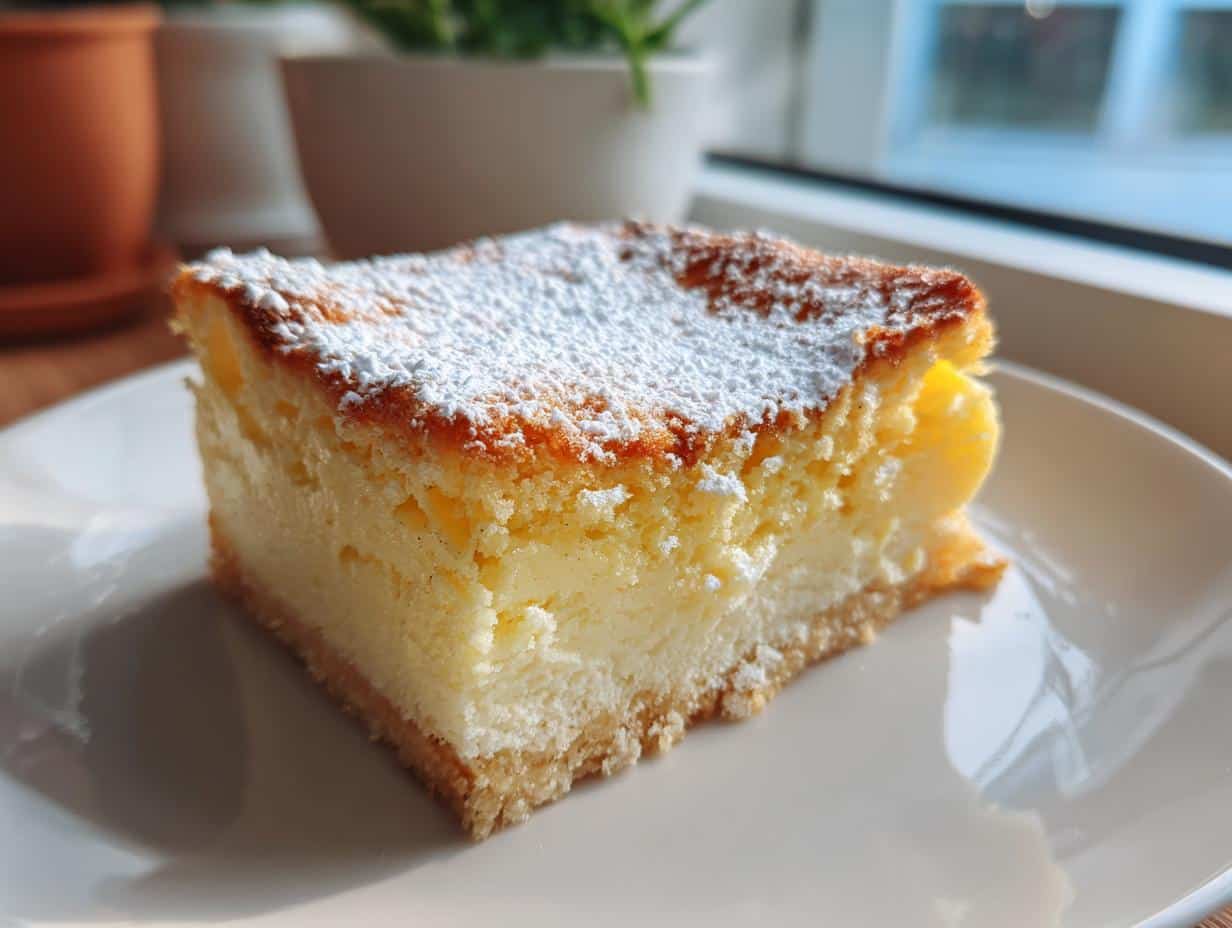
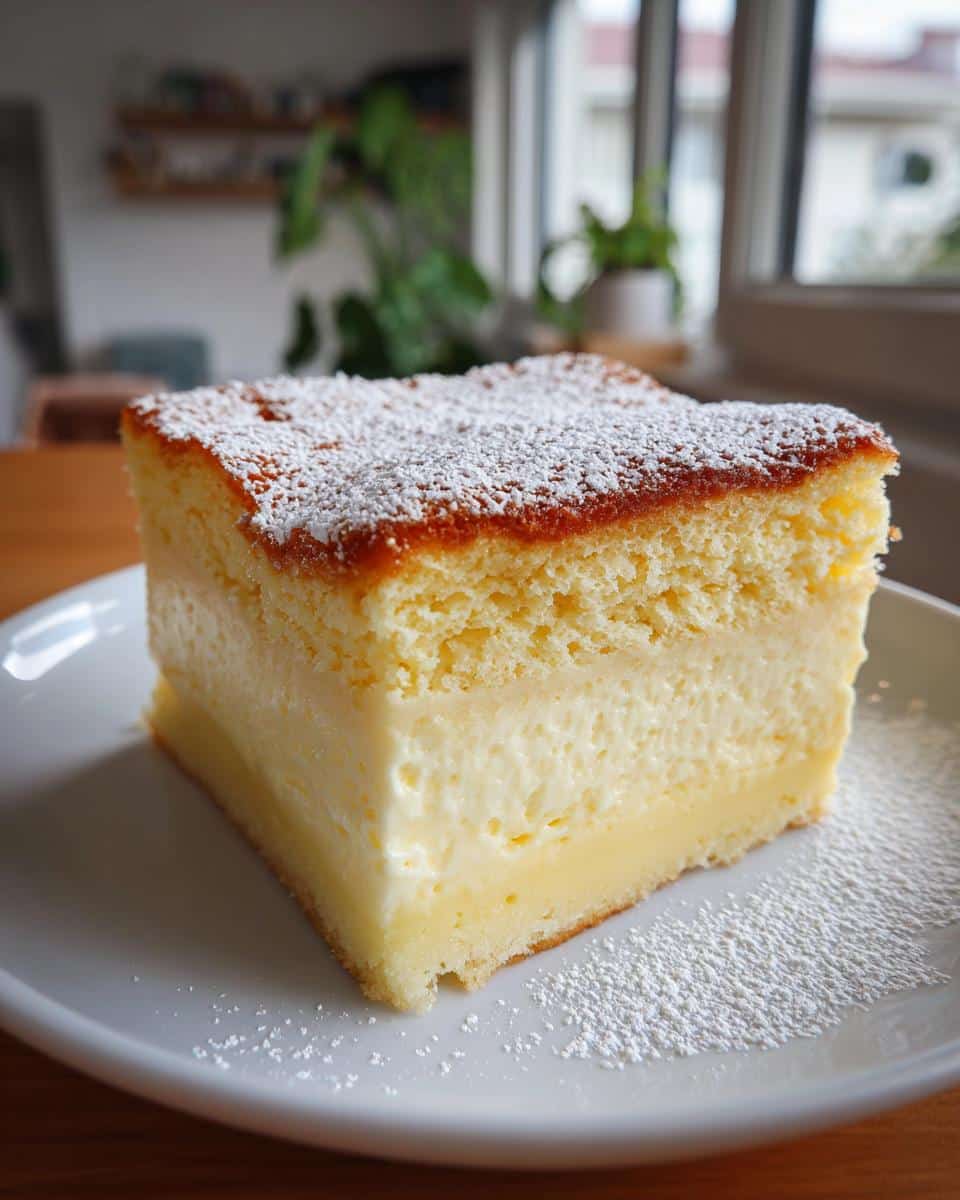
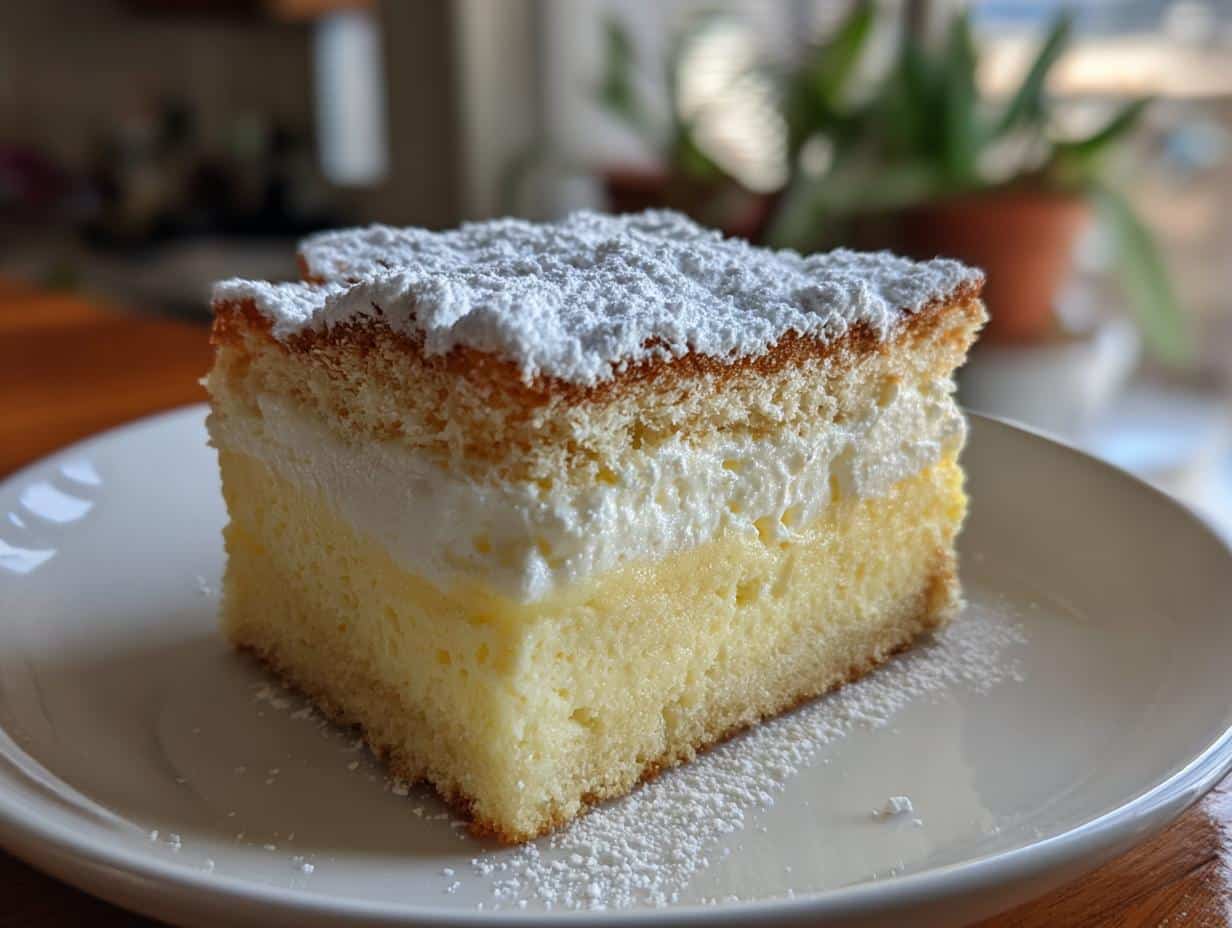
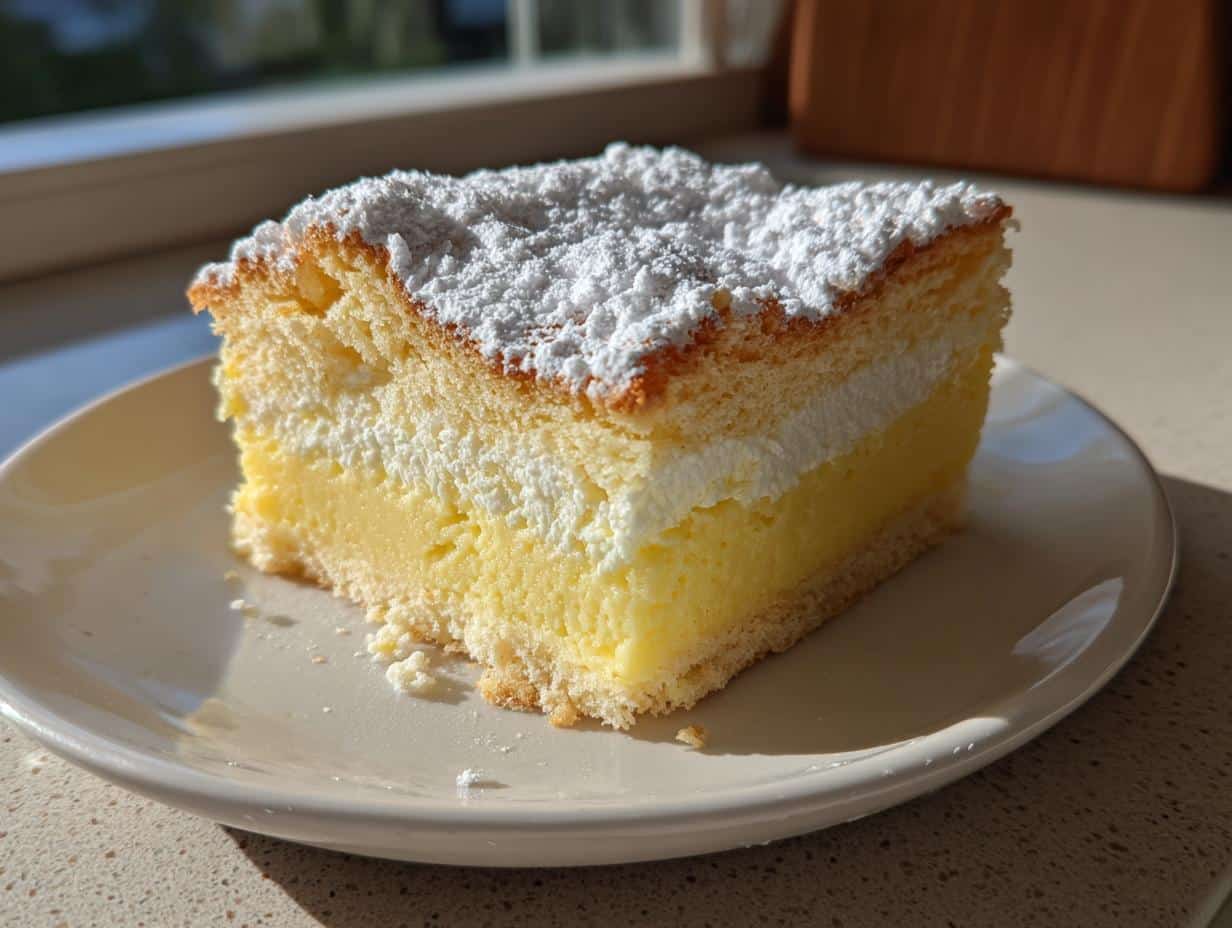
Oh, you guys! Let me tell you, the first time I saw this Vanilla Magic Custard Cake, I was absolutely captivated. It looked so fancy, sitting there with its perfect layers, and I just *had* to know how it worked! This isn’t just any vanilla cake; it’s a simple yet incredibly impressive dessert that literally forms three distinct layers while it bakes. You start with one thin batter in the pan, and then, ta-da! After baking, you have a dense custard base, a creamy middle, and a light, airy sponge top. It truly feels like magic!
Why You’ll Love This Vanilla Magic Custard Cake
Okay, so why should *this* Vanilla Magic Custard Cake be next on your baking list? Let me tell you, it’s pretty special. It’s one of those recipes that looks super fancy, but it’s deceptively easy to pull off. Seriously!
- No Fuss, Just Fun: You just mix up one batter, pour it in, and let the oven do all the hard work. No fiddly layering or separate components to bake.
- Picture Perfect: The way it magically separates into three distinct layers is just wow-worthy. It’s guaranteed to impress anyone you serve it to!
- Flavor Heaven: It’s got that comforting, creamy vanilla flavor that everyone adores. It’s rich, but still light enough that you’ll want another slice.
- A Little Bit of Everything: You get that dense, custardy bottom, a silky-smooth middle, and a fluffy cake top all in one bite. What’s not to love?
Essential Ingredients for Your Vanilla Magic Custard Cake
Alright, let’s talk ingredients! This Vanilla Magic Custard Cake really shines with just a handful of simple pantry staples. You don’t need anything crazy, just good quality basics, and a little attention to detail. Here’s what you’ll need to get started:
- Four large eggs, separated: This is key for those distinct layers!
- 150 grams granulated sugar: Just the right amount of sweetness.
- 1 teaspoon vanilla extract: A good quality one makes all the difference here.
- 125 grams unsalted butter, melted: Melting it gently is important.
- 115 grams all-purpose flour: Our binder!
- 500 ml warm milk: Not hot, not cold, just lovely and warm.
- Powdered sugar for dusting: For that pretty finish!
See? Nothing too wild! Just simple, honest ingredients ready to make some magic.
Step-by-Step Guide: How to Prepare Vanilla Magic Custard Cake
Alright, friends, grab your aprons! This is where the real fun begins and we turn those simple ingredients into a show-stopping Vanilla Magic Custard Cake. Don’t be intimidated by the “magic” part; I promise, it’s totally achievable. Just follow these steps, and you’ll be amazed!
- Prep Your Pan and Oven: First things first, get that oven preheating to a cozy 160°C (325°F). While it’s warming up, grab an 8-inch round cake pan. You’ll want to butter it *really* well and then dust it with flour. Don’t skimp here; you want that cake to slide out beautifully.
- Whisk Those Yolks: In your biggest mixing bowl, crack all four of those egg yolks. Toss in the granulated sugar and whisk, whisk, whisk! You’re going for a light, fluffy, almost pale yellow mixture. This takes a few minutes, so put some elbow grease into it!
- Add the Good Stuff: Now, stir in your vanilla extract and that lovely melted butter. Mix it until everything is just combined. It’ll smell amazing, I promise!
- Gentle with the Flour: Next up, gradually add your all-purpose flour. Mix it in gently, just until it’s incorporated. Seriously, stop before you even think about overmixing!
- Warm Milk Magic: Here’s a crucial bit! Slowly, slowly pour in that warm milk while you’re whisking continuously. Keep going until your batter is totally smooth. It’ll be quite thin, almost like a pancake batter, and that’s exactly what we want.
- Whip Those Whites: Grab a separate, super clean bowl and beat your egg whites. You’re looking for stiff peaks – you know, when you lift the whisk, and the peaks hold their shape proudly.
- Fold It In, Gently: This is the delicate part! Take about a third of your beaten egg whites and gently fold them into the batter. Then add another third, and finally the last bit. The key here is not to deflate those beautiful egg whites. You want to keep as much air as possible in there! The batter will still seem thin, but it’s loaded with potential!
- Into the Pan: Pour your now-thin-but-fluffy batter into your prepared cake pan. You’ll notice it looks… well, like one layer of batter. Trust the process!
- Bake Away: Pop that pan into your preheated oven and bake for about 50-60 minutes. You’re looking for a top that’s golden brown and a cake that’s set around the edges but still has a slight jiggle in the very center. It’s not like baking an oatmeal cake where you want it completely firm.
- Cool Down, Then Chill Out: Let the cake cool completely in the pan on a wire rack. Seriously, resist the urge to peek or cut into it! Once it’s cool, transfer it to the fridge for at least 2 hours, or even better, overnight. This chilling time is what helps those layers really firm up and become distinct.
- Dust and Serve: When you’re ready to serve, give it a beautiful dusting of powdered sugar. A little snow shower makes everything prettier! It’s kind of like dressing up an Oreo dump cake, but far more elegant.
Tips for Success with Your Vanilla Magic Custard Cake
Baking this Vanilla Magic Custard Cake is truly a joyful experience, and with just a few little tricks up your sleeve, you’ll nail it every single time. Think of these as my personal whispers of wisdom from my kitchen to yours!
- Ingredient Temp Matters: Make sure your eggs and milk are at room temperature. Seriously, it helps everything combine smoothly and makes for a more consistent batter. For the milk, just warm it gently on the stove or in the microwave until it’s comfortably warm, not hot.
- Melted Butter, Not Hot Butter: When you’re melting the butter, let it cool a bit before adding it to your egg yolk mixture. You don’t want to scramble those yolks!
- Don’t Be Afraid of the Jiggle: When it comes out of the oven, the center might still have a slight wobble. That’s *good*! It means the custard layer is doing its thing. It’ll firm up as it cools.
- The Power of Patience (and Chilling!): I know, I know, it’s hard to wait. But truly, this cake needs to cool completely at room temperature, then chill in the fridge for at least 2 hours, or even overnight. This is absolutely CRUCIAL for those gorgeous layers to set!
- My Top Tip: Don’t Overmix! As Lisa Raymond, I can’t stress this enough, especially after you add the flour and when you’re folding in those egg whites. Overmixing develops the gluten in the flour and deflates the air from the whites, which means you won’t get that delicate, distinct layering. Mix just until combined, that’s it!
Follow these little pearls of wisdom, and you’ll have a stunning Vanilla Magic Custard Cake that’s ready for its close-up!
Ingredient Notes and Substitutions for Vanilla Magic Custard Cake
Okay, let’s chat about a few of those ingredients for our Vanilla Magic Custard Cake, because sometimes the little details make all the difference, right?
- Warm Milk is Key: You absolutely want your milk warmed up, but not boiling hot! If it’s too hot, it’ll start to cook your egg yolks, giving you scrambled eggs instead of a smooth batter – and nobody wants that in their cake! Just a gentle warmth helps everything emulsify beautifully.
- Vanilla Extract: Go for the good stuff here if you can! Pure vanilla extract really elevates the flavor in a simple recipe like this. Avoid imitation vanilla if possible; it just doesn’t quite hit the same notes.
- Butter, Unsalted Please: I always bake with unsalted butter so I can control the salt content myself. If you only have salted, that’s okay, but maybe dial back any other salt you might be adding (though this recipe doesn’t call for extra, just a heads-up for other baking adventures!).
- Flour Power: All-purpose flour is perfect here. I wouldn’t recommend trying to swap it for gluten-free flour unless you’re very experienced with GF baking, as the texture can get a bit tricky with this specific cake.
Just a few little thoughts to help you out there!
Serving Suggestions for Vanilla Magic Custard Cake
Once your amazing Vanilla Magic Custard Cake has worked its magic and chilled to perfection, it’s time for the grand reveal! A simple dusting of powdered sugar is always elegant, but you can totally jazz it up! A fresh berry compote – think raspberries or sliced strawberries – adds a lovely tart contrast. Or, if you’re feeling extra decadent, a drizzle of warm caramel sauce. It’s also absolutely divine with a scoop of vanilla bean ice cream or just a simple cup of coffee for a cozy evening treat.
Storing and Reheating Your Vanilla Magic Custard Cake
So, you’ve got some glorious leftover Vanilla Magic Custard Cake? Lucky you! The best way to keep it fresh and tasting amazing is to store it in an airtight container in the refrigerator. This cake actually gets even better after a day or two in the fridge, as the layers fully set and the flavors meld. It’ll be perfectly good for 3-4 days. I don’t usually reheat it, as it’s meant to be served chilled, but if you absolutely must, a quick zap in the microwave for 10-15 seconds per slice can take the chill off!
Common Questions About Vanilla Magic Custard Cake
Okay, so you’ve heard all about this incredible Vanilla Magic Custard Cake, and maybe you’ve got some questions swirling around like batter in a bowl! No worries, I get it. It’s a bit different, but totally doable. Here are some of the most common things people ask me about it!
What makes this a ‘magic’ custard cake?
It’s pure kitchen alchemy! You simply pour one thin batter into your pan, and as it bakes, gravitational forces and temperature differences cause it to separate into three distinct layers: a dense custard on the bottom, a creamy middle, and a fluffy sponge cake on top. Isn’t that neat?
Can I make Vanilla Magic Custard Cake ahead of time?
Oh, absolutely! In fact, you really should. This custard cake needs a good long chill (at least 2 hours, but preferably overnight!) for those magical layers to fully set and firm up. It’s perfect for making the day before a party!
Why is my Vanilla Magic Custard Cake not setting?
Hmm, a couple of things could be happening. It might not have baked long enough – remember that slight jiggle is okay when it comes out of the oven, but it shouldn’t be liquid. Or, most commonly, it just needs more time to chill! That refrigeration step is non-negotiable for it to firm up properly.
Nutritional Information for Vanilla Magic Custard Cake
Just a quick heads-up on the nutritional details for this Vanilla Magic Custard Cake! The values you see are always estimates. They can change quite a bit depending on the exact brands and ingredients you use. So, just keep that in mind!
Print
Vanilla Magic Custard Cake
- Total Time: 80 min
- Yield: 8 servings 1x
- Diet: Vegetarian
Description
This cake forms three layers while baking: a dense custard base, a creamy middle, and a light sponge top. It is a simple yet impressive dessert.
Ingredients
- 4 large eggs, separated
- 150 g granulated sugar
- 1 tsp vanilla extract
- 125 g unsalted butter, melted
- 115 g all-purpose flour
- 500 ml warm milk
- Powdered sugar for dusting
Instructions
- Preheat your oven to 160°C (325°F). Grease and flour an 8-inch round cake pan.
- In a large bowl, whisk egg yolks with granulated sugar until light and fluffy.
- Stir in vanilla extract and melted butter until combined.
- Gradually add flour, mixing until just incorporated.
- Slowly pour in the warm milk, whisking continuously until the batter is smooth.
- In a separate clean bowl, beat egg whites until stiff peaks form.
- Gently fold the beaten egg whites into the batter in three additions. The batter will be thin.
- Pour the batter into the prepared cake pan.
- Bake for 50-60 minutes, or until the top is golden and the cake is set but still slightly jiggly in the center.
- Let the cake cool completely in the pan on a wire rack before refrigerating for at least 2 hours, or preferably overnight.
- Dust with powdered sugar before serving.
Notes
- Ensure the milk is warm, not hot, to prevent scrambling the eggs.
- Do not overmix the batter after adding flour or egg whites.
- Chilling the cake is crucial for the layers to set properly.
- Prep Time: 20 min
- Cook Time: 60 min
- Category: Dessert
- Method: Baking
- Cuisine: French
Nutrition
- Serving Size: 1 slice
- Calories: 320
- Sugar: 25g
- Sodium: 100mg
- Fat: 18g
- Saturated Fat: 10g
- Unsaturated Fat: 6g
- Trans Fat: 0.5g
- Carbohydrates: 32g
- Fiber: 1g
- Protein: 8g
- Cholesterol: 150mg