
Hey y’all! Max here, and I’ve got something super exciting to share today, a real game-changer straight from the bustling streets of Vietnam – the Vietnamese Rice Paper Pizza, or Bánh Tráng Nướng if you’re feeling fancy! You’ve probably seen this viral sensation popping up everywhere, and let me tell you, it’s every bit as fun and delicious as it looks. It’s got this amazing crispy texture that’s totally unexpected, and it’s so quick to whip up. It’s one of those global twists on comfort food that just makes my heart sing, and it’s so simple you’ll be making it all the time!
Why You’ll Love This Vietnamese Rice Paper Pizza
It’s crazy fast to make – seriously, we’re talking minutes! Super simple with just a few basic ingredients. That crispy, crunchy texture is out-of-this-world good! It’s a fantastic gluten-free alternative to regular pizza, and you can totally customize it with whatever toppings you love!
Gather Your Ingredients for Vietnamese Rice Paper Pizza
Alright, let’s get our shopping list ready! For this amazing Vietnamese Rice Paper Pizza, you’re going to want to grab a couple of those round rice paper wrappers – the big ones work best, about 20-22 cm across. Then, we need two eggs; if you’re feeling a bit fancy or want smaller individual pizzas, you can totally use 4 to 6 quail eggs instead! Don’t forget about a fourth of a cup of green onions, all chopped up nice and fine. Now, for the flavor boosters, you can add in a teaspoon or two of chili garlic sauce or Sriracha if you like a kick, and maybe some mayo or Kewpie for creaminess. Oh, and if you can find it, some pork floss is a fun little extra! You’ll just need a little bit of cooking oil, and then, of course, all your favorite toppings!
Simple Steps to Make Your Vietnamese Rice Paper Pizza
Okay, now for the fun part – making this amazing pizza! It really comes together in a flash. Here’s how we do it:
Preparing the Base and Toppings
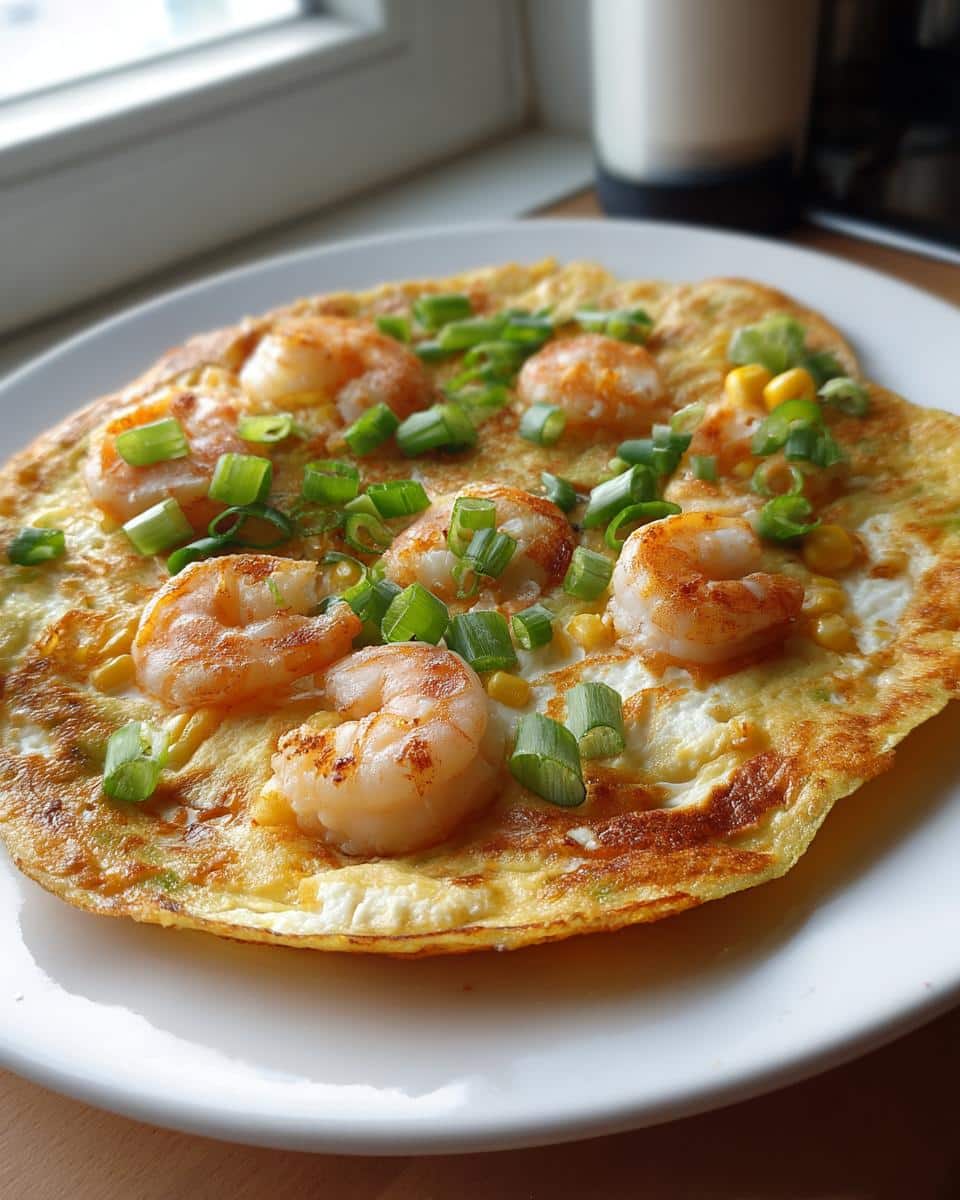
First things first, let’s get everything prepped. Finely chop those green onions, whisk up your eggs in a little bowl – just enough to combine them. Grab any other toppings you’re dreaming of, like little cooked shrimp or some corn. Having everything ready makes the cooking part super smooth!
Cooking Your Crispy Rice Paper Pizza
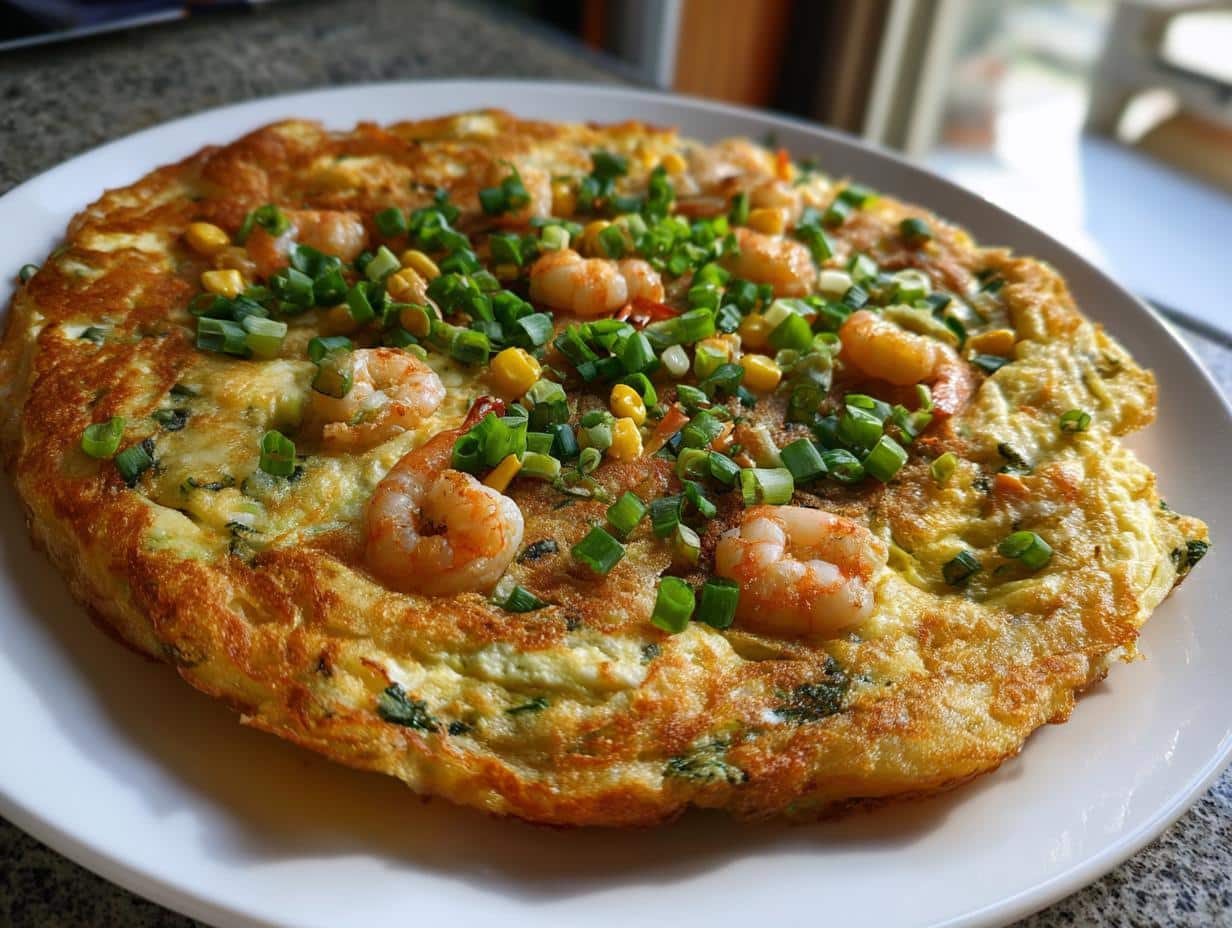
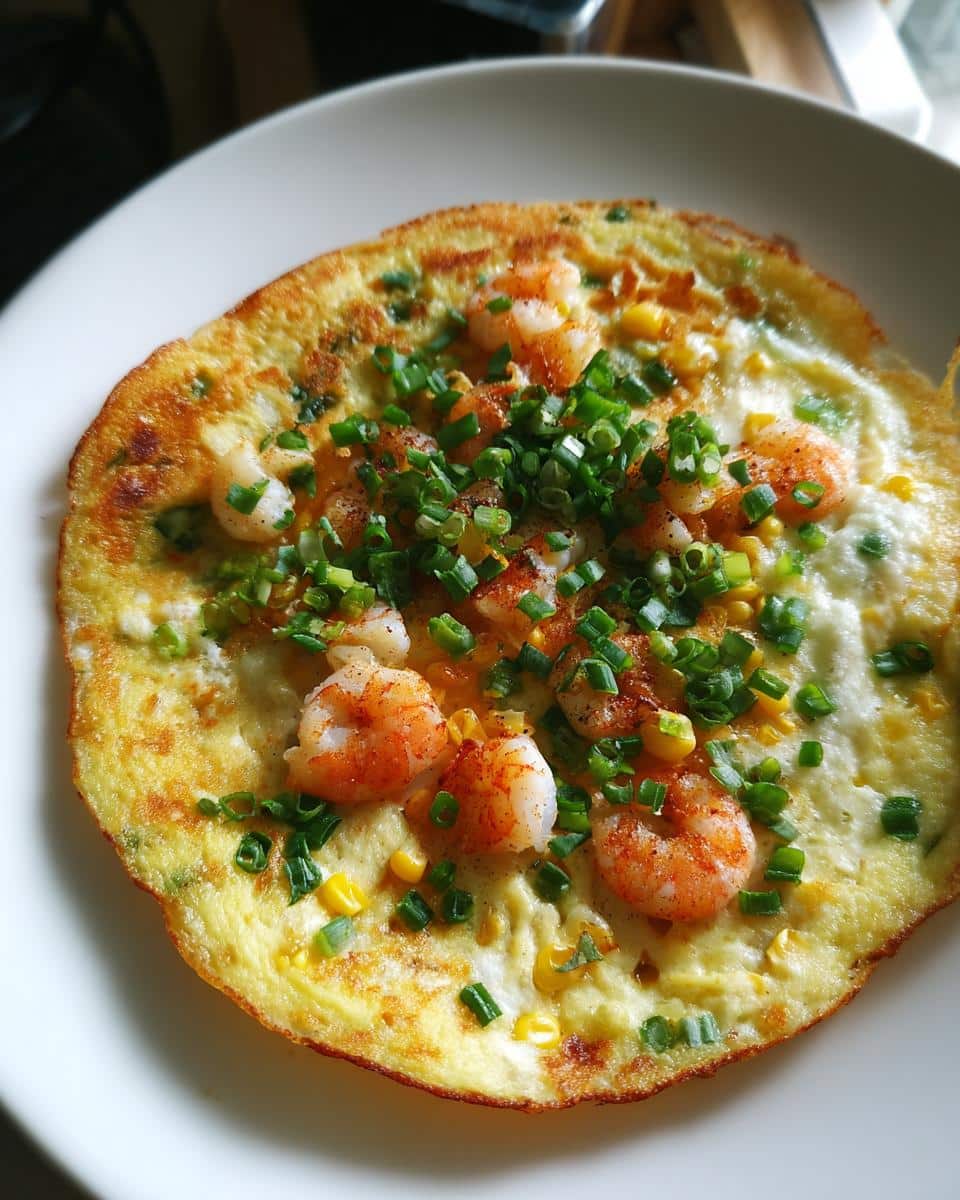
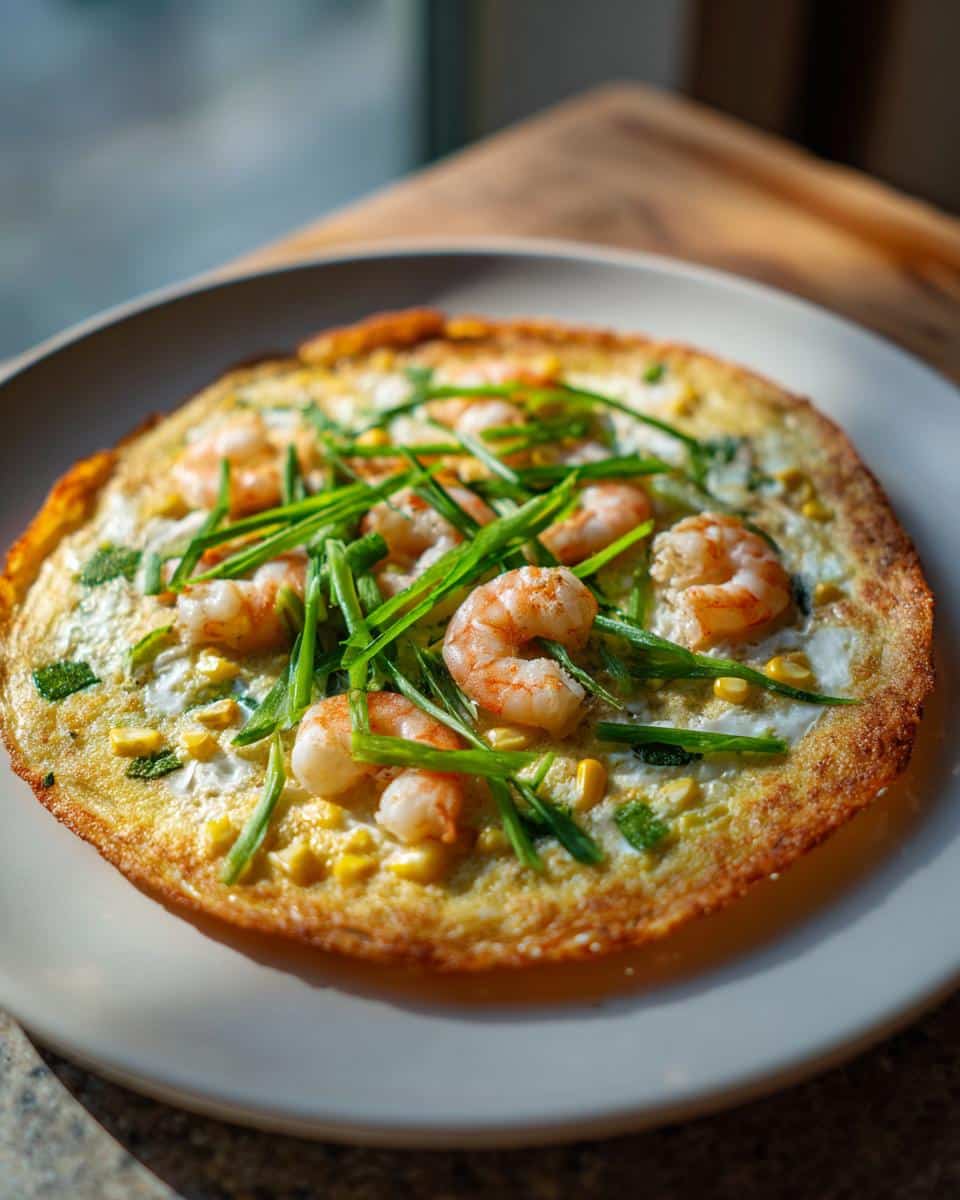
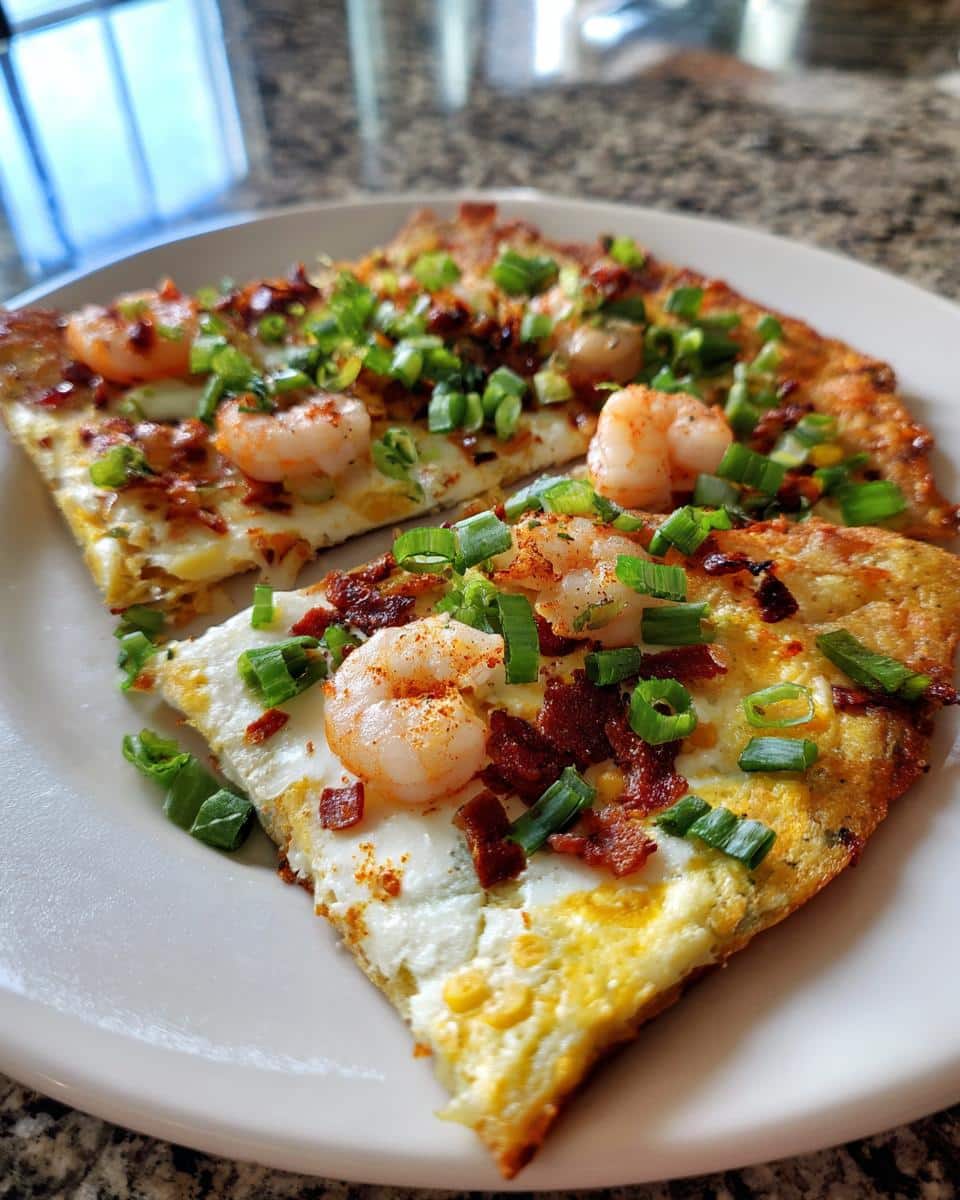
Now, grab a large non-stick pan, or if you have a flat griddle, that’s even better! Get it heated up over medium-low heat. You only need a tiny bit of cooking oil, just swish it around to coat the pan. Lay one rice paper wrapper right onto the hot pan. It’ll soften up super quick, just give it about 10 to 15 seconds. Immediately crack an egg right in the middle. Then, like magic, use the back of a spoon or a mini spatula to spread that egg all over the rice paper, but leave a little border around the edge. Sprinkle on your green onions, and if you’re using them, drizzle on that chili garlic sauce and mayo. Now pile on your other yummy toppings – maybe some pork floss, shrimp, or cheese. Let it cook for just 2 to 4 minutes. You want that rice paper to get wonderfully crispy and golden brown, with the edges starting to curl up just a bit. Make sure that egg is cooked all the way through!
Serving Your Vietnamese Street Food Pizza
Once it’s perfectly crispy and everything’s heated through, carefully slide your Vietnamese Rice Paper Pizza right onto a plate. You can totally fold it in half like a quesadilla, roll it up like a taquito, or just slice it into wedges like a pizza. The most important thing is to serve it up right away while it’s hot and super crunchy!
Tips for the Perfect Vietnamese Rice Paper Pizza
Oh, y’all, getting this Vietnamese Rice Paper Pizza *just right* is all about a few little tricks I’ve picked up! My grandma always said a little patience and attention goes a long way in the kitchen, and it’s so true here. Don’t be afraid to experiment, but definitely pay attention to a couple of key things.
Achieving Ultimate Crispiness
The secret to that shatteringly crisp rice paper? Medium-low heat is your friend, seriously! Too high and it’ll burn before it crisps. Also, make sure you spread that egg really, really thin all over the wrapper – think lace, not a fluffy omelet. That thin layer cooks fast and helps the wrapper get super crunchy.
Creative Topping Combinations
While pork floss is traditional, don’t stop there! I love adding a sprinkle of shredded mozzarella cheese toward the end of cooking, just to get it melty. Tiny cooked shrimp are fantastic, or even some sweet corn kernels. Honestly, anything you’d put on a tiny pizza works! I sometimes even add a few slivers of cooked sausage or a little crumbled ground pork. It’s like a little flavor explosion! Don’t be scared to try new things, that’s part of the fun!
Variations: Air Fryer Rice Paper Pizza
Now, if you’re an air fryer enthusiast like I am, you’re going to love this twist! Making your Vietnamese Rice Paper Pizza in the air fryer is just as easy, maybe even easier, and gives you that fantastic crispiness. Seriously, it’s perfect for those days you just want a quick, crispy snack without fuss. You can get that amazing crunch in just a few minutes!
Preheat your air fryer to 375°F (190°C). You’ll want to place your rice paper on a piece of parchment paper first; this helps make sure it doesn’t stick and makes cleanup a breeze. Then, just like you would in the pan, spread on your beaten egg, add your green onions, chili sauce, mayo, and any other toppings you fancy – think of it as your own little customizable pizza station! Pop it into the preheated air fryer and let it cook for about 5 to 7 minutes. Keep an eye on it, but you’re looking for that beautiful golden-brown color and super crispy texture. It’s such a fun way to make this already quick snack even speedier!
Ingredient Notes and Substitutions
A few little notes on some ingredients, just to make sure your Vietnamese Rice Paper Pizza turns out perfect! Pork floss can be a bit tricky to find sometimes, but don’t you worry if you can’t get your hands on it. You can totally skip it or try a little bit of finely shredded dried seaweed instead. And about those eggs – while regular chicken eggs work beautifully, those cute little quail eggs are a fantastic option if you want to make smaller, individual pizzas or just love experimenting! Just use two or three per pizza. If you don’t have chili garlic sauce, a little Sriracha mixed with a tiny dap of soy sauce can work in a pinch!
Frequently Asked Questions about Vietnamese Rice Paper Pizza
I get asked a lot of questions about this Vietnamese Rice Paper Pizza, and I love it! It’s such a fun dish, and you want to make sure you get it just right. Here are a few of the most common things folks wonder about:
Is this recipe really gluten-free?
Absolutely! That’s one of the best parts about the Vietnamese Rice Paper Pizza. The rice paper itself is made from rice flour, water, and tapioca starch, so it’s naturally gluten-free. It’s a fantastic option if you’re looking for a crispy pizza alternative and can’t have gluten. It’s a great gluten-free snack that feels super indulgent!
Can I make the Vietnamese Rice Paper Pizza ahead of time?
Honestly, the magic of this pizza is that it’s best served IMMEDIATELY. The rice paper gets wonderfully crispy when it’s fresh off the pan or out of the air fryer. If you try to make it ahead, the rice paper can get a little chewy or soggy as it sits. So, my best advice is to whip them up right before you’re ready to eat!
What are some other good topping ideas besides the basics?
Oh, the topping possibilities are endless! Besides the traditional green onions and pork floss, I love adding a sprinkle of shredded cheese – cheddar, mozzarella, or even a Monterey Jack blend – right at the end of cooking so it gets melty. Tiny cooked shrimp are delicious, as are sweet corn kernels. You can even add a little bit of cooked ground pork or thinly sliced cooked sausage. For a bit of freshness, try adding some finely chopped cilantro or a drizzle of hoisin sauce. It’s your own little masterpiece!
Estimated Nutritional Information
Now, keep in mind these numbers are just an estimate, ’cause we all know everyone’s toppings and portion sizes can be a little different! But generally, one of these delicious Vietnamese Rice Paper Pizzas is around 150 calories. You’re looking at about 8 grams of fat, 7 grams of protein, and 15 grams of carbohydrates. It’s a pretty good little snack, right?
Share Your Vietnamese Rice Paper Pizza Creations!
Alright, now it’s your turn to get in on all the fun! I’d absolutely LOVE to see your crazy-delicious Vietnamese Rice Paper Pizzas. Did you try a new topping combination? How did it turn out? Drop a comment below and tell me all about it. You can even rate the recipe right here, or get in touch via my contact page to share your experience. Let’s get this virtual street food party started!
Print
Vietnamese Rice Paper Pizza (Bánh Tráng Nướng)
- Total Time: 10 min
- Yield: 2 servings 1x
- Diet: Gluten Free
Description
A quick and crispy Vietnamese street food snack made with rice paper, egg, and your favorite toppings.
Ingredients
- 2 round rice paper wrappers (approx. 20–22 cm diameter)
- 2 large eggs (or 4–6 quail eggs)
- 1/4 cup green onions, finely chopped
- 1–2 tsp chili garlic sauce or Sriracha (optional)
- 1–2 tsp mayonnaise or Kewpie mayo (optional)
- 2 tbsp pork floss (optional)
- 1 tbsp cooking oil
- Optional toppings: small cooked shrimp, canned corn, shredded cheese, ground pork, thinly sliced sausages
Instructions
- Prepare your ingredients: Finely chop the green onions. Lightly beat the eggs in a small bowl. Gather any other desired toppings.
- Heat a large non-stick pan or flat griddle over medium-low heat. Add a tiny amount of cooking oil and spread it evenly, or use a cooking spray.
- Place one rice paper wrapper directly onto the hot pan. Allow it to soften slightly for about 10-15 seconds.
- Immediately crack one egg (or 2-3 quail eggs) onto the center of the rice paper. Using the back of a spoon or a small spatula, quickly spread the egg thinly and evenly across the rice paper, leaving a small border around the edge.
- Sprinkle a generous amount of chopped green onions over the egg. If using, drizzle with chili garlic sauce and mayonnaise. Add any other desired toppings like pork floss, shrimp, corn, or cheese.
- Continue to cook for 2-4 minutes, or until the rice paper becomes crispy, the egg is fully set, and the toppings are heated through. The edges of the rice paper should curl slightly and turn golden brown.
- Once crispy and cooked to your liking, carefully slide the Vietnamese Rice Paper Pizza onto a plate. You can fold it in half, roll it up, or cut it into wedges like a traditional pizza.
- Serve immediately while hot and enjoy your delicious, crispy street food snack!
Notes
- For an air fryer version, preheat your air fryer to 375°F (190°C). Place the rice paper on parchment paper, spread the egg and toppings, then air fry for 5-7 minutes until crispy.
- This recipe is naturally gluten-free.
- Prep Time: 5 min
- Cook Time: 5 min
- Category: Snack
- Method: Pan-Frying
- Cuisine: Vietnamese
Nutrition
- Serving Size: 1 pizza
- Calories: 150
- Sugar: 1g
- Sodium: 200mg
- Fat: 8g
- Saturated Fat: 2g
- Unsaturated Fat: 6g
- Trans Fat: 0g
- Carbohydrates: 15g
- Fiber: 1g
- Protein: 7g
- Cholesterol: 100mg