
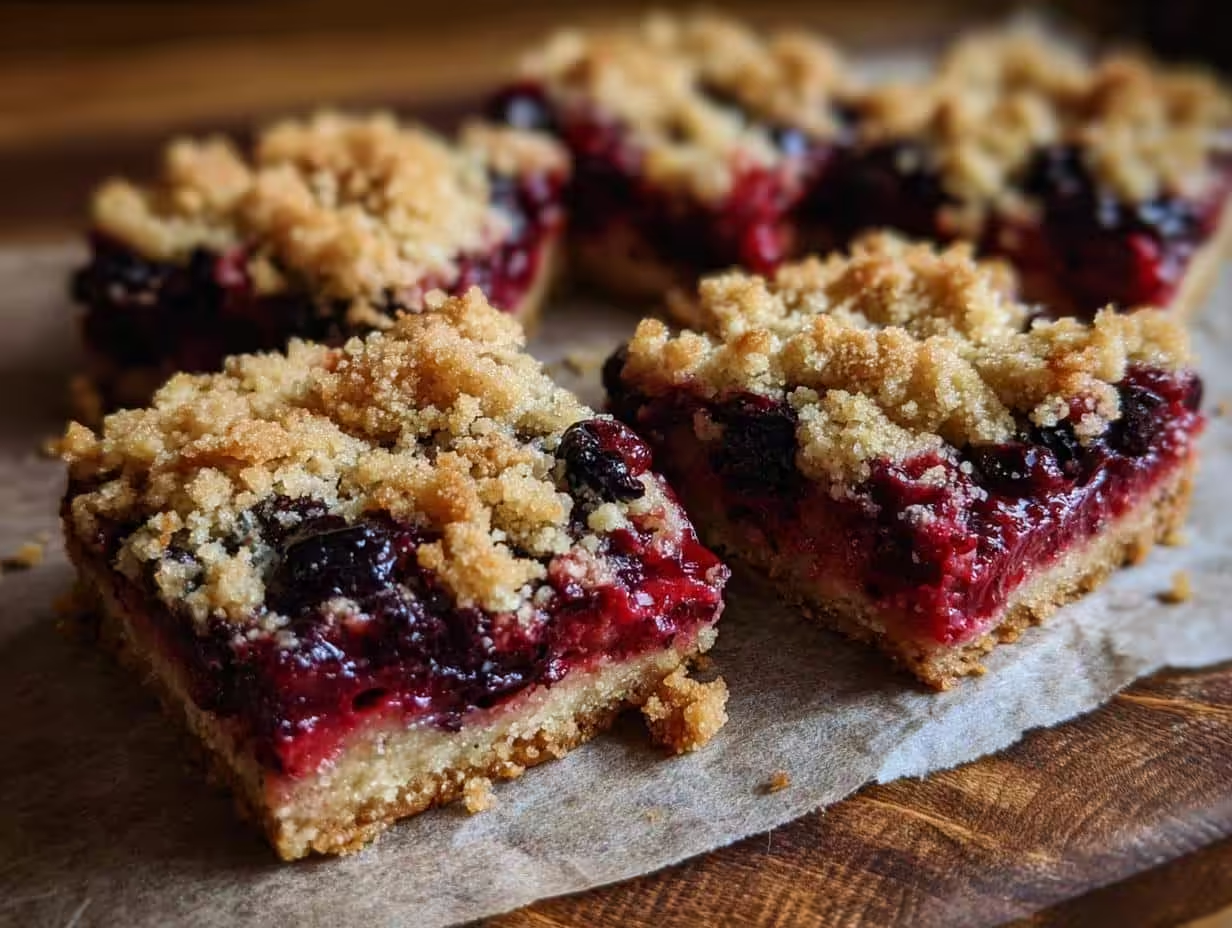
I’ll let you in on a little secret: I’m not usually a baker. Give me a pot of simmering collard greens or a smoky grilled chicken any day! But these Berry Crumble Bars? Wow, they’ve totally converted me. They’re so easy even *I* can’t mess them up, and let me tell you, that’s saying something. See, my grandma, bless her heart, she could bake up a storm. I mostly watched, occasionally stirring or, you know, “taste-testing.” These bars? They feel like a tiny piece of her magic, but made simple enough for even this ol’ supper club owner to whip up. And since I’m Maxine Holloway (Max, to my friends!), and I’ve been cooking up a storm in Asheville for years, you can trust me when I say these are a winner!
Why You’ll Adore These Berry Crumble Bars
Okay, so why are these berry crumble bars about to become your new obsession? Let me tell you:
- They’re ridiculously easy to make. Seriously, if you can stir, you’ve got this!
- That buttery, crumbly topping? Total melt-in-your-mouth goodness.
- Bursting with juicy berry flavor – the perfect sweet-tart combo.
- Snack time, dessert, breakfast (don’t judge!), they work for EVERYTHING.
- Plus, they’re awesome for meal prep. Make a batch on Sunday and enjoy them all week (if they last that long!).
Ingredients for the Best Berry Crumble Bars
Alright, let’s gather our goodies! Here’s what you’ll need to make these berry crumble bars shine – no fancy stuff, just good, honest ingredients. Don’t skimp on quality; it really makes a difference! Remember, if Grandma was watching, she’d say, “Use the good butter, Maxine!” Here’s the list:
- 1 ½ cups all-purpose flour
- ¾ cup packed light brown sugar
- ¾ cup rolled oats (not instant!)
- ½ teaspoon baking soda
- ½ teaspoon salt
- ¾ cup (1 ½ sticks) cold unsalted butter, cut into cubes
- 1 large egg
- 1 teaspoon vanilla extract
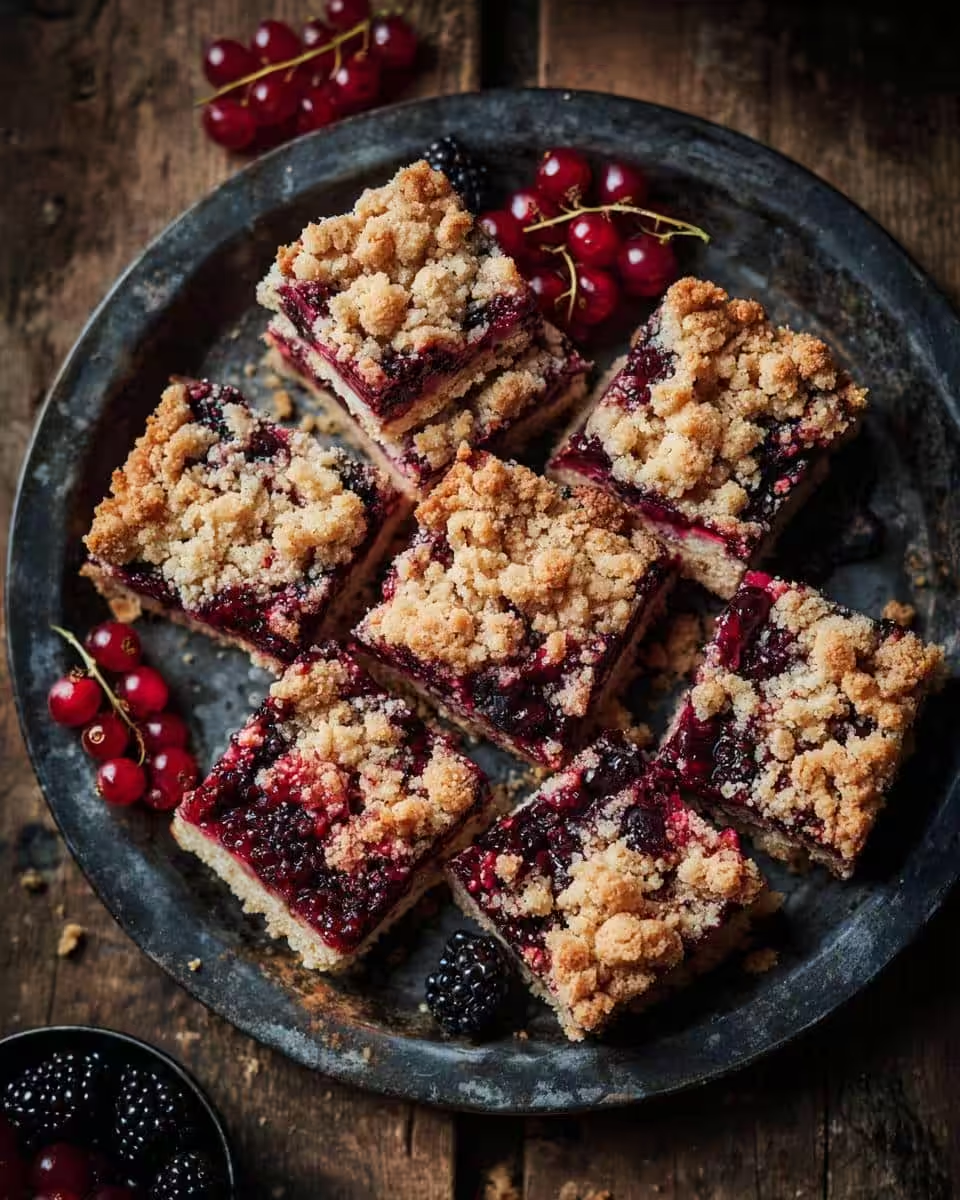
- 4 cups mixed berries (fresh or frozen, like blueberries, raspberries, and blackberries)
- 2 tablespoons granulated sugar
- 1 tablespoon cornstarch
- 1 tablespoon lemon juice

How to Make Berry Crumble Bars: Step-by-Step Instructions
Okay, gather ’round, because we’re about to make some magic! Don’t worry, it’s the fun kind of magic, the kind that ends with warm, gooey berry crumble bars. Take a deep breath – everything’s gonna be alright. I promise!
-
First things first: Preheat that oven to 375°F (190°C). You’ll want it nice and toasty when we’re ready to rock and roll. And grease a 9×13 inch baking pan. I always give mine a little extra love with some parchment paper hanging over the sides, makes for easy peasy removal later on. Trust me on this one. You’ll thank me later!
-
Now, let’s make the crumble! In a big bowl (the biggest you’ve got!), whisk together the flour, brown sugar, oats, baking soda, and salt. Get it all nice and even. This ensures no pockets of baking soda – nobody wants a salty surprise in their crumble!
-
Add the cold, cubed butter to the dry ingredients. This is where your hands come in handy! Use your fingers (or a pastry blender if you’re fancy) to cut the butter into the flour mixture until it resembles coarse crumbs. It should look kinda like wet sand. Cold butter is KEY here, folks. Don’t let it get melty on you!
-
In a separate small bowl – don’t get overwhelmed, we’re almost there! – whisk together the egg and vanilla extract. Pour this into the crumble mixture and stir until just combined. Don’t overmix! We want a nice, crumbly texture, not a tough dough.
-
Press about two-thirds of the crumble mixture into the prepared baking pan. Press it down firmly to create a nice, even base. This is the foundation of our delicious bars, so give it some love! Now, pop this little guy into the preheated oven, 375°F (190°C), for about 10 minutes. Baking the base first means it doesn’t get soggy! Yay!
-
While the base is pre-baking, let’s get those berries ready. In another bowl (are you tired of washing bowls yet? Hang in there!), combine the berries, granulated sugar, cornstarch, and lemon juice. Gently stir to combine. Cornstarch helps thicken up the berry juices so your bars aren’t a soupy mess, and the lemon juice just makes the berries pop!
-
Alright, base is ready! Gently spread the berry mixture evenly over the pre-baked crust. Then, sprinkle the remaining crumble mixture over the berries. Don’t be shy – we want a nice, generous layer of crumble on top!
-
Bake in the preheated oven for 30-35 minutes, or until the topping is golden brown and the berry filling is bubbly. Keep an eye on it, ovens vary! And careful taking the pan out – it will be HOT!
-
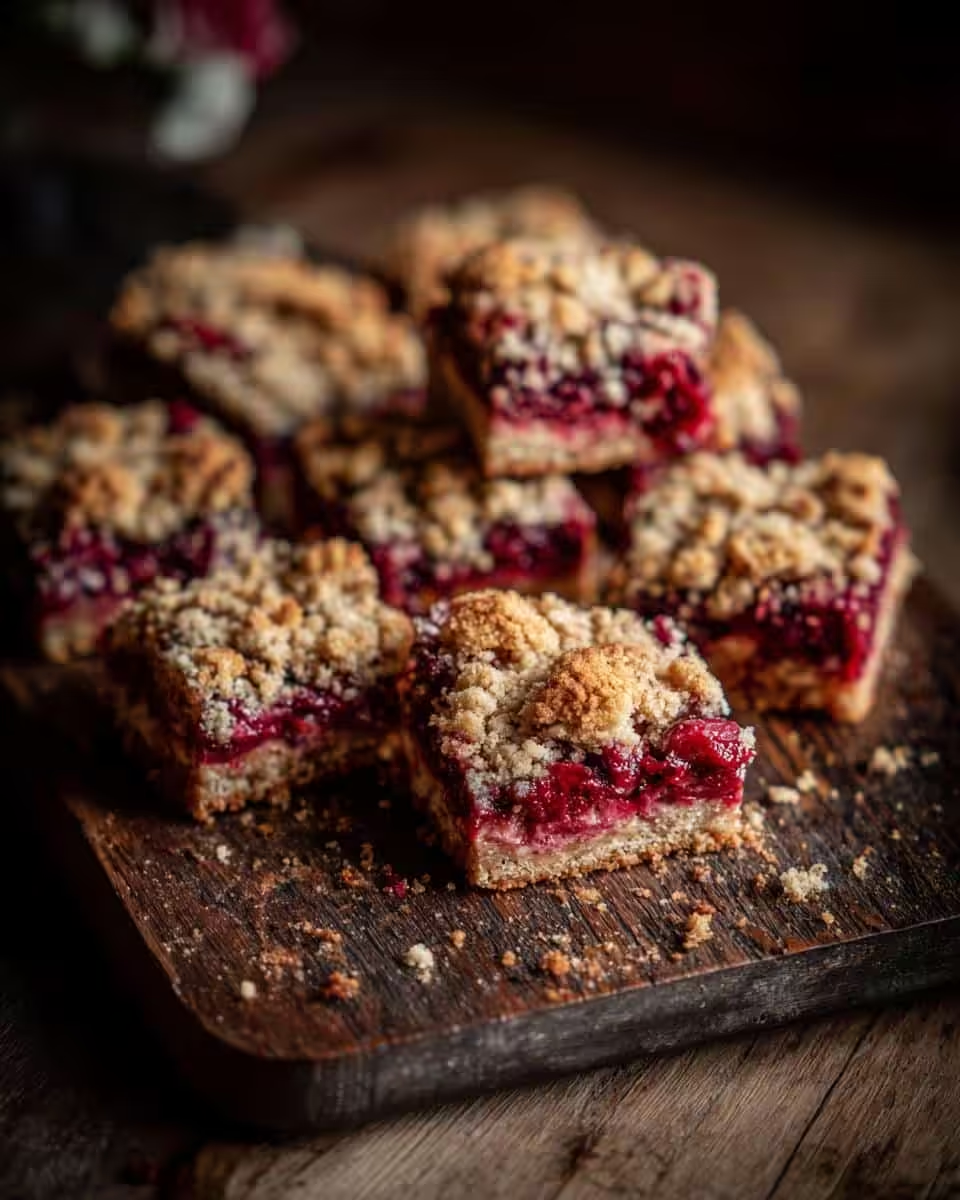
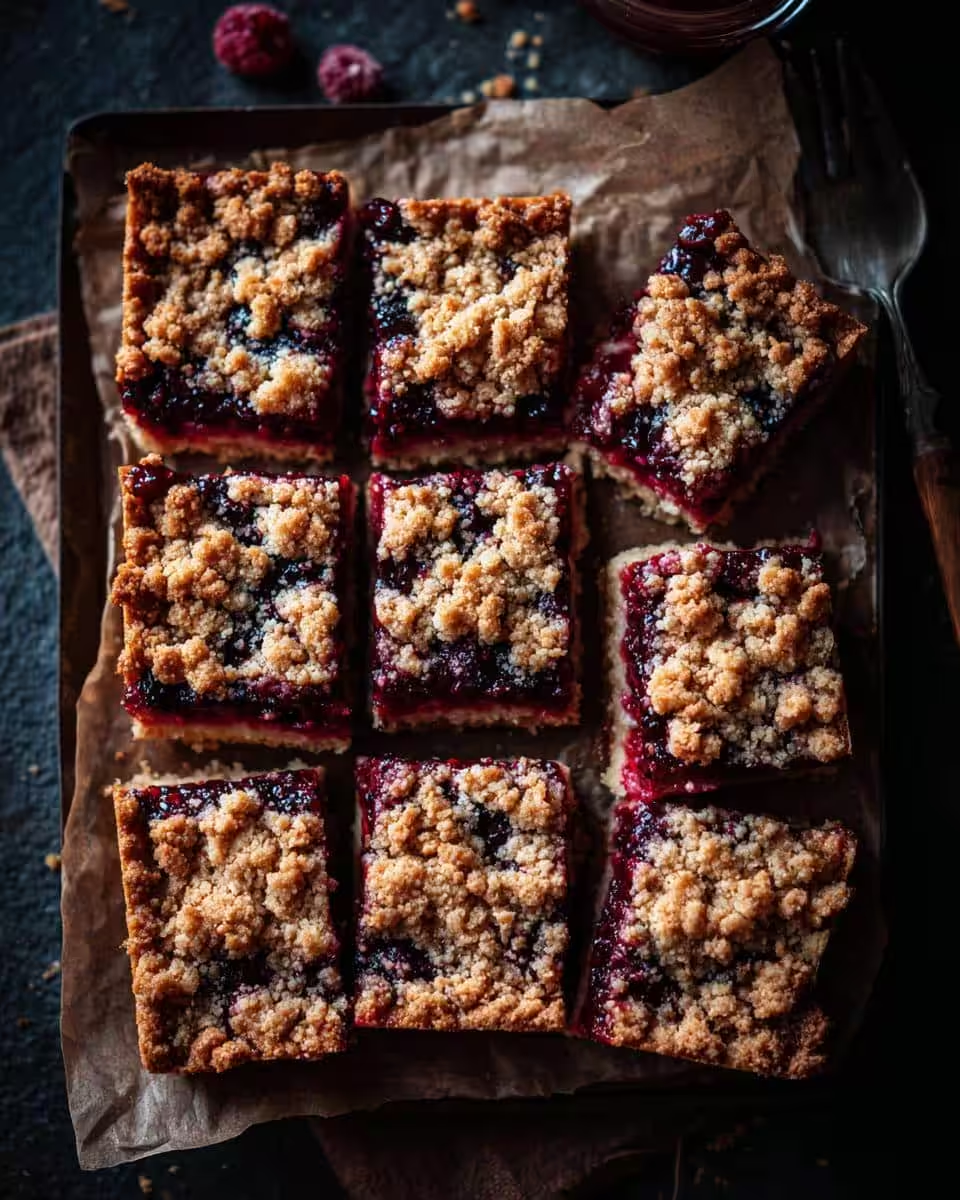
Let the bars cool completely in the pan before cutting into squares. I know, it’s torture, but trust me, they’ll be much easier to cut if you let them cool completely. I usually pop mine in the fridge to speed things up a bit, I just can’t wait! Enjoy! And I really hope you do!
Tips for Perfect Berry Crumble Bars
Want berry crumble bars that are *seriously* amazing? Here’s my two cents, learned from a few oops-I-almost-burned-them batches (don’t tell Grandma!).
- Butter *absolutely* needs to be cold. I sometimes even pop mine in the freezer for 10 minutes before cubing it. Seriously, cold butter makes the best crumble!
- Don’t overbake! You want that topping golden, not burnt. If it’s browning too fast, tent some foil over the pan.
- Let those bars cool ALL the way before cutting! Otherwise, you’ll end up with a gooey mess (still delicious, but messy). And a tip from one home cook to another, if the bars just refuse to hold their shape (it happens!), then let them sit in the fridge for a little while before cutting them. That’ll do the trick!
Variations on These Delicious Berry Crumble Bars
Okay, so you’ve made the basic berry crumble bars, and they’re amazing, right? But what if you want to mix things up a bit? Well, you’re in luck! These bars are super versatile. Don’t be afraid to experiment. That’s how Grandma created all her best dishes. She used to say “Recipes are just a starting point!” Here are some ideas:
- Change up the berries! Use all blueberries, or maybe a mix of raspberries and strawberries. Get wild!
- Add a little spice. A pinch of cinnamon or nutmeg in the crumble topping will add a warm, cozy vibe.
- Extracts are your friend! A little almond extract in the crumble is divine, or maybe some lemon extract in the berries. Yum!
- Want to make them extra decadent? Spread a thin layer of your favorite jam (raspberry or blackberry would be amazing!) over the crust before adding the berries.
Make-Ahead and Storage for Berry Crumble Bars
Good news, friends! These berry crumble bars are *perfect* for making ahead. Seriously! I’m all about that “bake once, eat all week” life. You can assemble the whole shebang – crust, berries, crumble topping – and then just pop it in the oven when you’re ready, up to 24 hours in advance. Just cover it tightly and keep it in the fridge. Leftovers? Well, if you *have* any (ha!), they’ll keep in an airtight container at room temperature for about 3 days, or in the fridge for up to a week. Though I’ve never had them last that long in my house! Now, for the real magic… can you FREEEZE them? Absolutely. Cool them completely, cut into individual bars, and wrap them well in plastic wrap before placing them in a freezer bag. They’ll keep for up to 2 months. Just thaw them out (or microwave them for a quick treat!) when the craving hits!
Frequently Asked Questions About Berry Crumble Bars
Got questions about making these berry crumble bars? Don’t sweat it! I’ve got answers. I know how frustrating it can be when a recipe doesn’t quite turn out, so I’m here to help you nail it every time. Here are some of the questions I get asked most often:
Can I use frozen berries?
Absolutely! Frozen berries work great in these bars. Just don’t thaw them first! Toss them with the sugar, cornstarch, and lemon juice while they’re still frozen. Thawing releases too much moisture, and we don’t want soggy bars now, do we?
What if I don’t have brown sugar?
Okay, no brown sugar? No problem! You can substitute granulated sugar, but your crumble won’t have that deep, molasses flavor. I personally LOVE the taste of molasses, so if you are going to switch out the brown sugar, try adding just a tiny splash to your batter. It’ll create a warm, deep flavor that you’ll love!
My crumble topping is dry. What did I do wrong?
Hmm, dry crumble? Sounds like you might have added too much flour or not enough butter! Make sure you’re measuring accurately (spoon and level, folks!). It can also be that the butter wasn’t cold enough to start, either. As stated above, it’s truly best to give your butter a bit of chill before starting this recipe! Adding a tablespoon or two of melted butter can fix it, though! Stir it in until the mixture clumps together. But don’t use too much butter – then it will become a gooey mess! Trial and error, it’s how we learn as home cooks and bakers.
How do I keep the bottom crust from getting soggy?
Pre-baking the crust always does the trick. Also, make sure you’re using the cornstarch in your berry mixture – that helps to thicken the juices. And the tip I always give folks? Make sure you don’t skip this step! Pre-baking is essential for a firm, and most of all, delectable crust!
Estimated Nutritional Information for Berry Crumble Bars
Okay, so while these berry crumble bars are absolutely a treat, sometimes it’s good to know what you’re getting into! Keep in mind this is just an estimate, but each bar clocks in around: Calories: 250, Fat: 12g, Protein: 3g, Carbs: 35g. Enjoy ’em!
Enjoyed This Recipe? Leave a Comment Below!
Made these berry crumble bars? I’d love to hear about it! Leave a comment below, rate the recipe, or share your photos on social media! Trust me, sharing the love makes it even sweeter!
Print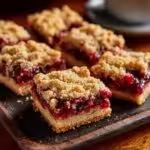
Crispy Oven Roasted Potatoes and Onions
- Total Time: 65 min
- Yield: 6 servings 1x
- Diet: Vegan
Description
Simple oven roasted potatoes and onions.
Ingredients
- 2 lbs potatoes, peeled and cubed
- 2 large onions, sliced
- 1/4 cup olive oil
- 1 teaspoon salt
- 1/2 teaspoon black pepper
- 1 teaspoon dried oregano
Instructions
- Preheat oven to 400°F (200°C).
- In a large bowl, combine potatoes, onions, olive oil, salt, pepper, and oregano.
- Spread the mixture in a single layer on a baking sheet.
- Roast for 45-50 minutes, or until potatoes are tender and golden brown, flipping halfway through.
- Serve hot.
Notes
- For extra crispiness, parboil the potatoes for 5 minutes before roasting.
- Prep Time: 15 min
- Cook Time: 50 min
- Category: Side Dish
- Method: Roasting
- Cuisine: Mediterranean
Nutrition
- Serving Size: 1 serving
- Calories: 250
- Sugar: 5g
- Sodium: 300mg
- Fat: 12g
- Saturated Fat: 2g
- Unsaturated Fat: 10g
- Trans Fat: 0g
- Carbohydrates: 35g
- Fiber: 4g
- Protein: 4g
- Cholesterol: 0mg