
Garlic Butter Chicken. Just the name makes my mouth water, doesn’t it? Honestly, it’s one of those recipes that’s almost *too* easy for how good it is. I mean, seriously, dump a few things together and bam! Dinner’s ready. It’s become a staple in my kitchen, especially on those crazy weeknights when I feel like I’m juggling a million things at once. But it also feels super special on a Sunday afternoon. My grandmother, bless her heart, she was all about simple, comforting meals, and I swear this would have been right up her alley. The beautiful thing about this Garlic Butter Chicken is that it delivers BIG flavor with minimal effort. It’s pure comfort food without the fuss!
Why You’ll Love This Garlic Butter Chicken Recipe
Okay, so you’re probably thinking, “Another chicken recipe? Really?”. Trust me on this one! This Garlic Butter Chicken is a game changer. Here’s why you’re gonna be obsessed:
- Quick Prep: Seriously, we’re talking minutes! Perfect for busy weeknights.
- Easy Cleanup: One pan wonder! Fewer dishes mean more time for you.
- Flavorful AF: That garlic butter sauce? *Chef’s kiss*. It’s outrageously delicious.
- Simple Ingredients: Nothing fancy here, just pantry staples.
- Kid-Friendly: Even the picky eaters will gobble this up. I promise!
- Adaptable: Gluten-free? Dairy-free? No problem! This recipe can be tweaked to fit your needs.
Ingredients for Garlic Butter Chicken
Alright, let’s talk ingredients! The beauty of this Garlic Butter Chicken is that you probably already have most of this stuff in your kitchen. No crazy trips to fancy grocery stores, promise! Here’s what you’ll need:
- 4 boneless, skinless chicken breasts. About 6-8 ounces each, and pat ’em dry with paper towels – trust me on this one.
- 4 cloves garlic, minced. Fresh is best, but the jarred stuff works in a pinch (don’t tell anyone I said that!).
- 1/4 cup unsalted butter. Softened is ideal, so leave it out on the counter for a bit. We want it creamy!
- 2 tablespoons fresh parsley, chopped. Adds a nice pop of color and freshness.
- 1 tablespoon lemon juice. Brightens everything up!
- 1 tablespoon olive oil. For searing – gets that nice golden crust.
- Salt and black pepper to taste. Don’t be shy! Season generously.
- Optional: Red pepper flakes. Just a pinch if you like a little kick! I always add them.
See? Nothing too scary. Now let’s get cooking!
How to Make Garlic Butter Chicken: Step-by-Step Instructions
Okay, friend, ready to make some magic? This Garlic Butter Chicken recipe is seriously foolproof. Just follow these simple steps, and you’ll be chowing down in no time.
- Prep the Chicken: Pat those chicken breasts dry! Seriously. Wet chicken steams instead of sears, and we want that golden-brown crust. Season both sides generously with salt and pepper. Don’t be shy!
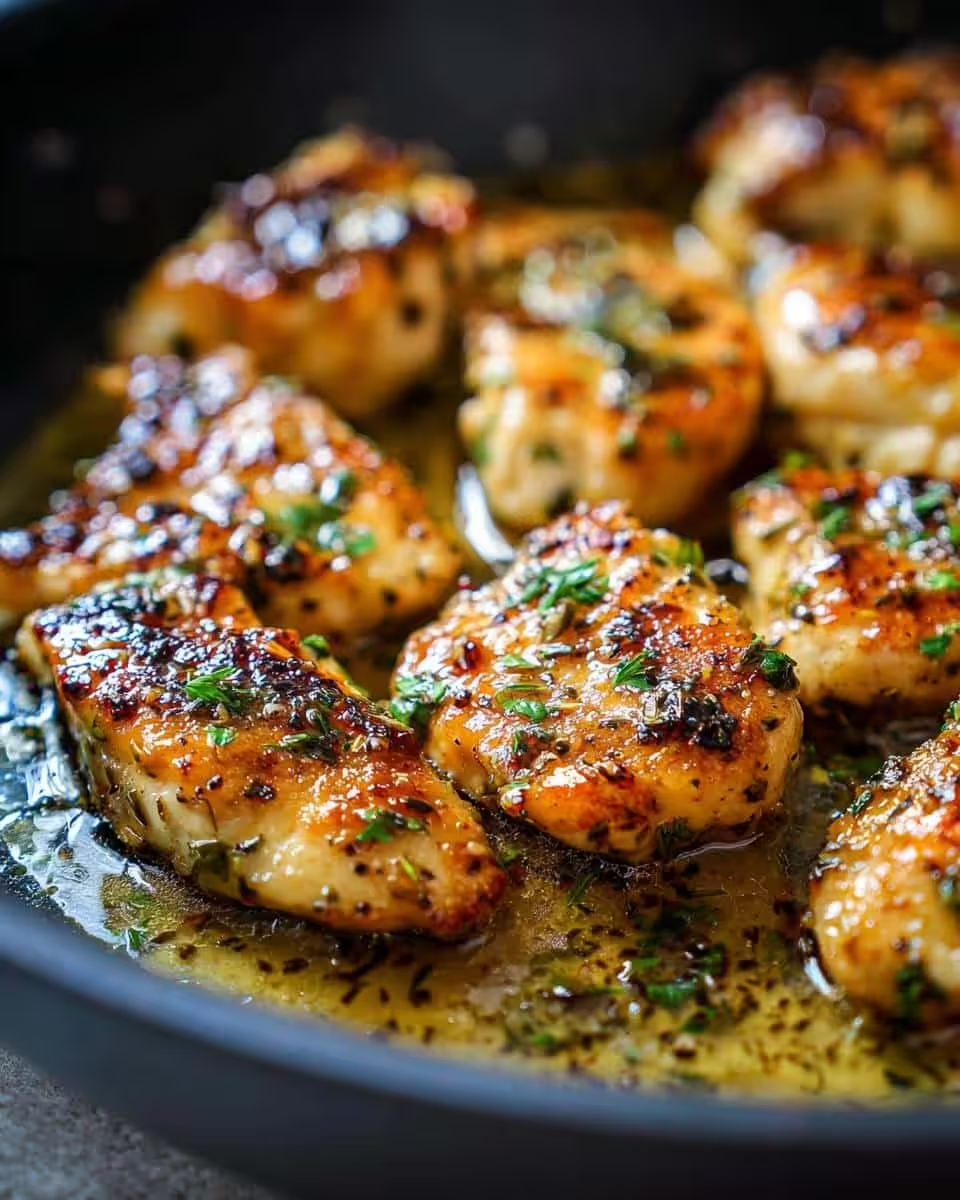
- Garlic Butter Bliss: In a small bowl, mash together the softened butter, minced garlic, parsley, and lemon juice. Give it a good mix until it’s all combined. This is gonna be our flavor bomb!
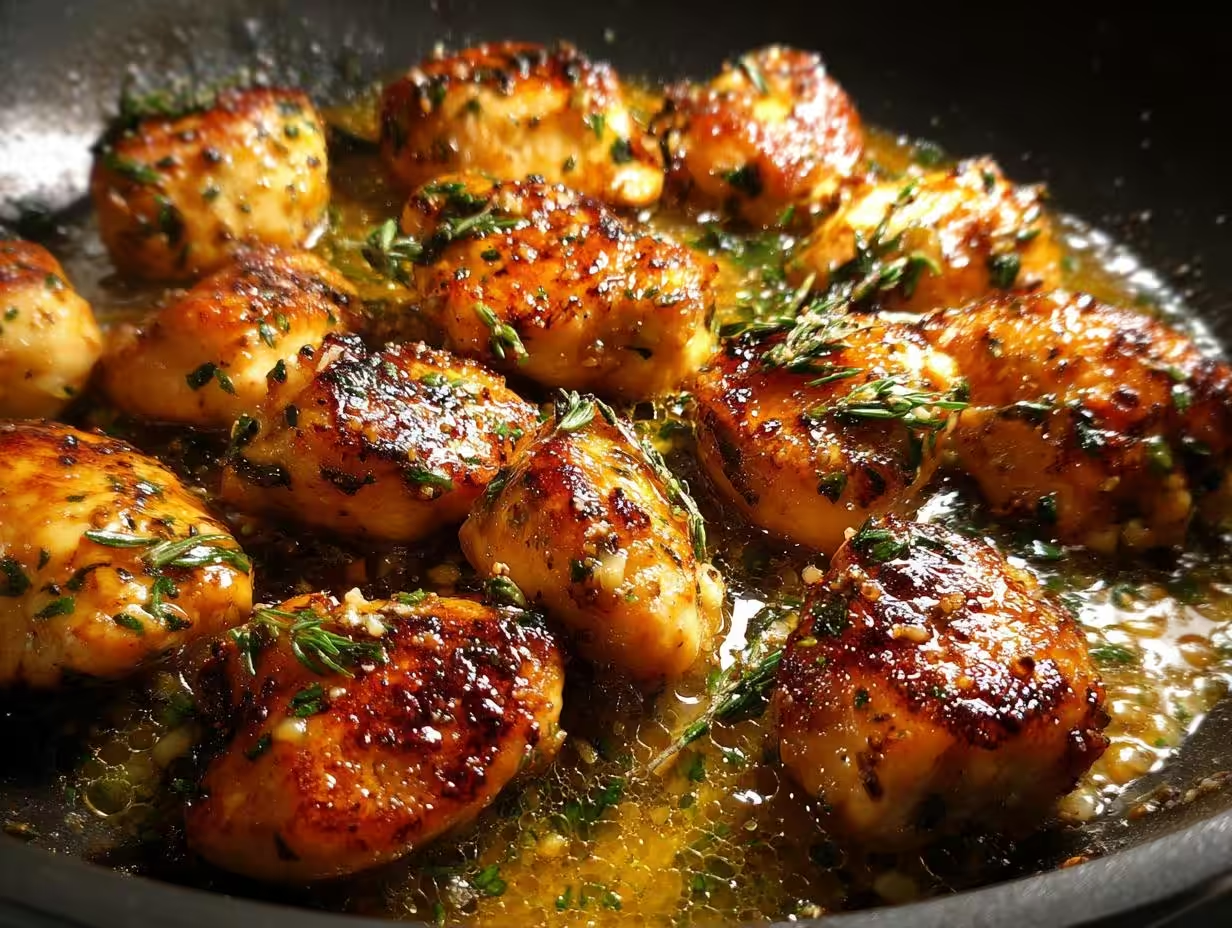
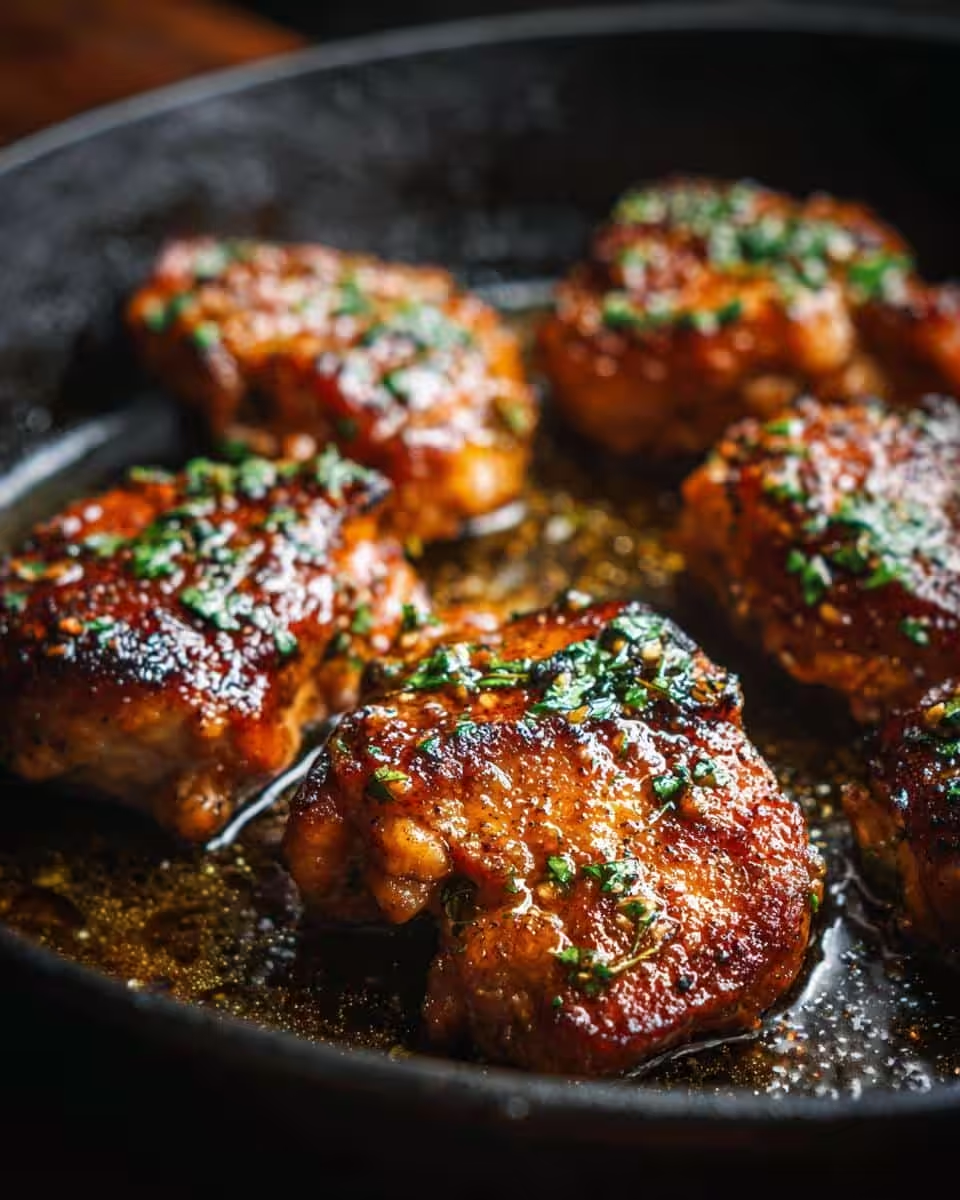
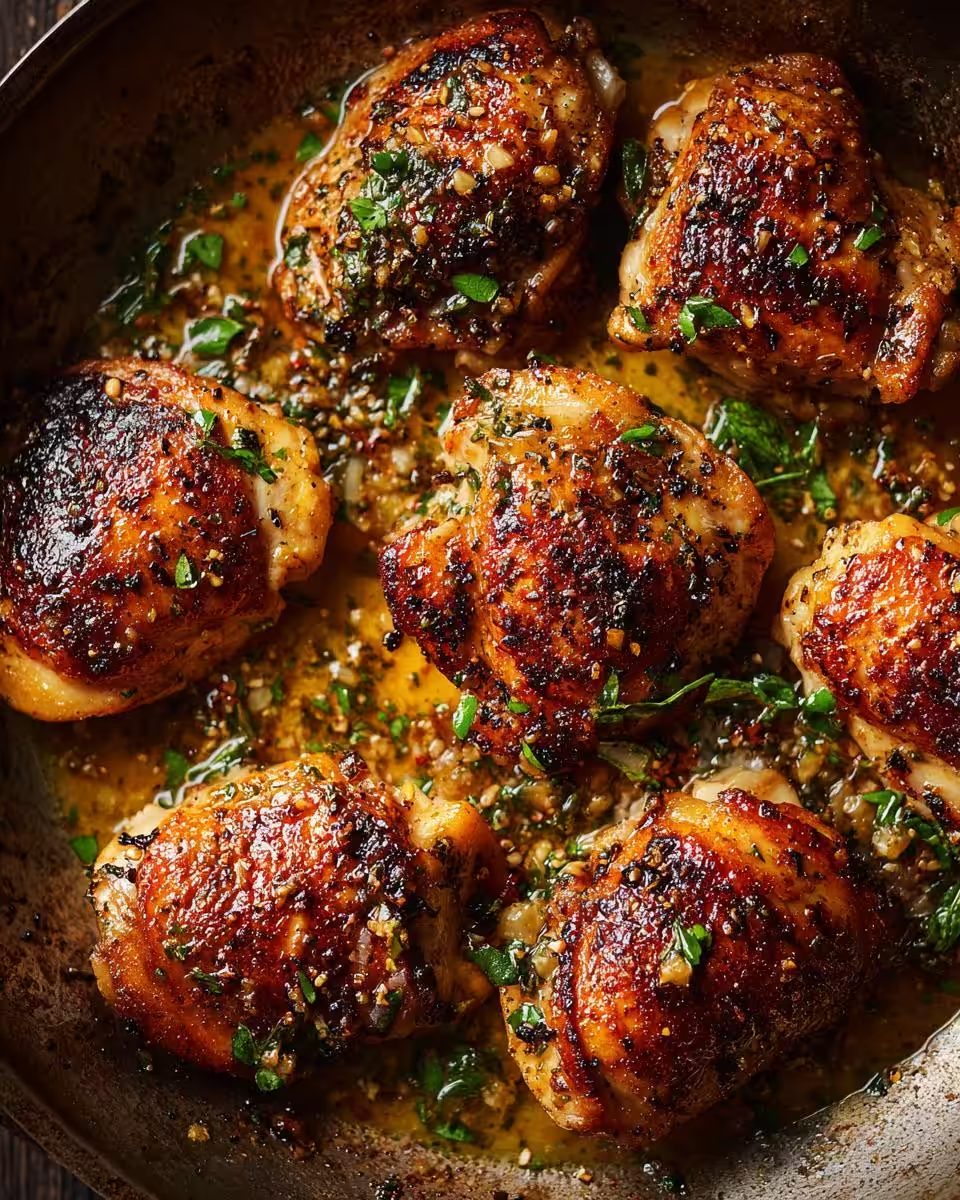
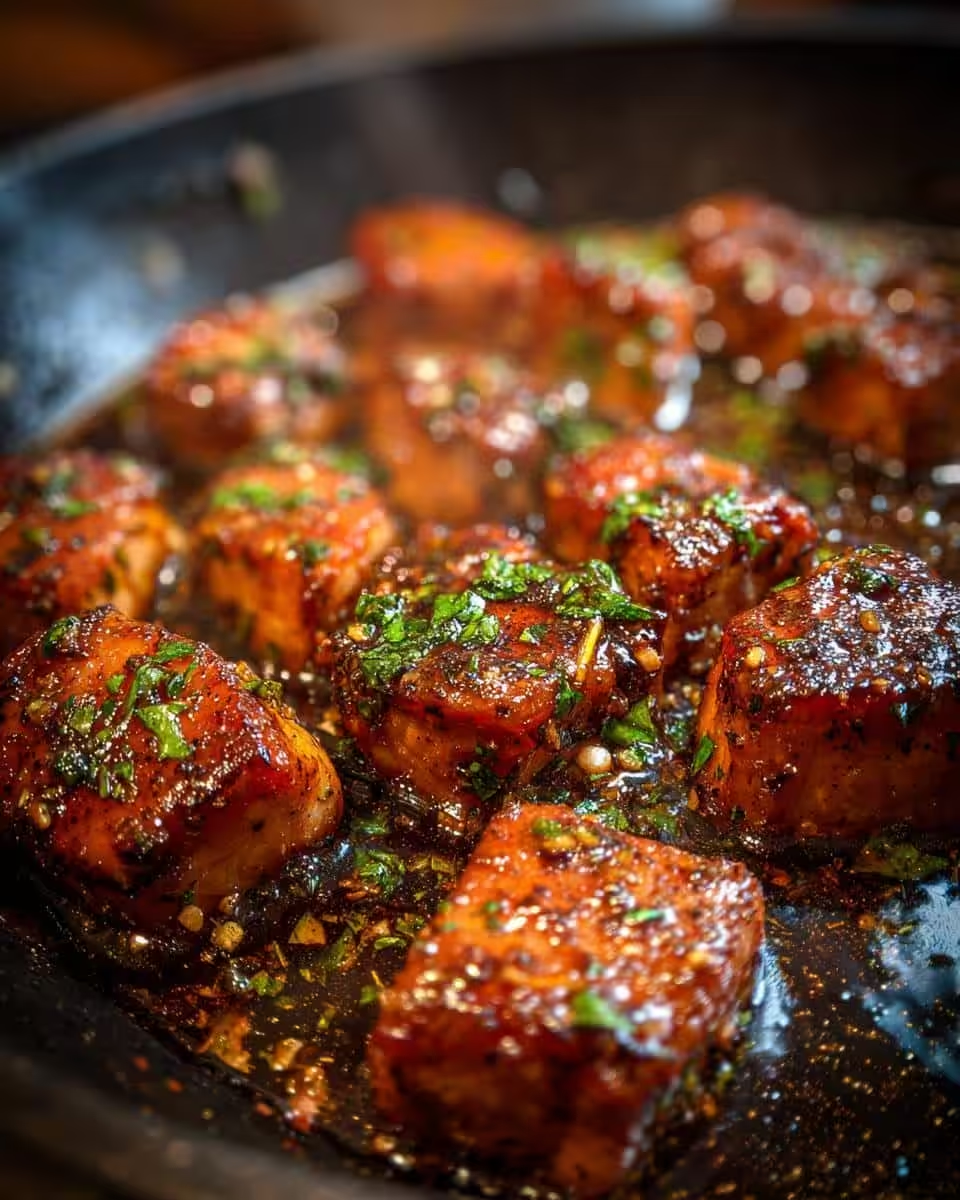
- Sear the Chicken: Heat the olive oil in a large skillet over medium-high heat. Careful, it splatters! Once the oil is shimmering (that’s how you know it’s hot enough), add the chicken breasts. Don’t overcrowd the pan, or they won’t sear properly. You might need to do this in batches. Cook for about 5-7 minutes per side, until golden brown and cooked through. A meat thermometer should read 165°F (74°C). I always aim for 165°F on the dot!
- Smother in Sauce: Reduce the heat to low and add the garlic butter mixture to the skillet. Let it melt and get all bubbly and fragrant. Use a spoon to coat the chicken breasts with the garlic butter sauce. Yum!
- Rest and Serve: Remove the skillet from the heat and let the chicken rest for a few minutes before slicing. This helps the juices redistribute, making it extra tender. Slice and serve immediately! Drizzle with any remaining garlic butter sauce from the pan. Don’t let that precious sauce go to waste.
See? Told ya it was easy! Now, go grab a fork and dig in!
Tips for the Best Garlic Butter Chicken
Okay, so you’ve got the basics down, but what about taking your Garlic Butter Chicken from “good” to “OMG this is amazing!”? Here are a few of my tried-and-true secrets:
- Don’t Overcrowd the Pan: I can’t stress this enough! Overcrowding lowers the pan temperature, leading to steamed, not seared, chicken. Work in batches, trust me.
- Use a Meat Thermometer: I know, I know, it sounds fussy, but a meat thermometer is your best friend here. Chicken needs to hit 165°F (74°C) internally to be safe and juicy.
- Sear it Like You Mean It: That golden-brown sear? That’s where the magic happens! Don’t be afraid to let the chicken get nice and brown on each side. It adds so much flavor.
- Adjust to Your Taste: Not a huge garlic fan? Tone it down! Love lemon? Add a squeeze more! This recipe is totally customizable to your taste buds.
- Let it Rest: This is key for juicy chicken. Let the chicken rest for 5-10 minutes before slicing. It makes a world of difference!
Follow these tips, and you’ll be making Garlic Butter Chicken that everyone raves about. Promise!
Serving Suggestions for Your Garlic Butter Chicken
Alright, so you’ve got this amazing Garlic Butter Chicken, but what do you serve with it? Don’t worry; I’ve got you covered! This dish is so versatile; it goes with almost anything. But my absolute favorites? Garlic Parmesan Broccoli makes a *fantastic* pairing – the garlicky flavors just amplify each other! Or, if you’re craving something comforting, you can’t go wrong with creamy mashed potatoes. The richness of the potatoes balances the brightness of the lemon in the chicken. Roasted veggies are another great option – think Brussels sprouts or asparagus. Rice or pasta are always winning choices, too! And if you’re feeling virtuous, a simple side salad with a light vinaigrette cuts through the richness nicely. Seriously, the possibilities are endless! Just go with what you love!
Storing and Reheating Your Garlic Butter Chicken
Okay, so you’ve made this amazing Garlic Butter Chicken, but maybe you have leftovers (lucky you!). Don’t worry; it keeps great! Just pop it in an airtight container and stash it in the fridge for up to 3-4 days. Now, reheating can be a little tricky since chicken can dry out so easily. My favorite trick? Add a splash of chicken broth or water to the pan when you reheat it – that helps keep it nice and juicy. You can reheat it in a skillet over medium-low heat, in the microwave (covered!), or even in the oven (again, covered, at a low temp like 325°F/160°C). Just don’t overcook it, or it’ll get tough!
Frequently Asked Questions About Garlic Butter Chicken
Got questions about this Garlic Butter Chicken? Don’t worry, I’ve got answers! Here’s a few things folks often ask me about this recipe:
Can I use chicken thighs instead of breasts?
Absolutely! Chicken thighs are a great alternative. They’re a bit more forgiving than breasts and tend to stay juicier. Just keep in mind they might take a little longer to cook, so use that meat thermometer!
Can I make this Garlic Butter Chicken ahead of time?
You can definitely prep some components ahead! I recommend mixing the garlic butter sauce and storing it in the fridge. You can also season the chicken ahead of time. Just store it separately and sear it when you’re ready to cook. I wouldn’t recommend fully cooking it ahead of time cause it might dry out.
How do I prevent the garlic from burning?
Ah, the dreaded burnt garlic! The key is to add the garlic butter after you’ve seared the chicken and to reduce the heat to low. That way, the garlic perfumes the dish without crisping and browning too fast.
Can I add other herbs besides parsley?
Of course! Fresh thyme, rosemary, or oregano would all be delicious in this dish. Get creative and use what you have on hand. I always encourage folks to experiment with herbs. It’s a fun way to remix it
Nutritional Information Disclaimer
Just a heads-up: nutritional info can vary ’cause brands and ingredients differ. So, don’t take these numbers as gospel, okay? They’re just estimates!
Enjoyed This Garlic Butter Chicken Recipe? Leave a Rating and Comment!
Hey there, friend! If you gave this Garlic Butter Chicken a whirl, I’d just *love* to know what you thought! Seriously, leave a rating and drop a comment below – it helps me tweak the recipe to make it even better for everyone. Plus, your tips might just be the key someone else needs to nail this dish! Happy cooking!
Print
Crispy Oven Roasted Potatoes and Onions
- Total Time: 65 min
- Yield: 6 servings 1x
- Diet: Vegan
Description
Simple oven roasted potatoes and onions.
Ingredients
- 2 lbs potatoes, peeled and cubed
- 2 large onions, sliced
- 1/4 cup olive oil
- 1 teaspoon salt
- 1/2 teaspoon black pepper
- 1 teaspoon dried oregano
Instructions
- Preheat oven to 400°F (200°C).
- In a large bowl, combine potatoes, onions, olive oil, salt, pepper, and oregano.
- Spread the mixture in a single layer on a baking sheet.
- Roast for 45-50 minutes, or until potatoes are tender and golden brown, flipping halfway through.
- Serve hot.
Notes
- For extra crispiness, parboil the potatoes for 5 minutes before roasting.
- Prep Time: 15 min
- Cook Time: 50 min
- Category: Side Dish
- Method: Roasting
- Cuisine: Mediterranean
Nutrition
- Serving Size: 1 serving
- Calories: 250
- Sugar: 5g
- Sodium: 300mg
- Fat: 12g
- Saturated Fat: 2g
- Unsaturated Fat: 10g
- Trans Fat: 0g
- Carbohydrates: 35g
- Fiber: 4g
- Protein: 4g
- Cholesterol: 0mg