 Skip to content

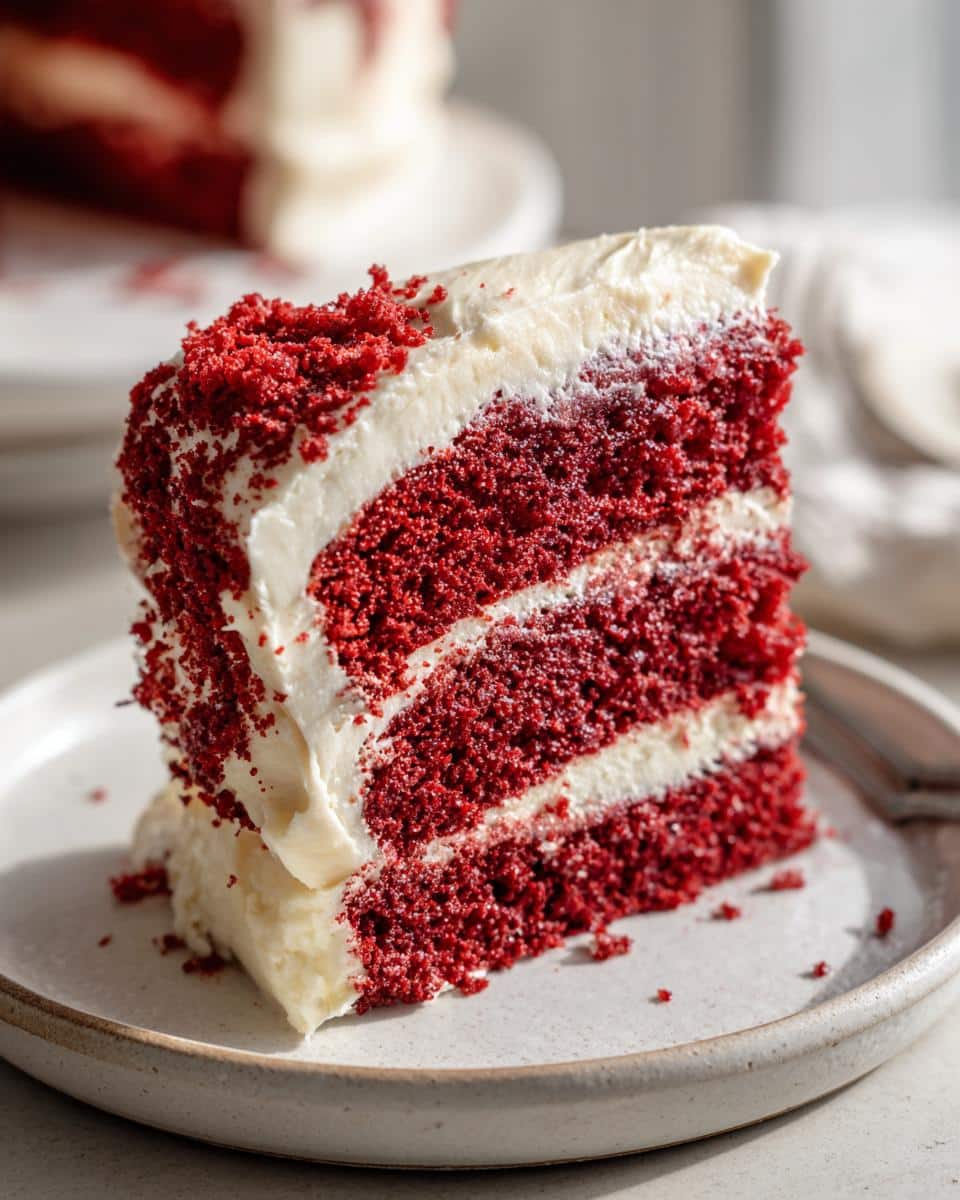
Oh my goodness, you guys! There’s just something about a classic red velvet cake that screams “celebration,” doesn’t it? I swear, just the sight of that deep, vibrant red against the fluffy white cream cheese frosting makes my heart do a little happy dance. I remember the first time I *really* nailed this red velvet cake recipe – it was for my best friend Sarah’s birthday, and I wanted to make something truly special, something that wasn’t just pretty but tasted absolutely heavenly. I’m talking moist, tender, with that unmistakable subtle cocoa tang and a rich, dreamy frosting that makes you want to lick the plate clean! It took a few tries, (let’s just say my first attempt was more ‘pinkish-brown’ than ‘red velvet’), but the journey to perfecting this classic has been so worth it. As a home cook who just loves making delicious things from scratch, this recipe has become one of my absolute favorites. It’s a showstopper every single time!
Why You’ll Love This Red Velvet Cake Recipe
Honestly? This isn’t just any old red velvet cake recipe; it’s *the one* you’ll come back to again and again! Trust me, I’ve tried a few! Here’s why I think you’ll fall head over heels for this particular rendition:
- It’s unbelievably moist: We’re talking melt-in-your-mouth tenderness here, truly a moist red velvet cake recipe that hits all the right notes.
- Flavor explosion: That classic subtle cocoa with a hint of tang and vanilla? Perfection! It’s easily the best red velvet cake recipe out there, in my humble opinion.
- Dreamy Cream Cheese Frosting: You can’t have red velvet without that iconic, luscious red velvet cake with cream cheese frosting! It balances the cake beautifully.
- Impressive, but totally doable: It looks fancy, but the steps are straightforward. You’ve got this!
Essential Ingredients for a Perfect Red Velvet Cake Recipe
Okay, let’s talk ingredients! This is where the magic really starts to happen for our red velvet beauty. I’m all about simple, quality stuff. Trust me, getting these right and having them ready before you even touch a mixing bowl makes all the difference. No running around frantically mid-recipe!
For the Gorgeously Red Cake Layers:
- 2 ½ cups all-purpose flour (and please, give it a good sift!)
- 1 teaspoon baking soda (fresh is best!)
- 1 teaspoon unsweetened cocoa powder (just a little kiss of chocolate)
- ½ teaspoon salt (don’t skip this, it brightens everything!)
- ½ cup unsalted butter, softened to room temperature (super important for creaming!)
- 1 ½ cups granulated sugar
- 2 large eggs (also room temp, pretty please!)
- 1 teaspoon vanilla extract (the good stuff, if you have it)
- 1 cup buttermilk (this is KEY for that famous tang and moisture!)
- 2 tablespoons red food coloring (liquid or gel, your choice – gel gives a deeper color, but I often use liquid for that classic look)
- 1 teaspoon white vinegar (another secret weapon for tender crumb and color!)
For the Dreamy Cream Cheese Frosting:
- 8 ounces cream cheese, softened (again, room temp is non-negotiable!)
- ½ cup unsalted butter, softened (you guessed it, room temp!)
- 4 cups powdered sugar, sifted (NO lumps, thank you very much!)
- 1 teaspoon vanilla extract
- 1-2 tablespoons milk or cream, as needed (just a splash to get the perfect consistency)
Step-by-Step Guide: How to Prepare This Red Velvet Cake Recipe
Alright, friends, this is where we actually *make* that gorgeous homemade red velvet cake! Don’t fret, I’m going to walk you through each step, just like I would if we were baking side-by-side in my kitchen. It’s all about method here, and once you get the rhythm, it’s super satisfying.
- Get Ready, Get Set, Bake! First things first, preheat your oven to 350°F (175°C). Then, grab two 9-inch round cake pans. I like to grease them really well and then flour them, tapping out any excess. This ensures your beautiful cakes slide out like a dream!
- Whisk Those Dry Guys: In a medium bowl, whisk together your flour, baking soda, cocoa powder, and salt until they’re all friends. Set this bowl aside for a moment. This pre-mixing stops any little clumps later on!
- Cream Time! In a totally separate, larger bowl (or your stand mixer bowl), beat the softened butter and granulated sugar together with an electric mixer. You want this to be light and fluffy, almost pale in color. This can take a few minutes, so be patient – it’s crucial for the cake’s texture!
- Eggs & Vanilla In: Beat in your eggs, one at a time, making sure each one is fully incorporated before adding the next. Then, stir in that lovely vanilla extract. It’s going to smell amazing already!
- Red Power Squad! In a separate small bowl or measuring cup, quickly whisk together the buttermilk, red food coloring, and white vinegar. This is where the magic red color really comes to life, and the vinegar reacts with the baking soda later for that perfect lift.
- Alternate Wet & Dry: Now for the gentle mingle! Gradually add the dry ingredients to your wet mixture, alternating with the buttermilk concoction. START and END with the dry ingredients. Mix until JUST combined. Seriously, stop mixing as soon as you don’t see any dry streaks. Overmixing is the enemy of a tender cake!
- Into the Pans: Divide that vibrant batter evenly between your prepared cake pans. I like to give the pans a little tap on the counter to level them out.
- Bake It Up! Pop them into your preheated oven and bake for 25-30 minutes. You’ll know they’re done when a wooden skewer or toothpick inserted into the center comes out clean. My gramma just knew by looking, but a toothpick works wonders!
- Cool Down: Let the cakes cool in their pans for about 10 minutes. This helps them firm up before you flip them out. Then, carefully invert them onto a wire rack to cool completely. No frosting a warm cake, promise! It’ll just melt off.
- Frosting Time! While your cakes are chilling, let’s make that glorious cream cheese frosting! In a large bowl, beat the softened cream cheese and softened butter until it’s perfectly smooth and creamy.
- Sugar Rush: Gradually add your sifted powdered sugar, one cup at a time, beating until everything is incorporated and fluffy.
- Vanilla Touch: Stir in the vanilla extract.
- Consistency Check: If your frosting feels a little too thick, just add a tablespoon of milk or cream at a time until it’s wonderfully spreadable. But do it slowly, you don’t want it soupy! It should be stiff enough to hold its shape for a gorgeous red velvet cheesecake swirl, for example!
- Assemble Your Masterpiece: Once the cakes are COMPLETELY cool (I mean it!), place one layer on your serving platter. Spread a generous layer of that irresistible cream cheese frosting over the top.
- Finish Line: Carefully place the second cake layer on top, and then frost the top and sides of the entire cake. Smooth it out, pile it high, or give it some fancy swirls – whatever makes you happy!
- Serve and Enjoy! Decorate if you want (some leftover red crumbs always look cute), slice it up, and watch everyone swoon. You did it!
Tips for Success with Your Red Velvet Cake Recipe
Okay, so you’ve got the steps down, but let me spill some little secrets that’ll take your red velvet cake from “good” to “whoa, *you* made this?!” These are my absolute must-follow tips for achieving that perfect, moist red velvet cake recipe every single time. Seriously, these make all the difference!
- Room Temperature is Your Best Friend: I can’t stress this enough! Butter, eggs, cream cheese, and especially that buttermilk – get them out on the counter well before you start. Room temperature ingredients emulsify better, which means a smoother batter and a more evenly baked, tender cake.
- Don’t Overmix the Batter: Once you start adding the dry and wet ingredients alternately, mix *just* until combined. Overmixing develops the gluten in the flour, making your cake tough and dry. A few small streaks of flour are totally fine; they’ll disappear during baking!
- Liquid Red Food Coloring vs. Gel: Both work! I usually grab the regular liquid kind for that classic red but for a really deep, vibrant hue, gel food coloring is fantastic. Just be mindful you might need a tiny bit less gel as it’s more concentrated.
- Know Your Oven: Every oven is a little different. Keep an eye on your cakes, especially towards the end of the baking time. That toothpick test is great, but also trust your nose – a perfectly baked cake usually smells amazing!
- Cool Completely Before Frosting: I know, I know, it’s hard to wait! But frosting a warm cake is a recipe for disaster (and melted frosting). Give those layers plenty of time to cool down completely on a wire rack before you even *think* about spreading that glorious cream cheese frosting. Patience, my friend, is a virtue in baking!
Variations of the Classic Red Velvet Cake Recipe
Once you’ve mastered this classic, which I know you totally will, you might be wondering, “What else can I do with this amazing red velvet cake recipe?” Oh, honey, the possibilities are endless! It’s such a versatile base. Here are a few ways I love to switch it up when I’m feeling a little extra:
- Red Velvet Cupcakes: Just divide the batter among cupcake liners! Pop them in the oven for about 18-22 minutes. Voila! Instant red velvet cupcake recipe that’s perfect for parties or just a little treat.
- Red Velvet Sheet Cake: Short on time or feeding a crowd? Pour the batter into a 9×13 inch baking pan. Bake for about 30-35 minutes. Easy peasy red velvet sheet cake recipe, and still just as delicious!
- Add a Fruity Twist: Sometimes I’ll fold in a handful of fresh raspberries or chopped strawberries into the batter right before baking. It adds a lovely tartness that plays beautifully with the cream cheese frosting.
- Coffee Lover’s Red Velvet: A tiny splash of strong brewed coffee or espresso (about 1-2 tablespoons) can really enhance the cocoa flavor without making it taste like coffee cake. It deepens those chocolate notes!
Storage & Reheating for Your Red Velvet Cake
So, you’ve made this showstopper of a cake, and now you have leftovers (lucky you!). Keeping your red velvet fresh is super important to enjoy every single bite. If it’s frosted, always store it in an airtight container in the fridge; it’ll stay delicious for up to 3-4 days. Unfrosted layers do great wrapped tightly in plastic wrap (and then maybe foil!) on the counter for a day, or they can be frozen for a couple of months. Just thaw them overnight in the fridge before frosting!
Frequently Asked Questions About This Red Velvet Cake Recipe
Okay, so you’ve got questions, and I’ve got answers! It’s totally normal to have a few head-scratchers when you’re tackling a new recipe, even one as fun as this red velvet cake recipe. Here are some of the things my friends (and I, in my early baking days!) always ask about red velvet.
Can I make this a southern red velvet cake recipe?
Absolutely! This recipe *is* rooted in those classic Southern traditions. The buttermilk, vinegar, and a touch of cocoa are all hallmarks of a true southern red velvet cake recipe. So, yes, you’re already doing it! Just picture yourself on a porch swing with a slice – that’s Southern, right?
What if I don’t have buttermilk for this red velvet cake recipe?
No buttermilk? No problem! This hack is a lifesaver. You can totally make your own. Just measure out 1 cup of regular milk (whole or 2% works best) and stir in 1 tablespoon of white vinegar or lemon juice. Let it sit for about 5-10 minutes until it looks slightly curdled. Voila! Instant buttermilk substitute that will work perfectly for your moist red velvet cake recipe.
How do I prevent my red velvet cake from drying out?
Ah, the age-old question! The biggest culprits for a dry cake are usually overmixing the batter or overbaking. Remember what I said about mixing *just* until combined? That’s key! Also, keep an eye on your oven and start checking for doneness at the lower end of the baking time. The toothpick test is your best friend here. Plus, the buttermilk and a good amount of fat (butter!) in this particular red velvet cake recipe really help keep it wonderfully moist. And be sure to store it properly, as mentioned above!
Is this the best red velvet cake recipe for beginners?
I genuinely think so! I’ve tried to make sure all the steps are super clear, and the ingredients are common. The secret to the best red velvet cake recipe isn’t about fancy techniques, it’s about following a good recipe and being patient. You’ve totally got this!
Estimated Nutritional Information for Red Velvet Cake
Just a quick note! While I’ve provided some delicious guidance for this red velvet cake, please remember that any nutritional information you find for baked goods, including this one, is always an estimate. The actual values can totally vary depending on the specific brands of ingredients you use (like butter, sugar, and even flour!) and how exact your measurements are. So, take it with a grain of salt (figuratively speaking, of course – don’t add more salt to the cake!).
Share Your Experience with This Red Velvet Cake Recipe
Well, there you have it, folks! My absolute favorite red velvet cake recipe, straight from my kitchen to yours. I am *so* excited for you to try this! Please, please, please come back and tell me how it went. Did your family devour it? Did you impress your friends? Leave a comment below, rate the recipe, or even better, snap a pic and tag me on social media! I just love seeing your creations!
Print
Classic Red Velvet Cake with Cream Cheese Frosting
- Total Time: 1 hr
- Yield: 12 servings 1x
- Diet: Vegetarian
Description
This recipe provides instructions for a classic red velvet cake with a rich cream cheese frosting. It yields a moist, flavorful cake with its characteristic red hue.
Ingredients
- 2 ½ cups all-purpose flour
- 1 teaspoon baking soda
- 1 teaspoon cocoa powder
- ½ teaspoon salt
- ½ cup unsalted butter, softened
- 1 ½ cups granulated sugar
- 2 large eggs
- 1 teaspoon vanilla extract
- 1 cup buttermilk
- 2 tablespoons red food coloring
- 1 teaspoon white vinegar
- 8 ounces cream cheese, softened
- ½ cup unsalted butter, softened
- 4 cups powdered sugar, sifted
- 1 teaspoon vanilla extract
- 1–2 tablespoons milk or cream (as needed)
Instructions
- Preheat your oven to 350°F (175°C). Grease and flour two 9-inch round cake pans.
- In a medium bowl, whisk together the flour, baking soda, cocoa powder, and salt. Set aside.
- In a large bowl, using an electric mixer, cream together the softened butter and granulated sugar until light and fluffy.
- Beat in the eggs one at a time, then stir in the vanilla extract.
- In a separate small bowl, whisk together the buttermilk, red food coloring, and white vinegar.
- Gradually add the dry ingredients to the wet ingredients, alternating with the buttermilk mixture, beginning and ending with the dry ingredients. Mix until just combined, being careful not to overmix.
- Divide the batter evenly between the prepared cake pans and spread smoothly.
- Bake for 25-30 minutes, or until a wooden skewer inserted into the center comes out clean.
- Let the cakes cool in the pans for 10 minutes before inverting them onto a wire rack to cool completely.
- For the Cream Cheese Frosting: In a large bowl, beat together the softened cream cheese and softened butter until smooth and creamy.
- Gradually add the sifted powdered sugar, one cup at a time, beating until fully incorporated and fluffy.
- Stir in the vanilla extract.
- If the frosting is too thick, add milk or cream one tablespoon at a time until it reaches a spreadable consistency.
- Assembly: Once the cakes are completely cool, place one cake layer on a serving platter.
- Spread a generous layer of cream cheese frosting over the top.
- Carefully place the second cake layer on top and frost the top and sides of the entire cake.
- Decorate as desired and serve.
Notes
- Ensure all ingredients are at room temperature for best results.
- Do not overmix the cake batter to keep the cake tender.
- Sift the powdered sugar for the frosting to prevent lumps.
- Prep Time: 30 min
- Cook Time: 30 min
- Category: Dessert
- Method: Baking
- Cuisine: American
Nutrition
- Serving Size: 1 slice
- Calories: 450
- Sugar: 50g
- Sodium: 250mg
- Fat: 25g
- Saturated Fat: 15g
- Unsaturated Fat: 8g
- Trans Fat: 0.5g
- Carbohydrates: 55g
- Fiber: 1g
- Protein: 4g
- Cholesterol: 80mg