
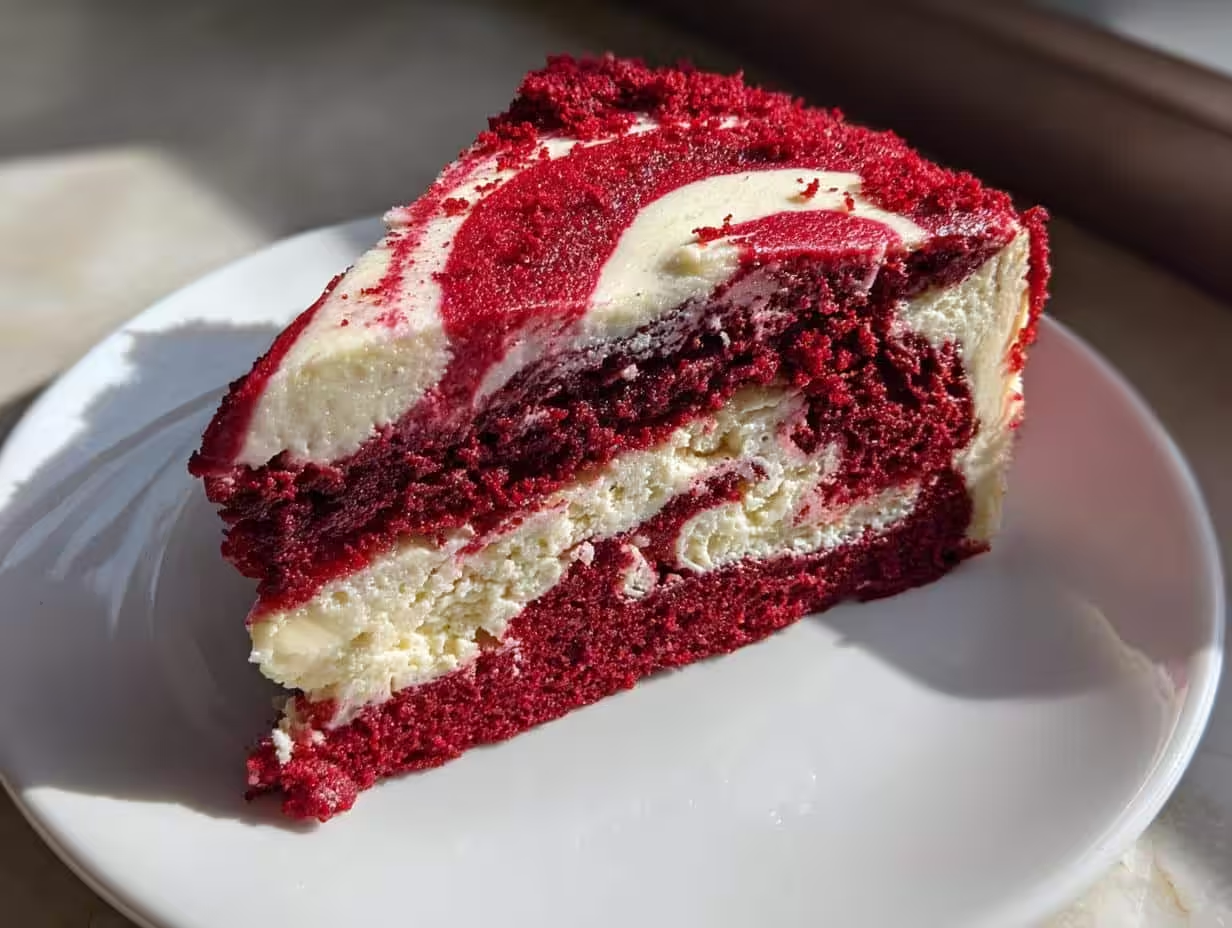
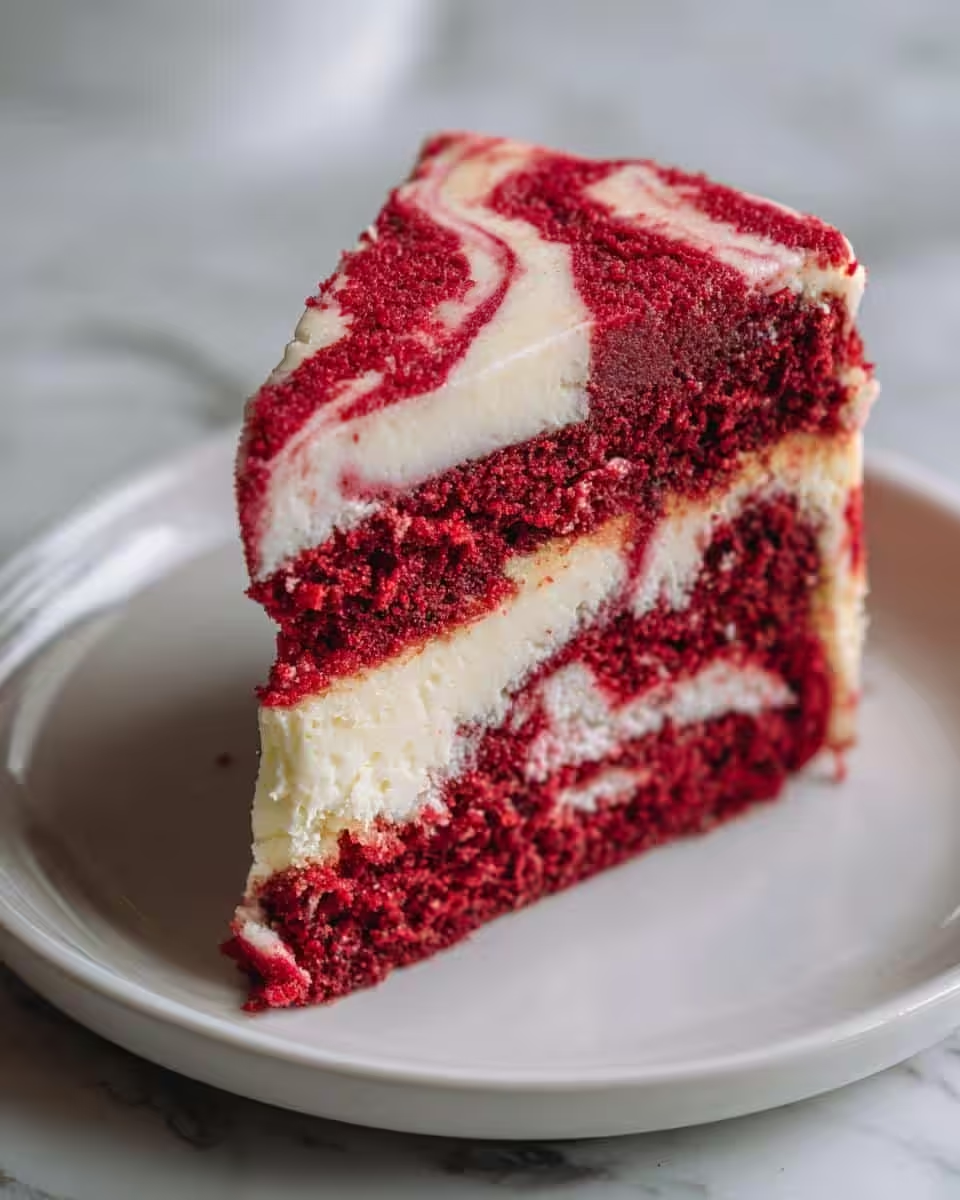
Okay, so picture this: it was my best friend Sarah’s birthday, and I wanted to make something truly special, something that screamed “celebration!” I’d always loved red velvet and I’m a total sucker for anything cheesecake. That’s when it hit me – why not put them together? The first time I pulled this Red Velvet Cheesecake Swirl Cake out of the oven, the smell alone was heavenly. Then, seeing that gorgeous crimson cake peeking through the creamy, bright cheesecake swirls? Pure magic! It instantly became one of my go-to desserts for special occasions. Seriously, it’s got that rich, cocoa-buttery red velvet deliciousness perfectly balanced with tangy, smooth cheesecake. If you’re looking for a showstopper that’s both elegant and ridiculously tasty, you’ve found it!
Why You’ll Love This Red Velvet Cheesecake Swirl Cake
Honestly, what’s not to love about this beauty? It’s not just a cake; it’s an experience! Seriously, I think you’ll fall head over heels for this Red Velvet Cheesecake Swirl Cake because:
- It’s super impressive (but secretly easy!): That swirl looks fancy, right? Well, it’s actually a breeze to create, making you look like a baking superstar with minimal effort.
- The best of both worlds: You get that moist, cocoa-rich red velvet cake paired perfectly with creamy, tangy cheesecake. It’s a flavor match made in dessert heaven!
- Perfect for any celebration: Whether it’s a birthday, holiday, or just a Tuesday that needs cheering up, this cake brings smiles every time. It just feels special without being fussy.
- Did I mention delicious? The balance of flavors and textures is just *chef’s kiss*. Trust me, it tastes even better than it looks!
Essential Equipment for Your Red Velvet Cheesecake Swirl Cake
To whip up this gorgeous Red Velvet Cheesecake Swirl Cake, you don’t need a professional kitchen, just a few basics! Here’s what I always grab:
- 9-inch round baking pan: This is my go-to for cakes like this.
- Large mixing bowls: You’ll need at least two, one for dry ingredients and one for wet.
- Whisk: For combining those dry ingredients effortlessly.
- Electric mixer (handheld or stand): A must for creaming butter and sugar, and getting that cheesecake swirl beautifully smooth.
- Rubber spatula: For scraping down the bowls and folding in the batter without overmixing.
- Measuring cups and spoons: Precision is key in baking, even for chaotic cooks like me!
- Wooden skewer or toothpick: For testing if your cake is perfectly baked.
Ingredients for the Perfect Red Velvet Cheesecake Swirl Cake
Alright, friends, let’s talk ingredients! This Red Velvet Cheesecake Swirl Cake uses pretty standard stuff, but getting them just right makes all the difference. Seriously, don’t skimp on quality here; it really shines through. And remember, room temperature is your best friend for butter and cream cheese – it helps everything combine smoothly!
- For the Red Velvet Cake:
- 1 1/2 cups all-purpose flour
- 1 cup granulated sugar
- 1 teaspoon baking soda
- 1/2 teaspoon salt
- 1/2 cup unsalted butter, softened (really soft, like you could press your finger right through it!)
- 1 large egg
- 1 teaspoon vanilla extract
- 1/2 cup buttermilk (if you don’t have it, a quick hack is 1/2 cup milk + 1/2 tablespoon lemon juice or white vinegar, let it sit for 5 minutes!)
- 1 tablespoon red food coloring (for that iconic red, honey!)
- For the Creamy Cheesecake Swirl:
- 4 ounces cream cheese, softened (again, room temperature is key for no lumps!)
- 1/4 cup granulated sugar
- 1 large egg yolk (just the yolk, it keeps it super rich and creamy, like in my Red Velvet Strawberry Cheesecake!)
How to Prepare Your Red Velvet Cheesecake Swirl Cake
Alright, let’s get down to the fun part – actually making this gorgeous Red Velvet Cheesecake Swirl Cake! Don’t fret, I’m going to walk you through it step-by-step. It’s truly simpler than it looks, I promise!
-
Get Ready to Bake: First things first, preheat your oven to 350°F (175°C). Then, grab your 9-inch round baking pan. You’ll want to grease and flour it really well. I usually use a little baking spray with flour in it, or you can butter it and dust with flour. This prevents any sad sticking situations!
-
Whisk the Dry Stuff: In a large bowl, whisk together your flour, 1 cup of granulated sugar, that all-important baking soda, and the salt. Give it a good whisk to make sure everything’s evenly distributed. No one wants a mouthful of just baking soda, right?
-
Mix the Wet Magic: In a separate, medium bowl, it’s time for the wet ingredients for your red velvet. Cream together your softened butter (remember, room temp is key!), the large egg, vanilla extract, buttermilk, and the red food coloring. You want this to be nice and smooth. Just look at that vibrant red!
-
Combine and Don’t Overmix! Now, gently add your wet ingredients to the dry ingredients. Mix until they are just combined. And I mean *just* combined! Overmixing is the enemy of a tender cake; it develops too much gluten and makes it tough. A few streaks of flour are totally fine; they’ll disappear in the oven.
-
First Layer Down: Pour about half of your beautiful red velvet batter into your prepared pan. Spread it out evenly with your spatula.
-
Cheesecake Swirl Time! In a small, clean bowl, beat together your softened cream cheese, the 1/4 cup of sugar, and that egg yolk. Beat it until it’s super smooth and creamy, no lumps allowed! This is going to be the dreamy center of your cake – kind of like the amazing swirl in my Pumpkin Cream Cheese Swirl Bread or these delish Blueberry Cheesecake Swirl Cookies.
-
Dollop and Pour: Take spoonfuls (dollops!) of that creamy cheesecake mixture and drop them over the red velvet batter in the pan. Don’t worry about being too neat. Then, carefully pour the remaining red velvet batter over the cheesecake dollops. Try to cover as much of the cheesecake as you can.
-
The Swirl Reveal: Now for the fun part! Gently take a knife—or even a skewer—and swirl through the layers to create that gorgeous marbled effect. Don’t overdo it, just a few passes will make it beautiful. We want swirls, not a muddy mess!
-
Bake to Perfection: Pop your cake into the preheated oven. Bake for about 30-35 minutes. You’ll know it’s done when a wooden skewer or toothpick inserted into the center comes out clean. If you see a little moist crumb, that’s okay, but no wet batter!
-
Cool Down: Let the cake cool in the pan for about 10 minutes. This is crucial! It gives the cake time to set properly. Then, carefully invert it onto a wire rack to cool completely. Resist the urge to cut into it while it’ll be worth the wait!
Tips for a Flawless Red Velvet Cheesecake Swirl Cake
Okay, so you’ve got the steps down, but I’ve got a few extra little secrets that’ll turn your Red Velvet Cheesecake Swirl Cake from good to absolutely *amazing*. These are the things that make all the difference, trust me!
- Room Temperature is Non-Negotiable: I cannot stress this enough! Make sure your butter, eggs, buttermilk, and especially your cream cheese are at room temperature. This helps everything emulsify properly, giving you a smooth, lump-free batter and an unbelievably creamy cheesecake swirl. Cold ingredients just don’t play nice together!
- Don’t Be Afraid of the Red! For that really vibrant, classic red velvet color, don’t be shy with the red food coloring. You want it to look striking! I usually add just a little more than the recipe calls for because I love that deep, rich hue.
- Gentle Mixing is Key: When you’re combining the wet and dry ingredients for the cake, mix *just* until combined. A few streaks of flour are perfectly fine. Overmixing develops the gluten, and we want a tender, soft cake, not a tough one!
- The Art of the Swirl: For the swirl, less is more! You want distinct lines of red velvet and cheesecake, not a muddy mess. After dolloping the cheesecake mixture, pour the remaining cake batter over. Then, just use a knife or skewer and make a few gentle S-shapes or figure-eights—don’t drag it too much. You’re aiming for pretty ribbons, not a fully blended batter.
- Patience, My Friend: Letting the cake cool completely before slicing is crucial. The flavors continue to meld, and the cake structure sets up perfectly. I know it’s hard, but resist the urge to cut into it right away!
Red Velvet Cheesecake Swirl Cake: Storage and Reheating
So, you’ve somehow managed to have some leftover Red Velvet Cheesecake Swirl Cake (a rare feat in my house!). Don’t worry, storing it is super simple. Because of the cream cheese swirl, you’ll definitely want to keep this cake refrigerated. Just pop it in an airtight container or cover it loosely with plastic wrap. It’ll stay wonderfully fresh and delicious for 3-4 days. If you’re a planner, this cake also freezes beautifully! Wrap individual slices or the whole cake tightly in plastic wrap, then an extra layer of foil, and freeze for up to 2-3 months. Thaw it in the fridge overnight before serving. No reheating needed; it’s best enjoyed chilled or at room temperature!
Frequently Asked Questions About Red Velvet Cheesecake Swirl Cake
I get a lot of questions about this Red Velvet Cheesecake Swirl Cake – and I love it! It means you’re just as excited about making it as I am. Here are some of the most common things people ask me:
Can I make this Red Velvet Cheesecake Swirl Cake ahead of time?
Absolutely! This Red Velvet Cheesecake Swirl Cake actually tastes even better the next day, once all those amazing flavors have had a chance to meld. Just bake it, let it cool completely, then cover it tightly and refrigerate for up to 2-3 days before you plan to serve. So perfect for parties!
What can I use instead of buttermilk in my Red Velvet Cheesecake Swirl Cake?
No buttermilk? No problem! My favorite easy swap is to measure out a 1/2 cup of regular milk (whole milk works best!) and then stir in 1/2 tablespoon of lemon juice or white vinegar. Let it sit for about 5 minutes, and voila – homemade buttermilk! It works perfectly for giving your red velvet that amazing tang and tender crumb. It’s truly a lifesaver for recipes like this or my Cheesecake Stuffed Snickerdoodles where that little bit of acidity really makes a difference.
How do I get a perfect swirl in my Red Velvet Cheesecake Swirl Cake?
The secret to a gorgeous swirl in your Red Velvet Cheesecake Swirl Cake is gentle restraint! After you’ve dolloped the cheesecake mixture over the first layer of red velvet, and then topped it with the rest of the red velvet batter, grab a knife or a skewer. Make just a few sweeping motions, like making a figure-eight or an “S” shape. Don’t overmix it; you want distinct ribbons of red and cream, not a muddy blend. Less is definitely more here for that stunning visual!
Estimated Nutritional Information for Red Velvet Cheesecake Swirl Cake
Just a quick heads-up on the nutritional stuff for this Red Velvet Cheesecake Swirl Cake! Since we’re all about real ingredients here, and brands can vary (plus how big you cut your slice, wink wink!), the nutritional values provided are just estimates. Think of them as a general guide, not gospel. What really matters is how much joy it brings!
Share Your Red Velvet Cheesecake Swirl Cake Creations!
Okay, now it’s YOUR turn! I’d absolutely LOVE to see your beautiful Red Velvet Cheesecake Swirl Cake creations. Did you add a special topping? Did your swirl turn out picture-perfect? Did it totally wow your family? Drop a comment below, share your experiences, or even better, tag me on social media! And please, don’t forget to give this recipe a rating if you loved it. Your feedback means the world to me!
Print
Red Velvet Cheesecake Swirl Cake
- Total Time: 55 min
- Yield: 8 servings 1x
- Diet: Vegetarian
Description
This recipe combines red velvet cake with a creamy cheesecake swirl. It is a dessert for special occasions.
Ingredients
- 1 1/2 cups all-purpose flour
- 1 cup granulated sugar
- 1 teaspoon baking soda
- 1/2 teaspoon salt
- 1/2 cup unsalted butter, softened
- 1 large egg
- 1 teaspoon vanilla extract
- 1/2 cup buttermilk
- 1 tablespoon red food coloring
- 4 ounces cream cheese, softened
- 1/4 cup granulated sugar
- 1 large egg yolk
Instructions
- Preheat oven to 350°F (175°C). Grease and flour a 9-inch round baking pan.
- In a large bowl, whisk together flour, 1 cup sugar, baking soda, and salt.
- In a separate bowl, cream together butter, 1 large egg, vanilla extract, buttermilk, and red food coloring.
- Add wet ingredients to dry ingredients and mix until just combined. Do not overmix.
- Pour half of the red velvet batter into the prepared pan.
- In a small bowl, beat cream cheese, 1/4 cup sugar, and egg yolk until smooth for the cheesecake swirl.
- Spoon dollops of the cheesecake mixture over the red velvet batter in the pan.
- Pour the remaining red velvet batter over the cheesecake mixture.
- Swirl gently with a knife to create a marbled effect.
- Bake for 30-35 minutes, or until a wooden skewer inserted into the center comes out clean.
- Let cool in the pan for 10 minutes before transferring to a wire rack to cool completely.
Notes
- Ensure all cold ingredients are at room temperature for a smooth batter.
- Do not overmix the cake batter; mix until just combined.
- For a deeper red color, you can add a bit more food coloring.
- Prep Time: 20 min
- Cook Time: 35 min
- Category: Dessert
- Method: Baking
- Cuisine: American
Nutrition
- Serving Size: 1 slice
- Calories: 450
- Sugar: 50g
- Sodium: 350mg
- Fat: 25g
- Saturated Fat: 15g
- Unsaturated Fat: 8g
- Trans Fat: 1g
- Carbohydrates: 55g
- Fiber: 1g
- Protein: 5g
- Cholesterol: 90mg