
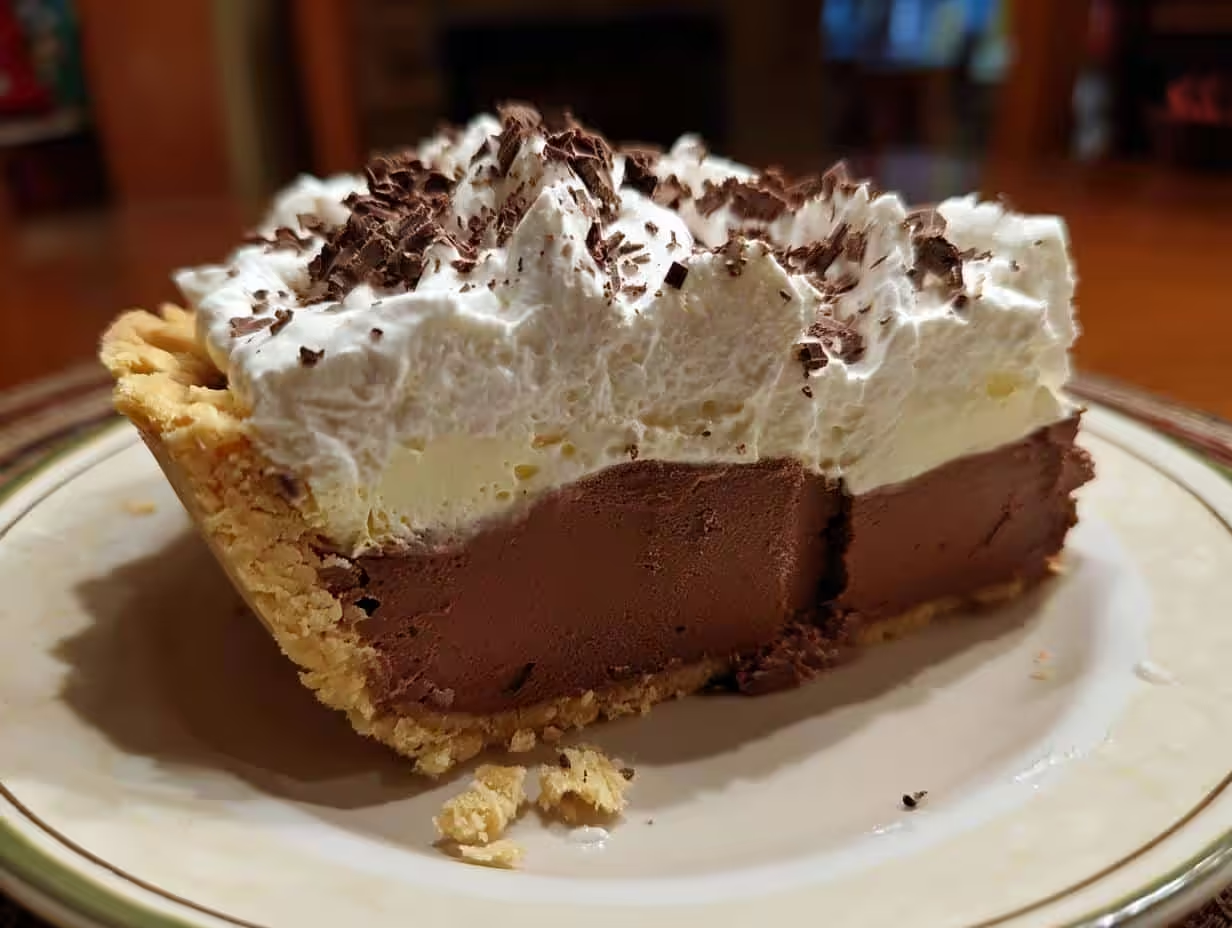
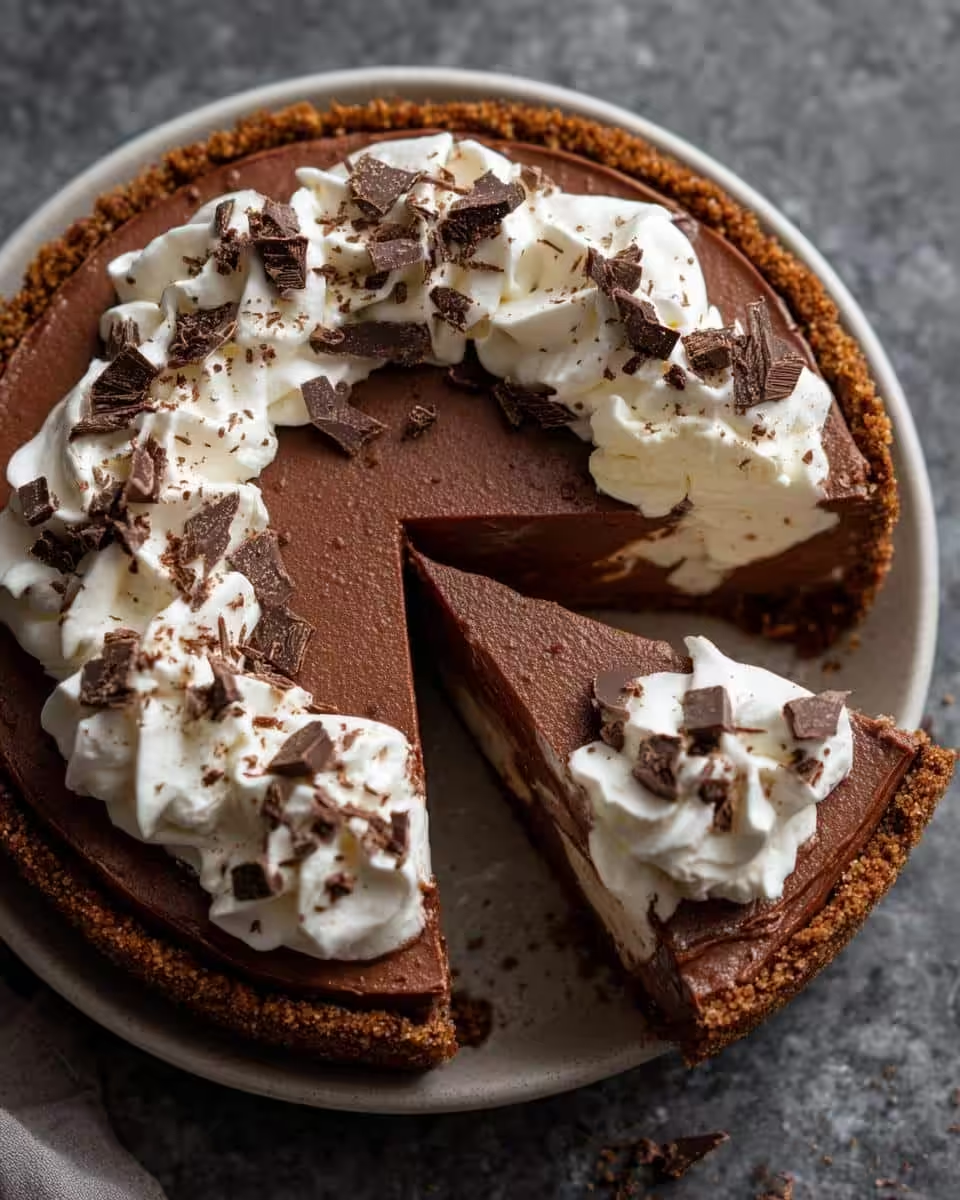
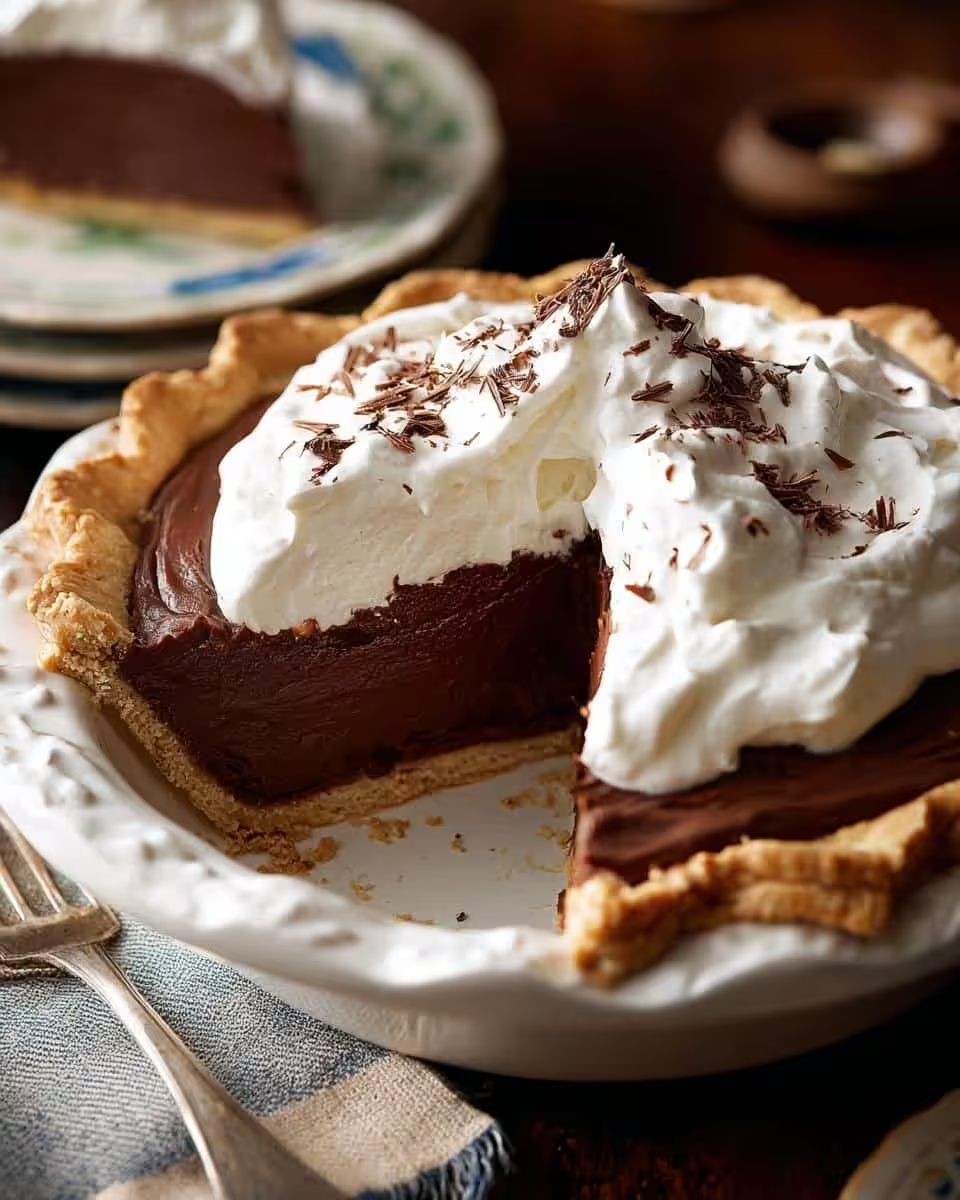
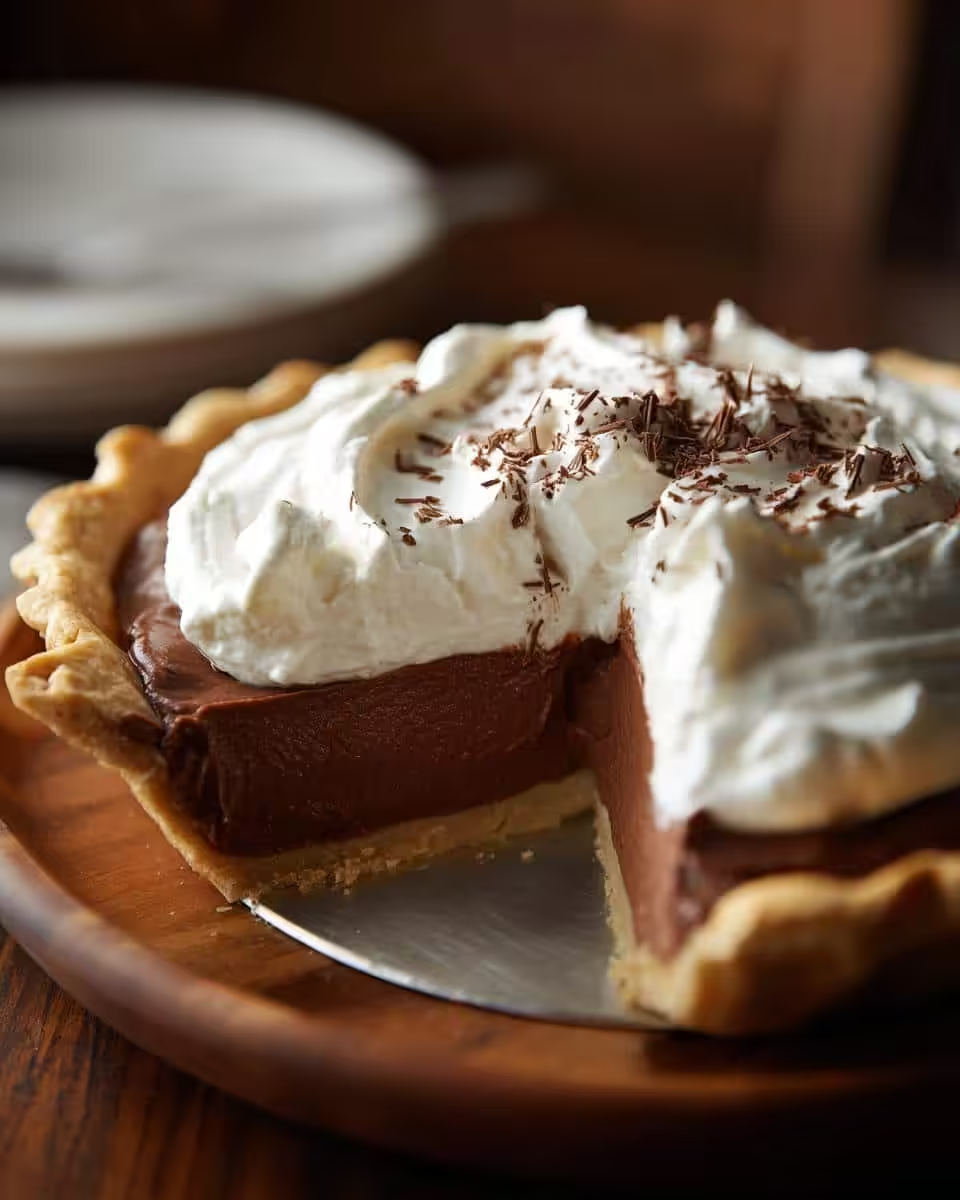
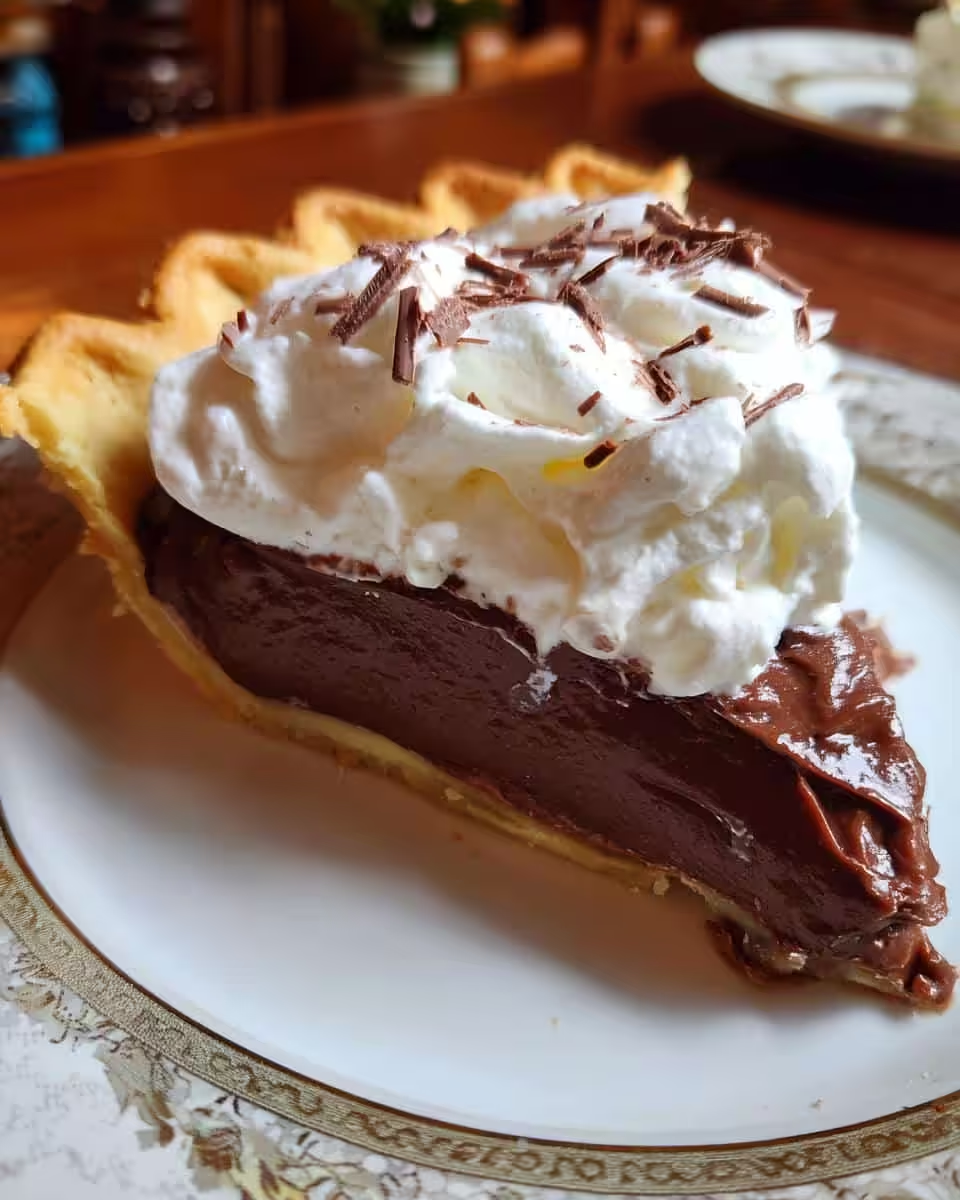
Okay, folks, let me tell you about the *best* classic chocolate cream pie you’ll ever taste. Seriously. I’ve been baking this recipe for years, tweaking and perfecting it until it’s just right. It all started with my grandma’s recipe, which was good, but needed *more* chocolate, if you ask me (and you are, kinda!). This isn’t just any chocolate cream pie, it’s got that silky smooth filling, that rich, intense chocolate flavor, and a crust that’s flaky and buttery. It’s my go-to for potlucks, birthdays, or, let’s be honest, a regular Tuesday night when I need a little chocolate therapy. Trust me, once you try this best classic chocolate cream pie, you’ll never go back to store-bought again. So, let’s get baking!
Why You’ll Love This The Best Classic Chocolate Cream Pie
Okay, so what’s so special about *this* chocolate cream pie? Lemme tell ya! It’s not just dessert; it’s an experience. Here’s why you’ll be head-over-heels:
- **Silky Smooth Filling:** Seriously, this filling is like velvet. It just melts in your mouth.
- **Rich, Intense Chocolate Flavor:** We’re talkin’ deep, dark, decadent chocolate. No wimpy chocolate here!
- **Easy-to-Make Crust:** Don’t be scared of making your own crust! This comes together easier than you might think.
- **Perfect for *Any* Occasion:** From holidays to “I deserve chocolate” days, this pie is always a winner.
Ingredients for The Best Classic Chocolate Cream Pie
Alright, gather ’round! Before we dive into the chocolatey goodness, let’s make sure we have all our ingredients ready. Nothing worse than getting halfway through and realizing you’re missing something, right? We’re breaking this down into crust and filling to keep things nice and organized.
For the crust:
- 1 1/4 cups all-purpose flour
- 1/2 teaspoon salt
- 1/2 cup (1 stick) cold unsalted butter, cut into small cubes
- 3-5 tablespoons ice water
For the filling:
- 1 cup granulated sugar
- 1/4 cup cornstarch
- 1/4 teaspoon salt
- 3 cups whole milk
- 4 large egg yolks, lightly beaten
- 6 ounces bittersweet chocolate, chopped (I like to use 70% cacao!)
- 2 tablespoons unsalted butter
- 1 teaspoon vanilla extract
And hey, don’t forget the whipped cream for topping! ‘Cause what’s chocolate cream pie without a cloud of fluffy whipped cream, am I right?
How to Make The Best Classic Chocolate Cream Pie: Step-by-Step Instructions
Okay, here comes the fun part! Don’t worry, I’m gonna walk you through every single step to make the *best* classic chocolate cream pie you’ve ever seen. Trust me, even if you’re not a pie pro, you’ve got this. Let’s do it!
Step 1: Make the Crust
- First, whisk together the flour and salt in a large bowl.
- Next, add the cold, cubed butter. Now, you can use a pastry blender to cut the butter into the flour until the mixture resembles coarse crumbs, or you can use your fingers! If you use your fingers, work quickly so the butter doesn’t melt.
- Gradually add the ice water, one tablespoon at a time, mixing until the dough just comes together. Don’t overmix! You want to see some butter chunks.
- Form the dough into a disc, wrap it in plastic wrap, and refrigerate for at least 30 minutes. This is important! It lets the gluten relax and prevents shrinkage when baking.
- After chilling, roll out the dough on a lightly floured surface to a 12-inch circle. Transfer it to a 9-inch pie plate. Crimp the edges decoratively.
- Now, here’s a secret trick: Dock the bottom of the crust with a fork. This prevents it from puffing up too much while baking.
- Preheat your oven to 375°F (190°C).
- Bake the crust for 15-20 minutes, or until golden brown. Let it cool completely before filling.
Step 2: Make the Chocolate Filling
- In a medium saucepan, whisk together the sugar, cornstarch, and salt.
- Gradually whisk in the milk until smooth. We don’t want any lumps here!
- Cook over medium heat, stirring constantly, until the mixture comes to a simmer and thickens. This usually takes about 5-7 minutes. Keep stirring!
- Remove from heat. In a separate bowl, whisk a little of the hot milk mixture into the egg yolks to temper them (this prevents them from scrambling).
- Pour the tempered egg yolks into the saucepan and whisk constantly.
- Return the saucepan to medium heat and cook for 1 minute more, stirring constantly. The mixture should be nice and thick.
- Remove from heat again and stir in the chopped chocolate, butter, and vanilla extract until the chocolate is melted and the filling is smooth and glossy. Mmm, look at that shine!
Step 3: Assemble the Pie
- Pour the chocolate filling into the cooled pie crust.
- Cover the pie with plastic wrap, pressing it directly onto the surface of the filling to prevent a skin from forming.
- Refrigerate for at least 4 hours, or preferably overnight, to allow the filling to set completely. Be patient, it’s worth it!
- Before serving, top with whipped cream. You deserve it!
Tips for Making The Best Classic Chocolate Cream Pie Perfectly
Alright, let’s talk secrets – the real deal about making this the *best* classic chocolate cream pie *ever*. It’s all about the little things, you know? Here’s what I’ve learned along the way:
- **Cold Butter is Key:** Seriously, don’t even think about using softened butter for the crust. It needs to be *cold*, like straight-from-the-fridge cold. Those little bits of butter create flaky layers.
- **Don’t Overbake the Crust:** A slightly underbaked crust is better than a burnt one. Keep a close eye on it in the oven.
- **Tempering the Eggs:** This step is *crucial* for a smooth filling. Don’t skip it, or you’ll end up with scrambled eggs in your pie (yuck!).
- **Patience, my friend!:** Let that pie chill completely! I know it’s tempting to dig in right away but those four hours (or overnight) are what makes this the best it can be!
Ingredient Spotlight: Choosing the Right Chocolate for The Best Classic Chocolate Cream Pie
Okay, chocolate lovers, listen up! When it comes to *the best* classic chocolate cream pie, the chocolate you choose *matters*. Seriously matters! I always go for bittersweet chocolate, around 70% cacao. It gives you that deep, dark chocolate flavor without being too sweet. Milk chocolate? Too sweet and kinda one-dimensional, ya know? And unsweetened? Well, that’s just gonna be bitter. The right chocolate is the key to that rich, decadent experience. So, choose wisely, my friends!
Make-Ahead and Storage Tips for The Best Classic Chocolate Cream Pie
Wanna know the best part about this *best* classic chocolate cream pie? You can totally make it ahead of time! The filling actually sets up better if it chills overnight, so that works great for busy bees. Just keep it covered tightly in the fridge – it’ll last for about 3-4 days. As for freezing, I’m not a huge fan, as the texture can get a little weird when it thaws, but if you *need* to, wrap the pie well in plastic wrap and then foil. Thaw it in the fridge overnight before serving. But honestly, it’s so good, it probably won’t last long enough to need freezing!
Frequently Asked Questions About The Best Classic Chocolate Cream Pie
Got questions about making this *best* classic chocolate cream pie? Don’t worry, I’ve got answers! Here are a few of the most common things folks ask me:
Can I use a different type of crust?
Sure thing! If you’re not feeling the homemade crust, a store-bought graham cracker crust works great too. Just make sure to buy a deep-dish one to fit all that luscious filling! Or you could even try an Oreo crust for a chocolatey twist. Yum!
How do I prevent the crust from getting soggy?
Ah, the dreaded soggy crust! The key is to blind bake it properly. Docking it with a fork helps, and you can also weigh it down with pie weights or dried beans. And make sure the crust is completely cool before adding the filling. A little melted chocolate brushed on the bottom of the cooled crust helps too!
How long does the pie last in the refrigerator?
This *best* classic chocolate cream pie will stay fresh in the fridge for about 3-4 days, but let’s be real, it probably won’t last that long! Just keep it covered tightly so it doesn’t dry out or pick up any weird fridge smells. Trust me; everyone will be coming back for seconds (and thirds!).
Can I freeze chocolate cream pie?
Freezing isn’t my *favorite* thing to do with this particular pie, as the texture of the filling can change a bit when it thaws. But, if you absolutely need to, wrap it really, really well in plastic wrap and then foil. Thaw it in the fridge overnight before serving. Just don’t expect it to be *exactly* the same as fresh!
Nutritional Information for The Best Classic Chocolate Cream Pie
Okay, folks, listen up! I always get asked about the nutritional info for this *best* classic chocolate cream pie, and I wanna be upfront: it’s tricky! Since everyone uses different brands and ingredients, it’s really hard to give you an exact number. So, just keep in mind that any nutritional information out there is just an estimate. But hey, we all know this pie is more about indulgence and happiness than strict calorie counting, right?
Enjoy Your Homemade The Best Classic Chocolate Cream Pie
Alright, friends, that’s it! You’ve made *the best* classic chocolate cream pie, and I’m sending you the biggest virtual high-five right now! I really hope you enjoyed baking this recipe as much as I love sharing it. Now, go grab a slice (or two!), share it with someone you love, and enjoy every single chocolatey bite. And hey, if you make this pie, please let me know what you think! Leave a comment below, give the recipe a rating, or snap a pic and share it on social media – I can’t wait to see your creations!
Print
Crispy Oven Roasted Potatoes and Onions
- Total Time: 65 min
- Yield: 6 servings 1x
- Diet: Vegan
Description
Simple oven roasted potatoes and onions.
Ingredients
- 2 lbs potatoes, peeled and cubed
- 2 large onions, sliced
- 1/4 cup olive oil
- 1 teaspoon salt
- 1/2 teaspoon black pepper
- 1 teaspoon dried oregano
Instructions
- Preheat oven to 400°F (200°C).
- In a large bowl, combine potatoes, onions, olive oil, salt, pepper, and oregano.
- Spread the mixture in a single layer on a baking sheet.
- Roast for 45-50 minutes, or until potatoes are tender and golden brown, flipping halfway through.
- Serve hot.
Notes
- For extra crispiness, parboil the potatoes for 5 minutes before roasting.
- Prep Time: 15 min
- Cook Time: 50 min
- Category: Side Dish
- Method: Roasting
- Cuisine: Mediterranean
Nutrition
- Serving Size: 1 serving
- Calories: 250
- Sugar: 5g
- Sodium: 300mg
- Fat: 12g
- Saturated Fat: 2g
- Unsaturated Fat: 10g
- Trans Fat: 0g
- Carbohydrates: 35g
- Fiber: 4g
- Protein: 4g
- Cholesterol: 0mg